Do you have a question about the Comelit Icona and is the answer not in the manual?
Covers intended use, installation, wiring, safe usage, maintenance, and disclaimer for Comelit products.
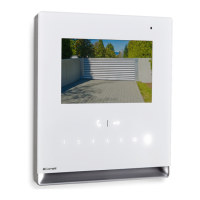
Details the Icona 2-wire door entry monitor's components: microphone, screen, buttons, loudspeaker, and terminals.
Explains touch-sensitive activation, press-and-hold functions, Doctor mode, and Hands-Free operation.
Provides comprehensive technical data including general, audio, electrical, hardware, settings, and environmental specs.
Step-by-step guide for installing the door entry monitor in a flush-mounted box.
Step-by-step guide for installing the door entry monitor using surface mounting or 503/round boxes.
Illustrates system wiring, connections, and details for call repetition device variants.
Guides on setting main/secondary monitors and managing power supply via DIP switches.
Details basic button functions via DIP switches and provides a legend for programming abbreviations.
Instructions for programming general intercom calls, including DIP switch settings and button association.
Covers programming selective intercom calls, assigning, and deleting device addresses.
Details programming procedures for generic and coded actuators using DIP switches.
Explains programming other functions like Self Activation, CCS, and managing the programming range.
Covers programming for LED indicators, alarms, lock-release, and changing the ringtone.
Details how to reset programming to factory defaults and information on system performance and layouts.
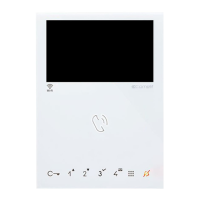
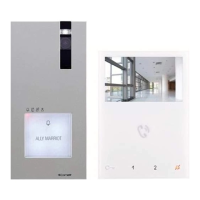
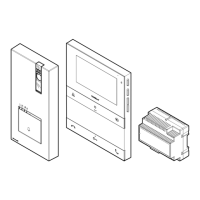
The Comelit Icona 2-wire door entry monitor, available as Art. 6601W and Art. 6601W/BM, is designed for audio and video communication systems in residential, commercial, industrial, and public buildings. The 6601W/BM model includes a magnetic amplification system for hearing aid devices.
The monitor features a 4.3" LCD screen and is equipped with 9 function buttons and 6 adjustment buttons. The buttons are touch-sensitive, requiring a swipe to enable the function row (1) and another swipe to enable the adjustment row (2) before pressing a desired button to activate its function. It is important to wait approximately 1 second between presses to avoid canceling commands.
The monitor's functions are indicated by an LED. A continuous flashing LED signifies an incoming call, while a steady LED indicates communication or that automatic answer (hands-free mode) is enabled. For lock-release, a single flash confirms the action. Programming success is indicated by 4 flashes, and a programming error by 10 flashes. In silent mode (privacy mode), the LED remains steady. When automatic door opening on receipt of call (Doctor mode) is enabled, the LED flashes 3 times every 5 seconds. A slow flashing LED indicates programming mode, and 4 flashes mean the device is busy.
The buttons offer various functions:
The Icona monitor supports both general and selective intercom calls. General intercom calls connect to devices within the same apartment or another apartment identified by the apartment's call address (user code). Selective intercom calls connect to specific devices identified by a unique selective address. It is crucial to note that general and selective intercom calls cannot be used simultaneously on the same riser.
The monitor offers advanced configuration options, allowing users to customize button functions beyond the default "Basic configuration." This involves setting S2 DIP-switches to "PROG" mode after programming. Buttons that are not programmed will revert to their default "Basic configuration" functions.
Press and Hold Functions (Disabled by default from firmware version 1.5.0): To enable or disable press and hold functions:
Once enabled, users can activate:
Programming Intercom Calls: To program a general intercom call:
Programming selective intercom calls involves similar steps, but requires assigning a selective address to the devices involved in the call beforehand. This is done by setting S1 DIP-switches according to "Table B" for the desired selective address. Up to 3 devices can share the same selective intercom address. Selective addresses can also be deleted.
Programming Actuators: Both generic and coded actuators can be programmed. The process is similar to intercom call programming, involving setting S2 DIP-switches to programming mode, identifying the ACT function in the "Basic configuration" table, setting S1 DIP-switches (all ON for generic, specific code for coded), and pressing the desired button.
Programming Range: This feature allows setting minimum and maximum addresses for specific functions. The procedure involves entering programming mode, setting S1 DIP-switches for the minimum address, then for the maximum address, and confirming with button presses.
LED/Alarm/Lock-Release/Actuator Programming: The monitor's inputs (IN 1-IN 2 and CFP2-IN 1) can be programmed for various functions such as LED indication, alarm activation, lock-release, or generic/coded actuator control. This involves setting S2 DIP-switches to programming mode, and S1 DIP-switches to either ON (for LED, alarm, lock-release, generic actuator) or a specific code (for coded actuator).
Changing the Ringtone:
Programming Reset: The monitor can be reset to factory settings, which include:
Comelit products are designed to require minimal maintenance. Routine cleaning should be performed according to the instructions provided in the manual. Any repairs must be carried out exclusively by Comelit Group S.p.A. for the products themselves, and by qualified technical personnel for the systems.
Installation Guidelines: Installation must be performed by qualified technical personnel, adhering to the instructions in the manuals. Power supply must be disconnected before any wiring operations. Wires with appropriate cross-sections should be used, following system manual instructions. It is advised against running system wires through the same duct as power cables (230V or higher).
Safety Guidelines: To ensure safe usage, users must carefully observe the indications in the manuals and ensure the system has not been tampered with or damaged.
| Type | Video Intercom |
|---|---|
| Material | Plastic |
| Call Memory | Yes |
| Display | LCD |
| Connectivity | Wired |
| Technology | 2-Wire |
| Mounting | Wall-mounted |
| Buttons | Touch buttons |
| Audio Output | Loudspeaker |
| Display Type | LCD |