EasyManua.ls Logo

ComfortStar CLA12CA-L - User Manual

ComfortStar CLA12CA-L
32 pages
Print Icon
To Next Page IconTo Next Page
Loading...
CLA12CA- L
CLA12CD- L
CLA18CD- L
CLA24CD- L
CSA12CA- L

Questions and Answers

  • A
    Amy DavisAug 6, 2025
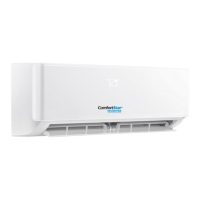
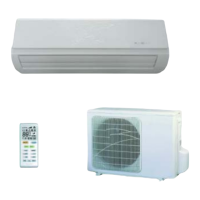
    How to troubleshoot a ComfortStar Air Conditioner that does not operate?
    • C
      Cynthia GoodmanAug 6, 2025
      If your ComfortStar Air Conditioner isn't operating, first check the power supply or reconnect the plug if it's loose. Also, the TIMER function may be active, so check and deactivate it if needed. Other potential issues include a damaged indoor/outdoor unit fan motor (replace it), a faulty compressor thermomagnetic circuit breaker (check and replace), faulty protective devices or fuses (replace them), loose connections (secure them), voltage outside the required range (adjust it), a damaged electronic control board (replace it) or the unit may have stopped to protect itself, in which case you should allow it to reset and monitor operation.
  • P
    Penny ValentineAug 10, 2025
    What to do if ComfortStar CLA12CA-L Air Conditioner does not respond to commands?
    • J
      justinnelsonAug 10, 2025
      If your ComfortStar Air Conditioner is not responding to commands, try moving the remote control closer to the indoor unit. Also, replace the batteries in the remote control. Make sure there are no obstacles blocking the signal between the remote and the unit.
  • R
    Rick McintoshAug 15, 2025
    Why ComfortStar CLA12CA-L Air Conditioner has insufficient airflow, either hot or cold?
    • R
      Rebecca BerryAug 15, 2025
      If your ComfortStar Air Conditioner isn't providing sufficient airflow (either hot or cold), start by adjusting the temperature setting appropriately. Then, check for and clear any obstructions from the air conditioner intakes and outlets. Also, clean or replace the air filter if it's dirty. Ensure the fan speed isn't set to minimum and increase it if necessary. Try to eliminate or reduce other heat sources in the room. Finally, the system may need to have the refrigerant recharged.
  • S
    suzanne70Aug 20, 2025
    How to fix ComfortStar Air Conditioner when the display is off?
    • N
      Nicolas SandersAug 20, 2025
      If the display on your ComfortStar Air Conditioner is off, first check the power supply. If power is available, deactivate the DISPLAY function. Other potential issues include strange noises during operation (investigate them), a faulty electronic control board (replace it), faulty fuses or switches (check and replace them), water or objects inside the appliance (remove them), and overheated cables or plugs (inspect and replace any damaged ones).
  • A
    amandabradleyAug 26, 2025
    Why does my ComfortStar CLA12CA-L have a strange odor?
    • J
      james28Aug 26, 2025
      If your ComfortStar Air Conditioner emits a strange odor, the air filter may be dirty. Clean or replace the air filter.
  • C
    christopher16Aug 30, 2025
    What causes the noise of running water in ComfortStar CLA12CA-L?
    • D
      debra90Aug 30, 2025
      If you hear the noise of running water in your ComfortStar Air Conditioner, it could be due to back flow of liquid in the refrigerant circulation. Check and resolve the refrigerant flow issue.

Summary

Safety Precautions

Safety Rules and Recommendations for the Installer

Guidelines and recommendations for safe installation of the air conditioner.

Safety Rules and Prohibitions

General rules and prohibitions to follow for safe operation and handling of the air conditioner.

Name of Parts

Indoor Unit Components

Details the various parts and features of the indoor air conditioning unit.

Outdoor Unit Components

Details the various parts and features of the outdoor air conditioning unit.

Indoor Unit Display Indicators

Explains the meaning of the LED indicators and digital display on the indoor unit.

Remote Control

Remote Control Display and Symbols

Illustrates the remote control display and the meaning of its symbols.

Remote Control Battery Replacement

Instructions on how to replace batteries in the remote control unit.

Operation Modes

Explains how to use Cooling, Fan, Heating, Dry, Auto, and Fan Speed modes.

Timer, Swing, and Turbo Functions

Instructions for using Timer, Swing, and Turbo functions on the remote control.

Sleep, ECO, Health, and Display Functions

Details on using Sleep, ECO, Health, and Display functions of the remote.

Operation Instructions

Heating Operation Characteristics

Describes preheating and defrosting processes during heating operation.

Emergency Button Operation

Instructions on how to use the emergency button when the remote fails.

Installation Precautions

Pipe Length and Refrigerant Specifications

Specifications for pipe length, additional refrigerant charge, and refrigerant types.

Torque Parameters for Connections

Specifies torque values for connecting pipes of various sizes.

Electrical Wiring and Fuse Specifications

Details on wire cross-sectional area, socket specifications, and fuse ratings.

Indoor Unit Installation

Step 1: Select Installation Location

Criteria for choosing the optimal installation location for the indoor unit.

Step 2: Install Mounting Plate

Procedure for attaching the mounting plate to the wall for the indoor unit.

Step 3: Drill Wall Hole

Instructions on drilling the wall hole for refrigerant piping and cables.

Step 4: Connect Refrigerant Pipe

Steps for connecting the refrigerant pipes to the indoor unit.

Step 5: Connect Drainage Hose

Procedure for connecting the drainage hose to the indoor unit.

Step 6: Connect Wiring

Steps for connecting the electrical wiring to the indoor unit control box.

Step 7: Wrap Piping and Cable

Instructions for bundling and insulating pipes, wires, and hoses.

Step 8: Mount Indoor Unit

Procedure for mounting the indoor unit onto the installed mounting plate.

Outdoor Unit Installation

Step 1: Select Installation Location

Guidelines for selecting a suitable location for the outdoor unit.

Step 2: Install Drainage Hose

Procedure for installing the drainage hose on heating pump models.

Step 3: Fix Outdoor Unit

Steps for securely fixing the outdoor unit to its base or bracket.

Step 4: Install Wiring

Instructions for connecting the electrical wiring to the outdoor unit.

Step 5: Connect Refrigerant Pipe

Procedure for connecting the refrigerant pipes to the outdoor unit valves.

Step 6: Vacuum Pumping

Steps for vacuum pumping the refrigerant system to remove air and moisture.

Test Operation

Inspections Before Test Run

Checks to perform before initiating the test run of the air conditioner.

Test Run Instructions

Procedure for conducting the test run and verifying functionality.

Maintenance

Cleaning the Unit

Instructions for cleaning the exterior and interior surfaces of the air conditioner.

Cleaning the Filter

Procedure for removing, cleaning, and reinstalling the air filter.

Service and Long-Term Maintenance

Guidance on service checks and maintenance for long-term shutdown or use.

Troubleshooting

Appliance Does Not Operate

Possible causes and solutions when the air conditioner fails to operate.

Strange Odor

Identifies potential causes for unusual odors emitted by the unit.

Noise of Running Water

Explains the causes behind the sound of running water from the unit.

Mist from Air Outlet

Provides reasons for mist appearing at the air outlet.

Strange Noise Heard

Lists possible causes for abnormal noises during operation.

Insufficient Airflow or Temperature Issues

Addresses problems related to airflow and improper heating or cooling.

No Response to Commands

Troubleshoots issues where the unit does not respond to the remote control.

Display is Off

Explains possible reasons for the unit's display being inactive.

Critical Shutdown Events

Lists critical situations requiring immediate shutdown and power disconnection.

Error Codes on Display

Lists error codes displayed on the unit and their corresponding descriptions.

ComfortStar CLA12CA-L Specifications

General IconGeneral
TypePortable Air Conditioner
Power Supply115V / 60Hz
RefrigerantR410A
BTU12, 000 BTU
Cooling Capacity12, 000 BTU/h
Operating Temperature62°F - 90°F

Related product manuals