4. Adjust the focus
For B6 pro: press the “Auto” button to autofocus.
Note: Please refer to next page “Auto Focus Setting” if it the focus is not right
The sensor is not at the center of the engraving area. Please place the material directly under the red dot before
pressing the “Auto” button for accurate focusing. After auto-focusing, the material can be moved if necessary For B6
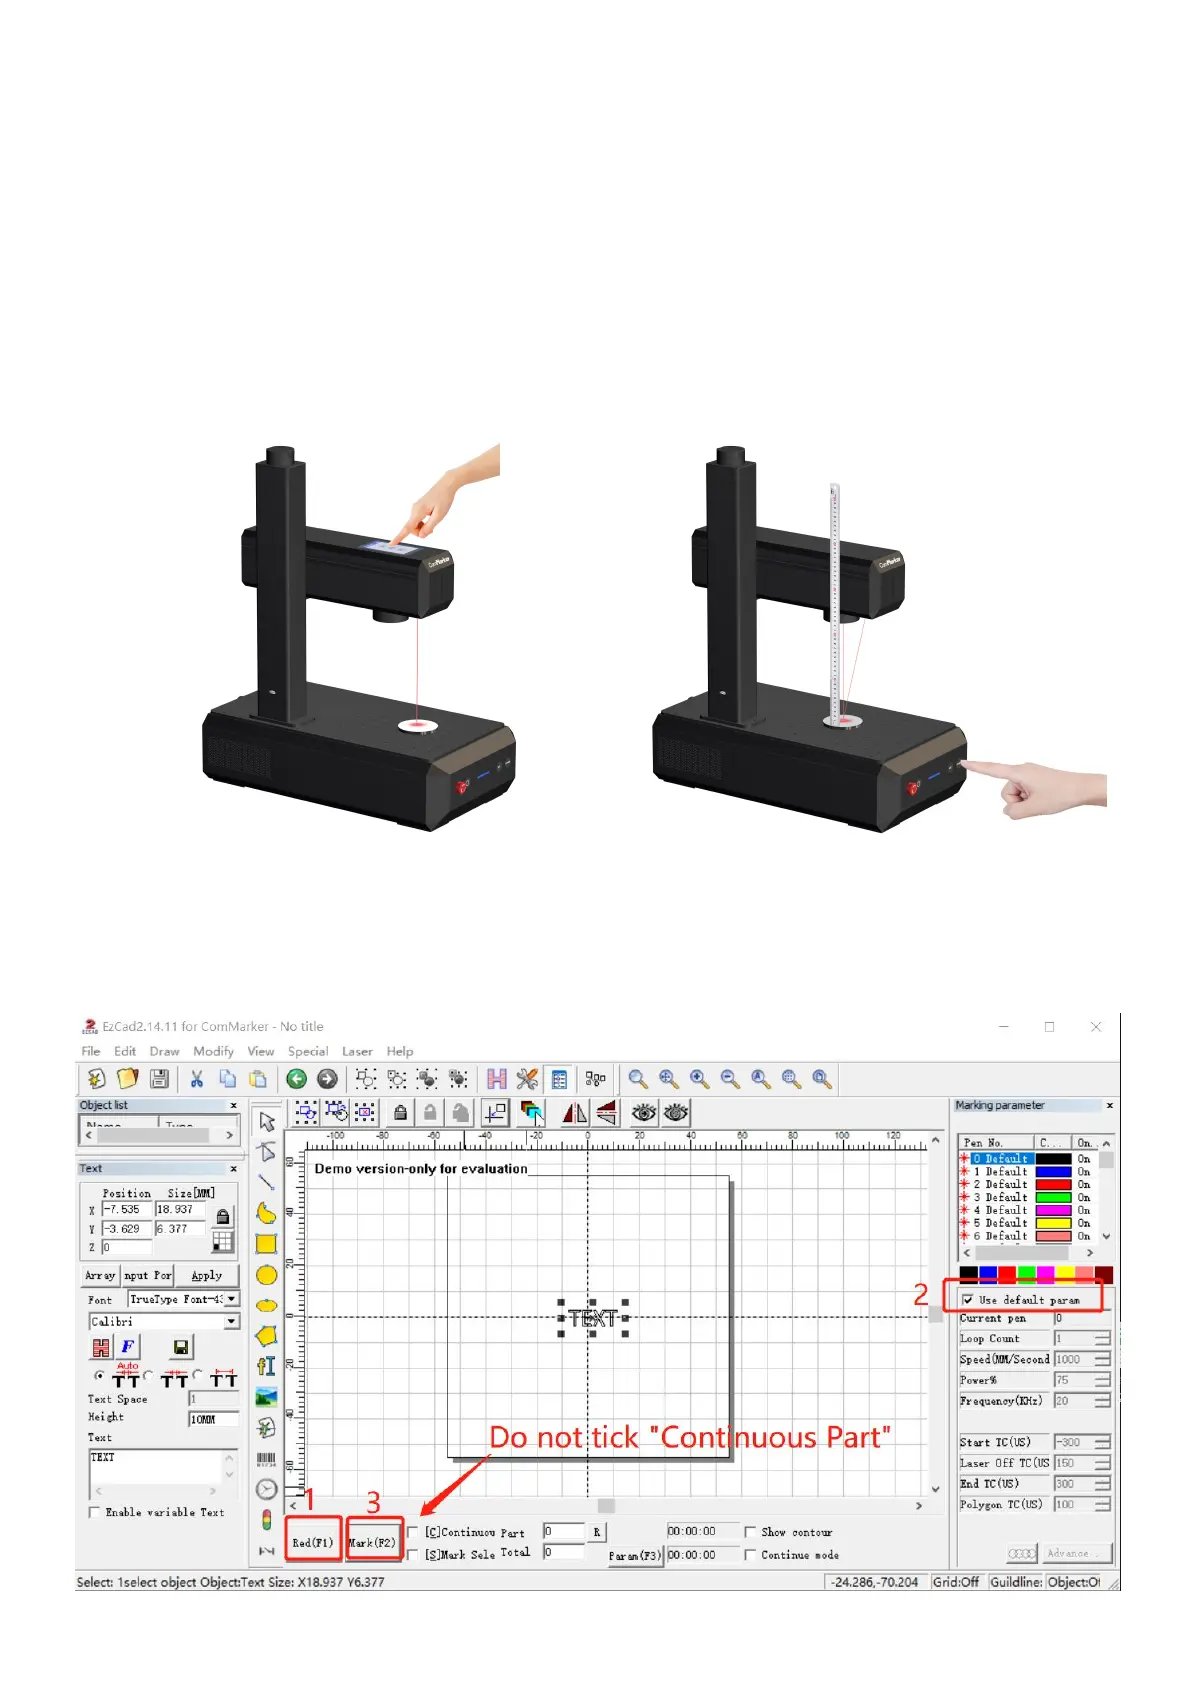
Press up or down button to lift or lower the laser head until the two red light point overlap, this is the best focal point.
The measuring focal length of this machine is:
___________(70*70), ___________(110*110), ___________(150*150), ___________(200*200), ___________(300*300)
the measuring distance is the length from the bottom line of the laser head to the surface of the material. This parameter
is measured manually, and each device has different focal lengths due to changes in laser sources and field lenses.
Note: Please refer to FAQ if the focal point does not match with the overlapping point
5. Marking test
Place the test engraving material on the machine. Click "Red (F1)", the area shown by the red light is the marking area. Tick
“Default Parameters". Click "Mark (F2)" to start marking.