TROUBLESHOOTING GUIDE (continued)
Problem
Programs
won't
load and
green dri
ve
light flashes
Possible
Cause
Disk error
Solution
Check the error channel
to
determine the error, then
follow the advice
in
Appendix B to correct it.
The error channel
is
explained
in
Chapters 2 and 3
(Be sure to spell program names correctly and include the exact punctuation when loading the
programs)
Your programs load OK, but
commercial programs and
those from other 1571s don't
Your programs that used
to
load,
won't
anymore, but
programs saved on newly-
formatted diskettes will
Either the diskette
is
faulty,
or your disk drive
is
misaligned
Older diskettes have
been damaged
The disk drive has gone out
of
alignment
SIMPLE MAINTENANCE TIPS
1.
Keep the drive well ventilated.
Try another copy
of
the
program.
[f
several
programs from several
sources
fail
to
load, have
your dealer align your disk
drive
See the safety tips for
diskettes in the next section.
Recopy from backups
Have your dealer align
your disk dri
ve
A couple
of
inches
of
space to allow air circulation on all sides will prevent heat from
building up inside the drive.
2. Use Commodore diskettes.
Badly-made diskettes can cause increased wear on the drive's read/write head. If
you're
using a diskette that
is
unusually noisy,
it
could be causing added wear and
should be replaced.
3. The
1571
should be cleaned once a year
in
normal use.
Several items are likely
to
need attention: the two read/write heads may need cleaning
(with
91
% isopropyl alcohol on a cotton swab). The rails along which the head moves
may need lubrication (with a special molybdenum lubricant, not oil), and the write
protect sensor may need
to
be dusted. Since these chores require special materials or
parts, it is best
to
leave the work to an authorized Commodore service center. If you
want to do the work yourself, ask your dealer for the appropriate materials. IMPOR-
T ANT: Home repair
of
the
1571
will void your warranty.
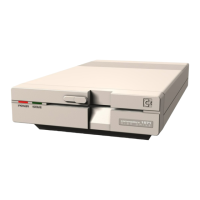
INSERTING A DISKETTE
To insert a diskette, first open the drive door by rotating the door lever counter-
clockwise one quarter
tum
until
it
stops, with the lever parallel
to
the horizontal slot
in
the
front
of
the drive.
Grasp the diskette by the side opposite the large oval access slot, and hold it with the
label up and the write-protect notch to the left (See Figure 3). Now insert the diskette
by
pushing it straight into the slot, the access slot going
in
first and the label last. Be sure the
diskette goes
in until it stops naturally. You shouldn't have
toforce
or bend it
to
get it in.
7
 Loading...