MODEL 36, TYPE B & C
SINGLE RANGE TENSIONCELLS
INSTRUCTION MANUAL A-279
6
Copyright 2023 - Revised Comptrol All Rights Reserved
4. Connect the positive (+) output lead to Pin D and the
negative (-) output lead to Pin C. (See Figure 4)
5. Repeat Steps 1 through 4 of the electrical wiring
procedure for the Tensioncells mounted on the other
end of the measuring roll.
II-G ELECTRICAL ZERO ADJUSTMENT
(Read the complete Electrical Zero Adjustment
procedure before proceeding with the adjustment.)
1.
Disengage strip from the measuring roll so that no
tension force is applied to the loadcell.
2.
Connect a voltmeter to Pins C and D (See Figure
4)
3.
Apply 24-volt DC electrical power to the loadcell
observing the correct polarity. [Plus (+) to Pin D
and minus (-) to Pin C]. Do not exceed the
maximum rated input voltage.
NOTE: Allow 20 minutes for the loadcell to warmup
before taking first readings to insure accurate readings.
4.
Measure the output voltage of the LVDT between
the Green and Blue leads for each Tensioncell with
a voltmeter with a sensitivity of at least 100,000
ohms per volt. The output voltage should be
between 0.5 and 6.5 volts.
5.
Since Comptrol Tensioncells cannot be
mechanically zeroed, refer to the Control Manual
for zeroing out the tare weight voltage.
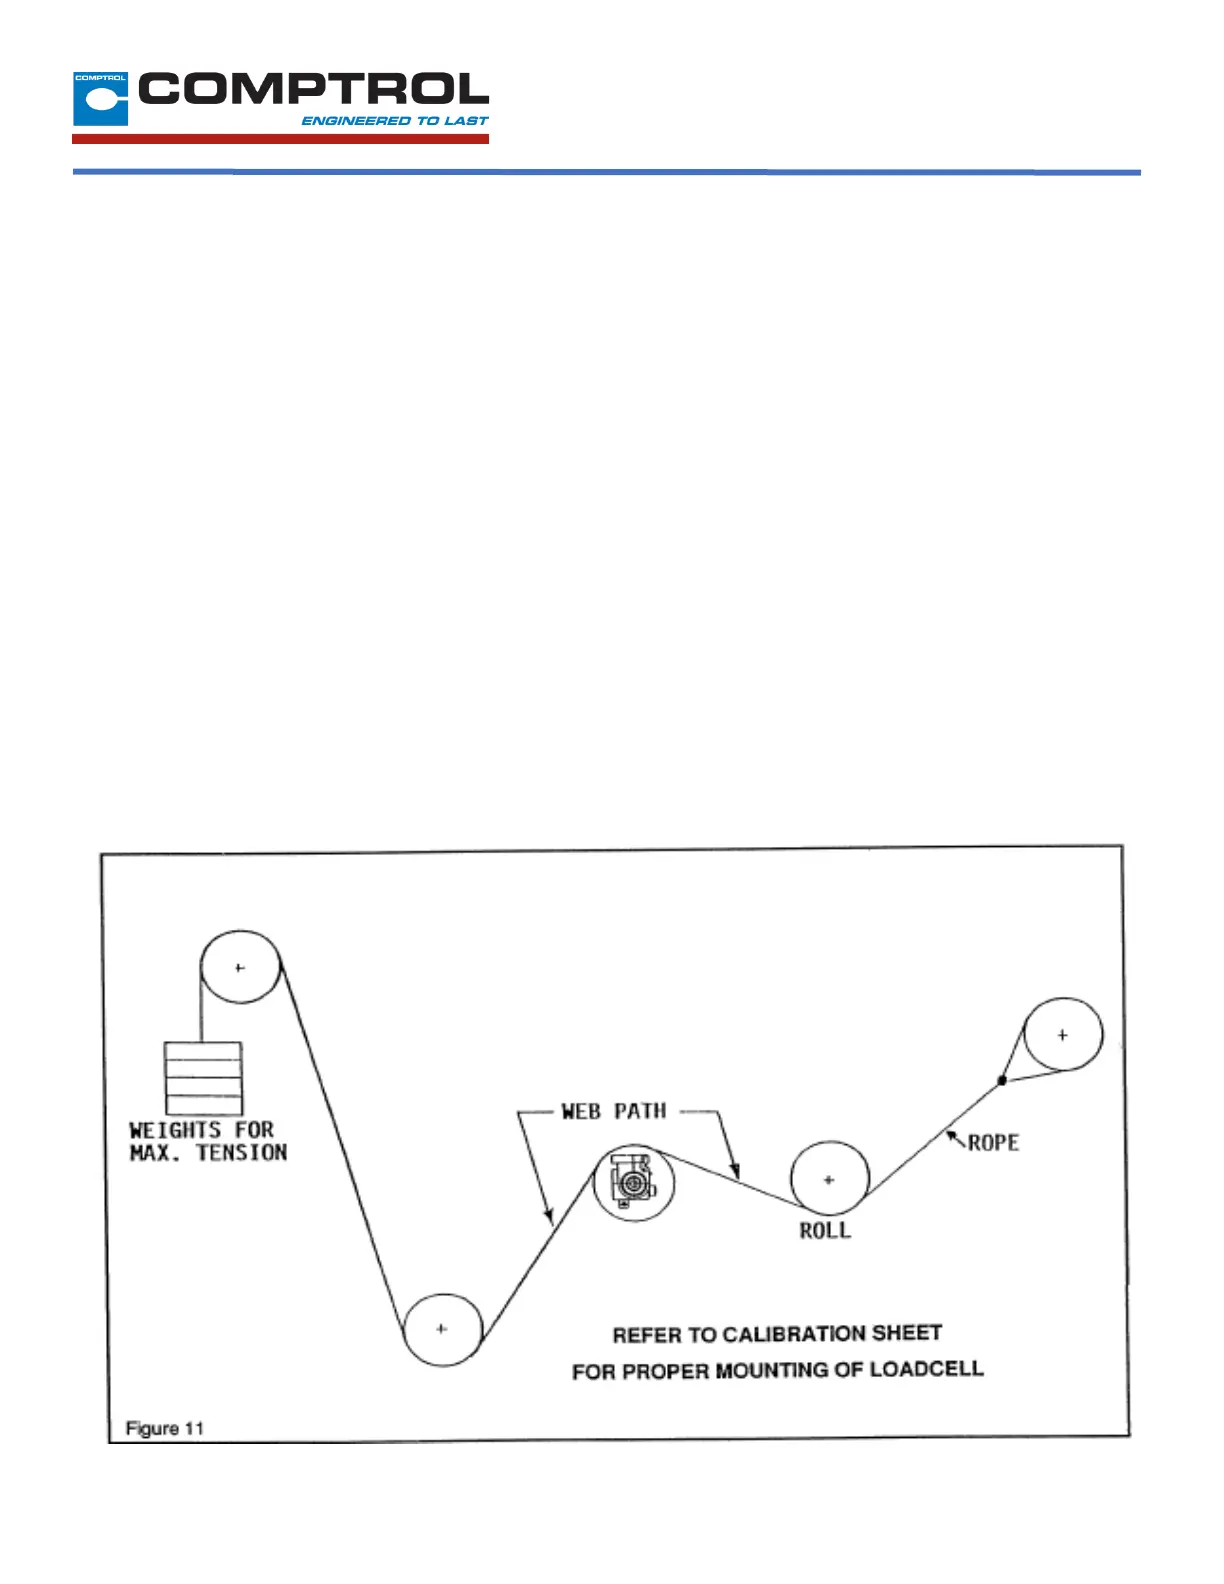
II-H FULL LOAD ADJUSTMENT
After the loadcell has been zeroed, a pull test can be
made to check the output voltage of the loadcell at full
load. (See calibration sheet for voltage output)
1. Run a non-stretchable rope over the center of the
tension roll simulating the web path. (NOTE: the rolls
should be free to turn)
2. With one end of the rope secured, hang a known
weight, equally over the roll so that the total tension is
equal to the maximum strip tension specified on the
calibration sheet, at the other end. (See Figure 6)
 Loading...