has steamed (1 L/34 oz). Turn the unit to the
OFF position, unplug from electrical outlet,
and allow to sit for 30 minutes. Remove
water container. Remove excess water from
the reservoir by lifting the unit, inverting
and pouring the unit over sink, and allowing
water to drain from internal reservoir. Repeat
the above procedure as many times as
necessary until a normal steam rate returns,
usually 2-3 times. With each repeated cycle,
use a fresh solution of vinegar and water.
Run one cycle of fresh, cold water through
the unit at the completion of decalcification,
before using the unit again to steam gar-
ments.
TIPS FOR USE
Steam Technique:
Grasp the "T" handle steam nozzle with the
steam jets facing away from you. Begin at the
bottom of the fabric to allow the steam to rise
inside and outside, removing
wrinkles. Slowly move the nozzle from the
bottom to the top of the fabric. Remove the
nozzle from the garment and smooth the fab-
ric with your free hand. Some fabrics are best
steamed on the underside of the material.
This will allow the fibers of the fabric to relax,
eliminating wrinkles.
NOTE: Test fabric for colour fastness in an
inconspicuous spot. Drape linens, towels,
handkerchiefs and napkins over a rod or
place onto a towel rack.
Heavier fabrics may require repeated steam-
ing. Repeat as necessary.
With practice, you will gain speed and
efficiency. You will soon learn which fabrics
TROUBLESHOOTING
• PROBLEM - Steamer fails to heat
CAUSE - Steamer not plugged in
SOLUTION - Plug into electrical outlet
• PROBLEM - No steam
CAUSE - Water level is low
SOLUTION - Turn ON/OFF switch to OFF
and refill water container
• PROBLEM - Water drips from nozzle
CAUSE - Condensation in hose
SOLUTION - Hold the hose vertically
and allow water to drain back into unit
• PROBLEM - Nozzle gurgles
CAUSE - Condensation in hose
SOLUTION - Hold the hose vertically
and allow water to drain back into unit
• PROBLEM - Poor steam performance
CAUSE - Sediment in container
SOLUTION - Decalcify reservoir and
water container
Note: Minerals in water will vary in different
areas. To insure continued operation of the
steamer, never store without cleaning and
removing excess water from the reservoir
and water container.
LIMITED ONE-YEAR WARRANTY
Conair will repair or replace (at our option)
your unit free of charge for 12 months from
the date of purchase if the appliance is defec-
tive in workmanship or materials.
To obtain service under this warranty, return
the defective product to the service centre
listed below together with your purchase
receipt and $7.50 for postage and handling.
In the absence of a purchase receipt, the war-
ranty period shall be 12 months from the date
of manufacture.
ANY IMPLIED WARRANTIES, OBLIGATIONS,
OR LIABILITIES, INCLUDING BUT NOT
LIMITED TO THE IMPLIED WARRANTY OF
MERCHANTABILITY AND FITNESS FOR A
PARTICULAR PURPOSE, SHALL BE LIMITED
IN DURATION TO THE 12 MONTH DURATION
OF THIS WRITTEN, LIMITED WARRANTY.
IN NO EVENT SHALL CONAIR BE LIABLE
FOR ANY SPECIAL, INCIDENTAL, OR
CONSEQUENTIAL DAMAGES FOR BREACH
OF THIS OR ANY OTHER WARRANTY,
EXPRESS OR IMPLIED, WHATSOEVER.
This warranty gives you specific legal rights,
and you may also have other rights, which vary
from province to province.
08CN152
LOW WATER INDICATOR LAMP
Should the water container run out of water,
the unit will automatically turn on and off,
cycling the low water indicator lamp on and
off.
To refill:
1. Turn ON/OFF switch to OFF. Light will go
out.
2. Remove water container and refill as
described in the operating instructions.
3. Replace filled water container in unit.
4. Turn ON/OFF switch back to ON.
Note: if the low water reset lamp becomes
illuminated, but the water container is not
empty, follow the instructions for decalcifi-
cation.
5. The unit is ready when low water lamp is
off and steam comes out from T-nozzle.
OTHER IMPORTANT NOTES
During operation, the steamer hose may
gurgle. This is a normal
result of condensation
collecting inside the hose.
Simply lift the "T" handle
upward until the hose is
extended to its full height.
The gurgling will disappear
when the excess moisture inside
the hose has had a chance
to drain back into the base.
DECALCIFICATION
If the appliance begins to
produce steam more slowly
than usual, if the steamer stops
producing steam and then starts
again, or if the low water
indicator lamp illuminates
even with water container
full, you may need to
decalcify your steamer.
Decalcification refers to removing the cal-
cium deposits which form over time on the
metal parts of the Steamer. For best per-
formance from the Conair Fabric Steamer,
decalcify the unit from time to time. The
frequency depends upon the hardness of
your tap water and how often you use the
steamer.
To decalcify, use a solution of 1/3 white vin-
egar and 2/3 water in the water container.
Replace the water container into the unit.
Plug the unit into electrical outlet. Turn to the
ON position and run until half the amount
require multiple steam applications.
Do not directly touch velvet or silk with the
steam head.
Always steam with hose in upright
position, so any condensation is free
to flow back into the steamer.
If you steam in a low position, condensation
will collect inside the hose. This will cause
gurgling and some water droplets to form
near the steam jets on the "T" handle. To
avoid this: frequently lift the steam handle
upward until the hose is extended to its full
height.
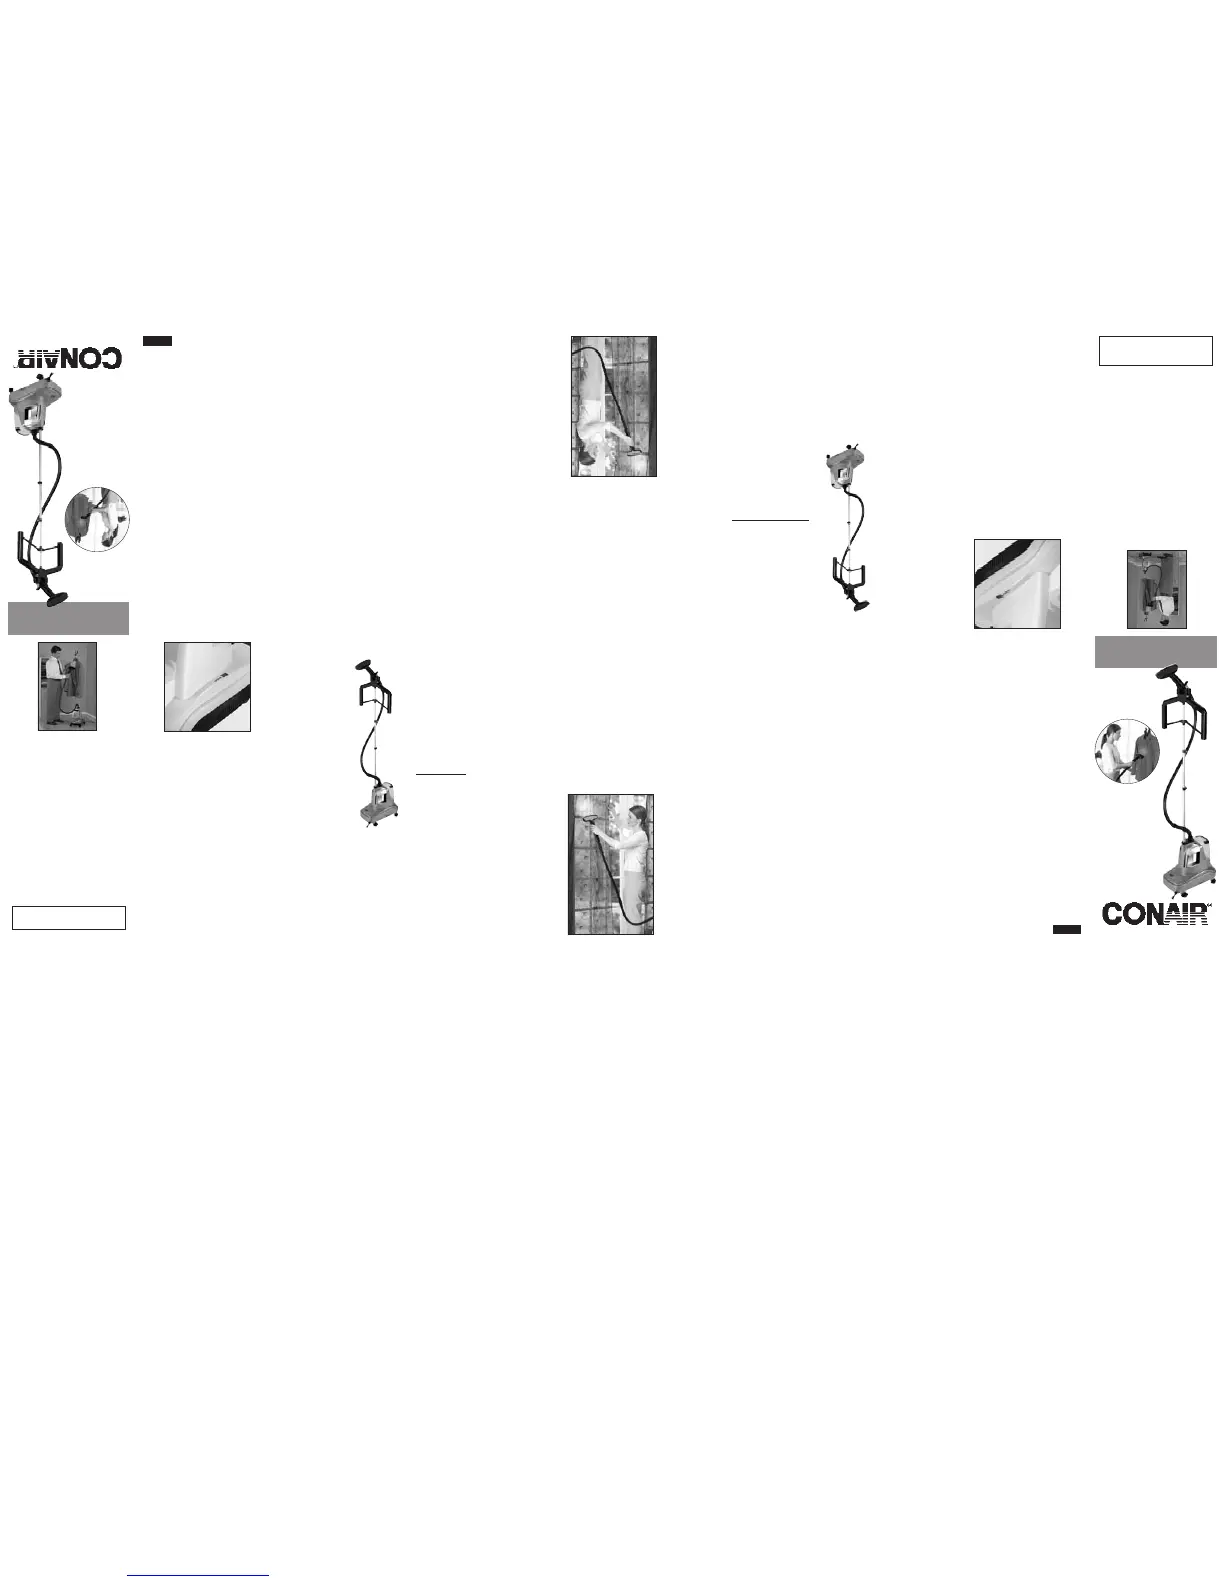
TO STEAM DRAPES:
Wash and dry drapes as directed according
to fabric type. Re-hang drapes and steam
drapes when in place.
CLEANING AND STORING
I. Turn the ON/OFF switch to the OFF posi-
tion and unplug from the power source.
(The light will go out when power is off).
2. Wait for the steamer to cool completely
for at least 30 minutes.
3. Push cord-reel pedal. Cord will retract
into the unit.
4. Remove the steamer hose.
5. Remove the water container from unit,
unscrew valve and empty unused
contents. Allow to air dry.
6. Remove excess water from the reservoir
by lifting the unit and pouring it out.
7. Coil the hose and insert into hose lock.
8. Collapse telescopic hanger rod.
9. Replace water container.
10. Store the unit.
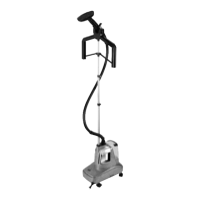
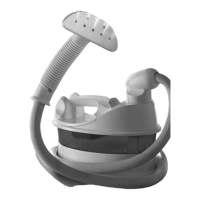
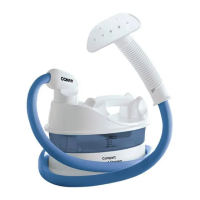
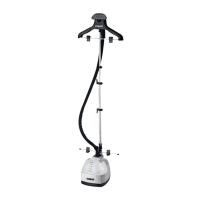
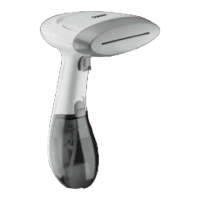
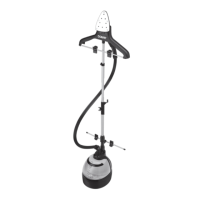
Model GS11IC
Convenient to Use
on Clothes, Drapes
& Linens!
Instructions
for Use
For your safety
and continued
enjoyment of this product,
always read the instruction
book carefully
before using.
IB-8495
SERVICE CENTRE:
Conair Consumer Products Inc.
100 Conair Parkway
Woodbridge, ON L4H 0L2
1-800-472-7606
www.conaircanada.ca
©2008 Conair Consumer Products Inc.
CAUTION: Hose will be hot when in
use. Avoid prolonged contact.
IONIC FABRIC
STEAMER
soit évaporée. Éteindre le défroisseur, la
débrancher et laisser reposer 30 minutes.
Enlever le réservoir d’eau, enlever l’eau dans
le fond de la cavité en soulevant le défrois
-
seur et l’inclinant au-dessus de l’évier et en
laissant l’eau se vider du réservoir intérieur.
Répéter autant de fois que nécessaire pour
obtenir une vapeur normale (2 à 3 fois).
Utiliser une solution fraîche de vinaigre
et eau à chaque fois. Faire un cycle avec
de l’eau fraîche après le détartrage, avant
d’utiliser le défroisseur de nouveau.
CONSEILS D’UTILISATION
Technique de défroissage :
Saisir la poignée en T, tenant la buse de
vaporisation à l’opposé de sa personne.
Commencer dans le bas du tissu, laissant
la vapeur monter sur l’intérieur et l’extérieur,
éliminant les froissements. Éloigner la buse
du vêtement et lisser le tissu avec la main
libre. Certains tissus se pressent mieux
en les vaporisant par l’intérieur. Les fibres
peuvent ainsi mieux se détendre et éliminer
les froissements.
REMARQUE :
S’assurer que le tissu ne déteint
pas en faisant un test à un endroit caché.
Étaler la literie, les serviettes, les mouchoirs
et les serviettes de table sur une tige ou un
porte-serviette.
Les tissus plus épais peuvent nécessiter une
vaporisation répétée.
Un peu de pratique permettra de mieux juger
du travail nécessaire.
Ne pas laisser la buse toucher directement le
velours ou la soie.
SOLUTIONS AUX PROBLÈMES
• Le défroisseur ne chauffe pas
CAUSE - le défroisseur n’est pas branché
SOLUTION - Le brancher dans une prise de
courant
• Pas de vapeur
CAUSE - Le niveau d’eau est bas
SOLUTION - Éteindre le défroisseur et
remplir le réservoir d’eau
• Des gouttes d’eau sortent par la buse
CAUSE - Condensation dans le boyau
SOLUTION - Allonger le boyau et laisser
l’eau retourner dans le défroisseur
• La buse régurgite
CAUSE - Condensation dans le boyau
SOLUTION - Allonger le boyau et laisser
l’eau retourner dans le défroisseur
• Peu de vapeur
CAUSE - Défroisseur entartré
SOLUTION - Détartrer le défroisseur et
le réservoir
Remarque : La teneur en minérais dans
l’eau varie d’un endroit à l’autre. Pour un
bon fonctionnement, ne jamais ranger le
défroisseur sans d’abord nettoyer et vider le
réservoir et la machine.
GARANTIE LIMITÉE D’UN AN
Conair réparera ou remplacera (à sa discré
-
tion) votre appareil sans frais, si au cours des
12 mois suivant la date d’achat, il affiche un
vice de matière ou de fabrication. Pour un
service au titre de la garantie, renvoyez le
produit défectueux au service après-vente
ci-dessous, accompagné du bon de caisse et
de 7,50 $ pour les frais de poste et d’admi-
nistration. En l’absence du bon de caisse, la
période de garantie sera de 12 mois à compter
de la date de manufacture.
TOUTE GARANTIE, OBLIGATION OU
RESPONSABILITÉ IMPLICITE, Y COMPRIS,
MAIS SANS Y ÊTRE LIMITÉ, LA GARANTIE
IMPLICITE DE QUALITÉ MARCHANDE ET
D’APTITUDE À PRODUIRE UNE TÂCHE
PARTICULIÈRE, SERA LIMITÉE À LA PÉRIODE
DE 12 MOIS DE CETTE GARANTIE ÉCRITE.
EN AUCUN CAS PEUT-ON TENIR CONAIR
RESPONSABLE DE QUELQUE DOMMAGE
FORTUIT, INDIRECT OU SPÉCIAL QUE CE
SOIT POUR BRIS DE CETTE GARANTIE OU DE
TOUTE AUTRE, EXPRESSE OU IMPLICITE.
Cette garantie vous confère des droits parti-
culiers et vous pouvez également bénéfi
-
cier d’autres droits qui varient d’un province
à l’autre.
08CN152
TÉMOIN DE BAS NIVEAU D’EAU
Si le réservoir d’eau se vide, l’appareil
s’allume et s’éteint automatiquement, allu
-
mant et éteignant le témoin de bas niveau
d’eau.
Remplir le réservoir :
1. Réglez l'interrupteur en position d'arrêt
« OFF ».
2. Enlever le réservoir d’eau et remplissez- le
comme indiqué dans le mode d’emploi.
3. Remettre le réservoir plein sur le défrois
-
seur.
4. Remettre le défroisseur en marche.
Remarque : Si le témoin de bas niveau
d’eau se rallume et que le réservoir n’est
pas vide, suivez les directives pour le
détartrage.
5. L’appareil est prêt à utiliser quand le
témoin de bas niveau d’eau s’éteint et que
la vapeur sort par le bec en T.
AUTRES REMARQUES IMPORTANTES
Pendant l’usage, le défroisseur peut
régurgiter. Ceci est le
résultat normal de la
condensation à l’intérieur du
boyau. Soulever la poignée
en T jusqu’à ce que le boyau
soit étiré. Le régurgitement
cessera dès que l’excès
d’humidité dans le boyau aura
la chance de retourner dans le
fond de l’appareil.
DÉTARTRAGE
Si la vapeur prend plus de
temps à être produite, si le
défroisseur cesse de produire
de la vapeur puis se remet en
marche ou si le témoin de bas
niveau s’allume alors que le
réservoir est plein, il est
temps de détartrer le
défroisseur Détartrer consiste
à éliminer les dépôts de calcium qui se
forment sur les pièces métalliques avec le
temps. Pour assurer le bon fonctionnement
de le défroisseur Conair, il faut la détartrer
de temps à autre. La fréquence dépend de la
dureté de l’eau du robinet et de la fréquence
d’usage.
Pour le détartrer, utiliser une solution de
1/3 de vinaigre blanc et 2/3 d’eau dans
le défroisseur. Remettre le réservoir sur
le défroisseur, la brancher, la mettre en
marche et le laisser fonctionner jusqu’à
ce que la moitié de la solution (1 L/34 oz)
Toujours vaporiser avec le tube allongé
pour permettre le retour de condensat
dans le défroisseur.
Vaporiser dans une position abaissee permet
au condensat de s’accumuler dans le boyau,
causant un régurgitement et la formation
de gouttelettes dans le jet de vapeur. Pour
éviter cela, soulever régulièrement la poignée
vers le plafond pour allonger le boyau au
maximum.
VAPORISER DES RIDEAUX :
Laver et sécher les rideaux en suivant les
directives pour le type de tissu. Suspendre
les rideaux et les vaporiser en place.
NETTOYAGE ET RANGEMENT
I. Réglez d’interrupteur en position d’arrêt «
OFF » et débrancher le cordon de la prise
de courant. (L’indicateur s’éteint quand le
courant est coupé).
2. Attendre au moins 30 minutes pour que
le défroisseur se refroidisse.
3. Appuyer sur la pédale du dévidoir pour
enrouler le fil dans le boîtier.
4. Démonter le boyau.
5. Enlever le réservoir, dévisser la valve et le
vider complètement. Le laisser sécher à
l’air libre.
6. Enlever l’excédent d’eau dans la cavité
en soulevant l’appareil et l’inclinant.
7. Enrouler le boyau et le suspendre au cro
-
chet.
8. Rabattre la tige télescopique.
9. Remettre le réservoir dans sa cavité.
10.Ranger la vaporiseuse.
Modèle GS11IC
Pratique sur les
vêtements, les
draperies et la
lingerie!
Mode
d'emploi
Pour un usage sûr
et pratique de ce produit,
toujours lire le manuel
d’instructions avant
de l’utiliser.
IB-8495
SERVICE APRÈS-VENTE :
Conair Consumer Products Inc.
100 Conair Parkway
Woodbridge, ON L4H 0L2
1-800-472-7606
www.conaircanada.ca
©2008 Conair Consumer Products Inc.
ATTENTION : Le boyau devient chaud
en cours d’utilisation. Éviter le contact
prolongé.
DÉFROISSEUR
IONIQUE
 Loading...