ENGLISH
8
• The Format Wizard will appear on your screen. Click “Next” to continue.
• Select the size for your new harddisk. By default, the maximum size is specified. If you want to create
multiple volumes on your harddisk, reduce the size to the required size of your first volume. If you
want to create 1 volume, keep the maximum size. Click “Next” to continue.
• Select which drive letter you want to assign to the new volume. By default, the first available drive
letter is shown. Click “Next” to continue.
• Select your format options. You can change the file system, change the volume label and choose for
“Perform a quick format”. Click “Next” to continue.
Note :
Partitions bigger than 32GB can only be formatted with the NTFS file system when using the
Windows Disk Management.
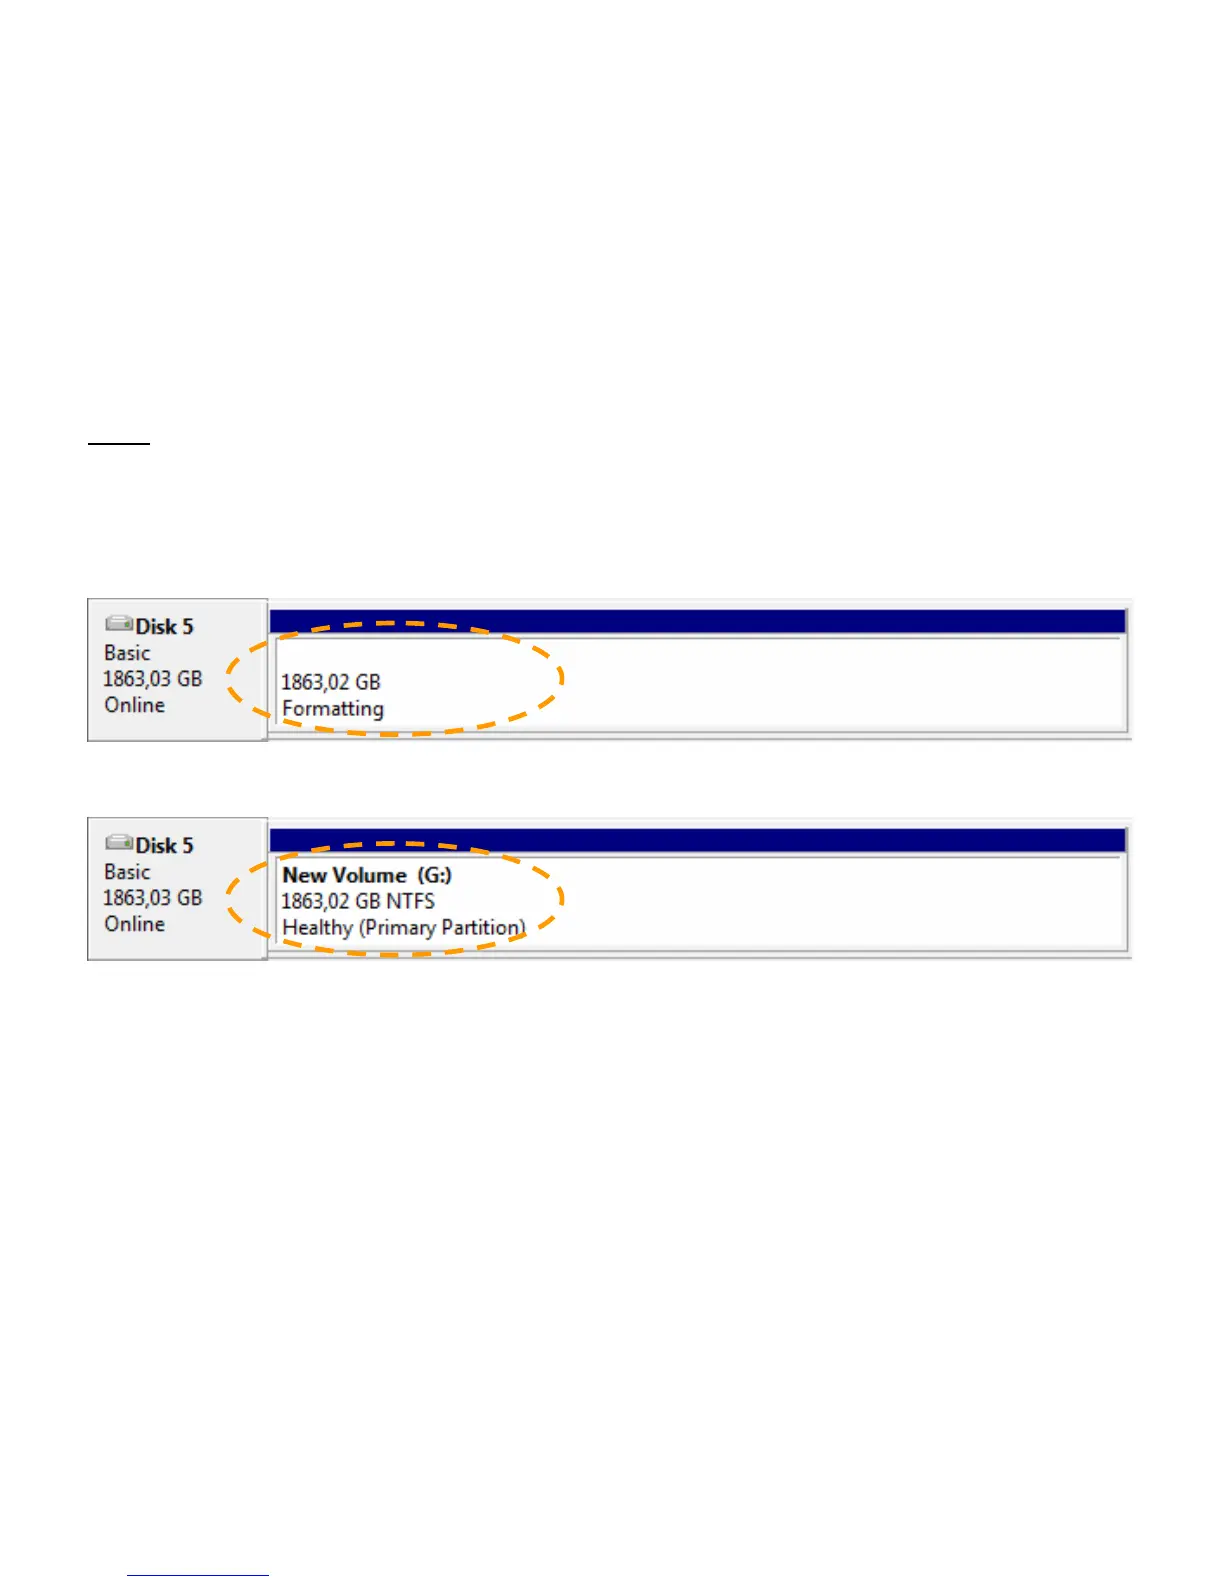
• You will see a summary of the selected commands. Select “Finish” to close the Format Wizard and start
formatting your harddisk.
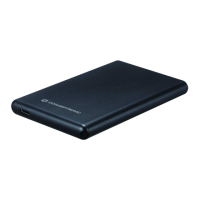
When the format is completed, the harddisk will be shown in the Disk Management as “Healthy”.
You can now use the formatted harddisk.
Enjoy the use of your Conceptronic Harddisk Box!