9
Fig. 15
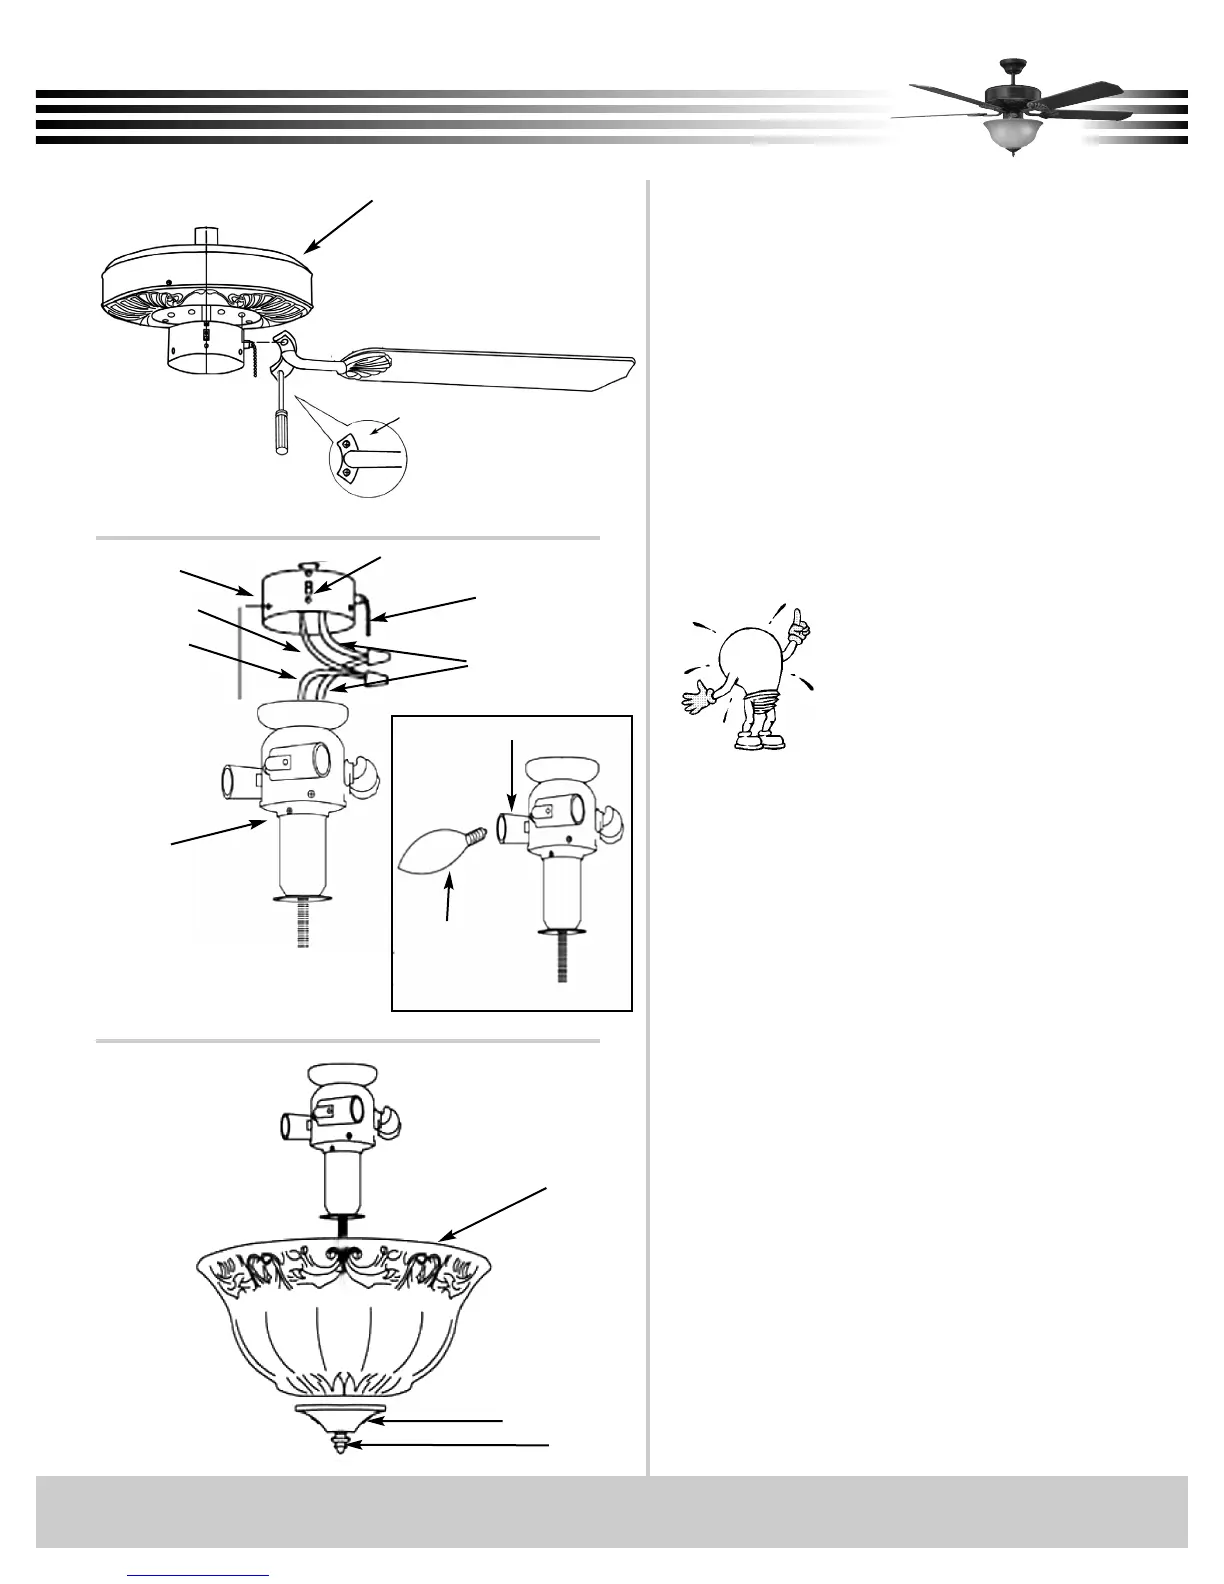
Connect white wire to white wire and blue wire
to black wire. Secure with wire nuts.
Remove switch housing screws. Press light kit
fixture up into switch housing shell, aligning
screw holes. Insert (3) screws and tighten firm-
ly (see figure 14).
Install (2) 60watt Candelabra Base bulbs. Slide
bowl glass over the threaded nipple, followed by
the glass cap, and then finial. Twist finial clock-
wise until snug.
Lower chains thru hole in bowl glass and glass
cap. Attach chain extensions (see figure 15).
Step 7 Installation of Light Fixture
Switch Housing Shell
Blue
Black
White
Forward/Reverse Switch
Fan Switch Chain
Fig. 14
60w
Candelabra
Base
Socket
Light Kit Fixture
Glass Cap
Finial
Bowl Glass
Remove the large screws in the face of the
motor. Discard any rubber blocks attached to
these screws. The rubber blocks are installed at
the factory to stabilize the motor during ship-
ment.
Select the correct mounting pattern and attach
each blade to the motor face using pre-installed
screws (see figure 13). Take care not to bend the
blade arms during installation. This will cause
your fan to wobble while running.
Step 6 Blade Assembly Installation
Try mounting the blades on opposing
sides of the motor face. This will help
keep the fan more level during blade
installation.
Motor Housing
Pre-Installed Screws
to Blade Arm
Fig. 13