Assembly Instructions
Tier: Angled Module
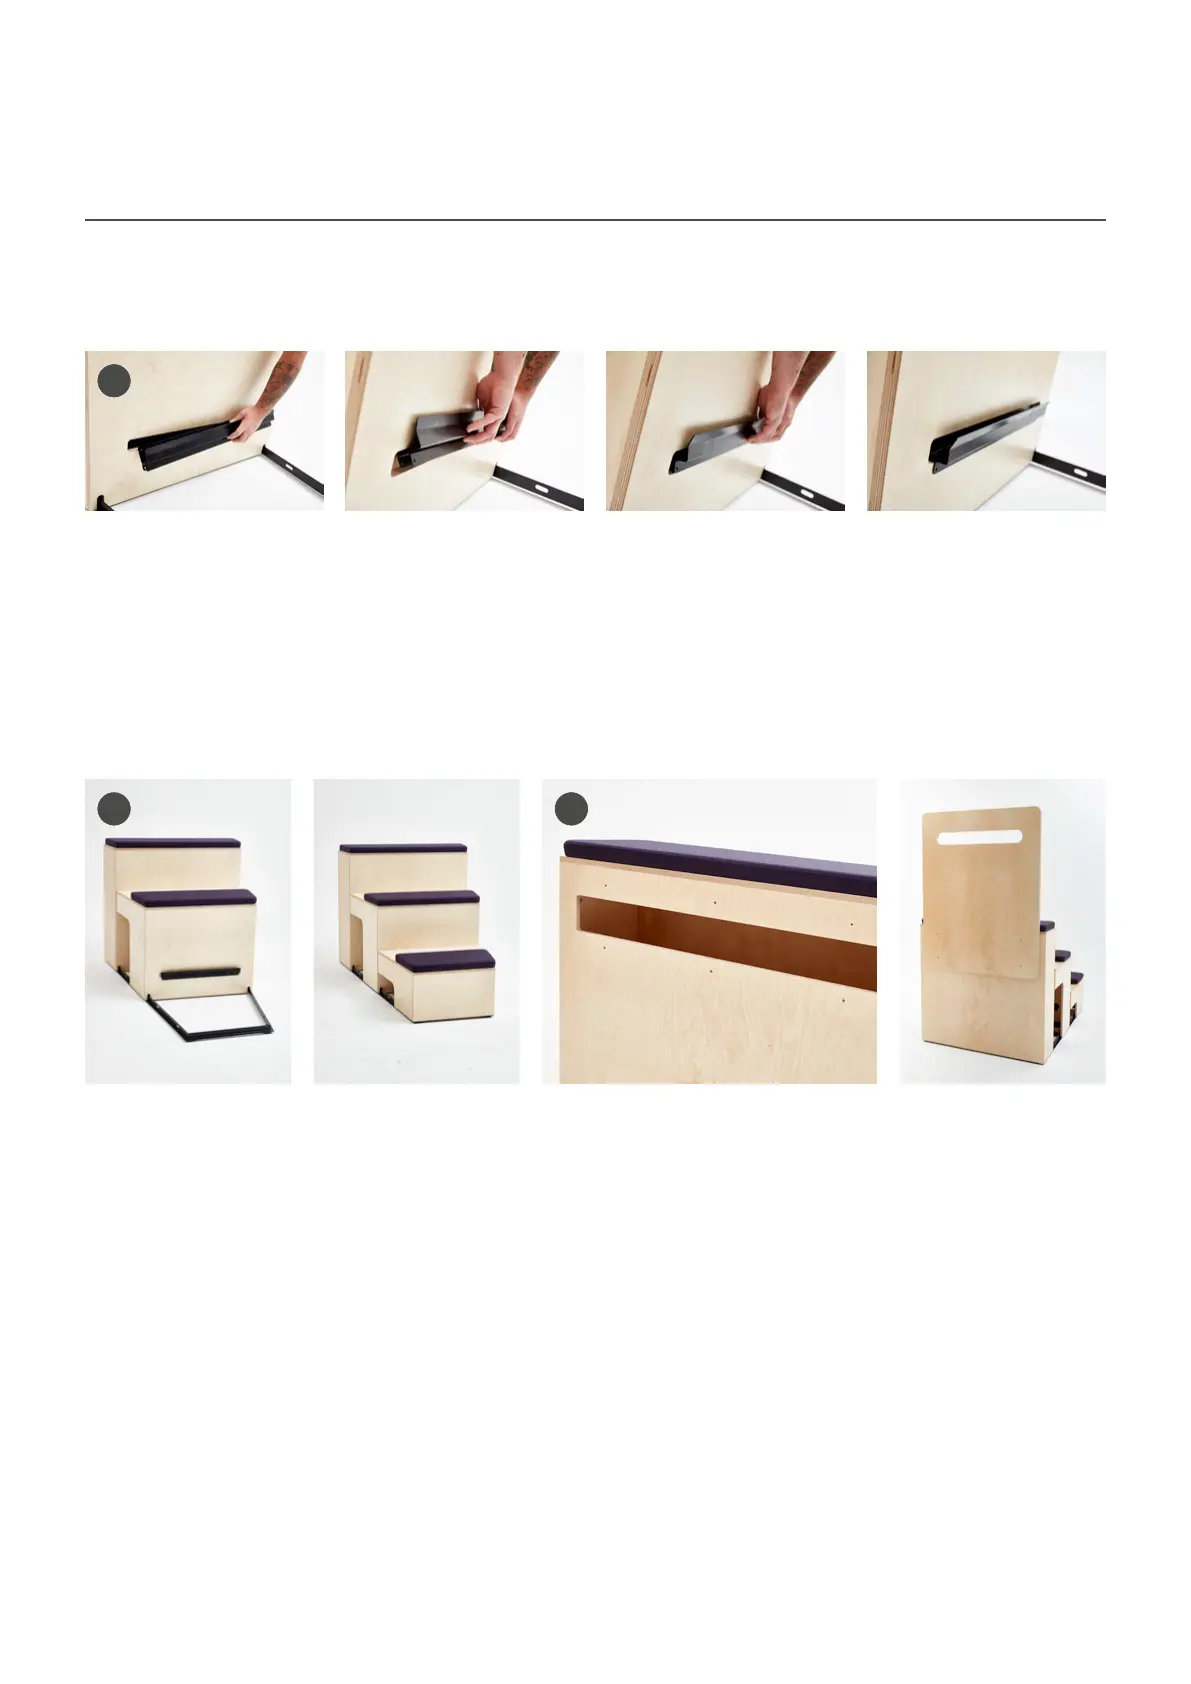
5. Insert 600mm bracket into small cut out on front of the central angled module by lifting widest section
of bracket within the cut-out halfway. Drop smallest ‘run’ onto the small cut-out so that it sits secure.
Centralise the bracket. Use 3x woodscrews to secure in place.
6. Lift the smaller front angled module and place on 600mm bracket and angled module metal support
frame. Ensure that frame sits under cut out grooves to secure module. All modules are now connected to
the frame.
Attaching back balustrade: If connecting a Tier Angled module to another module then do not attach
balustrade until these modules are connected together. Please see page 7 before returning to complete.
7. Locate and face back balustrade to the top of the Tier Angled module. Attach the back balustrade to
steps and secure with 6x M6x40 furniture bolts. Balustrade is now attached.
If carpet tiles are specified for Tier Angled module, they will need to be cut down and attached with adhesive
once complete configuration is connected.
5
6 7
 Loading...