14
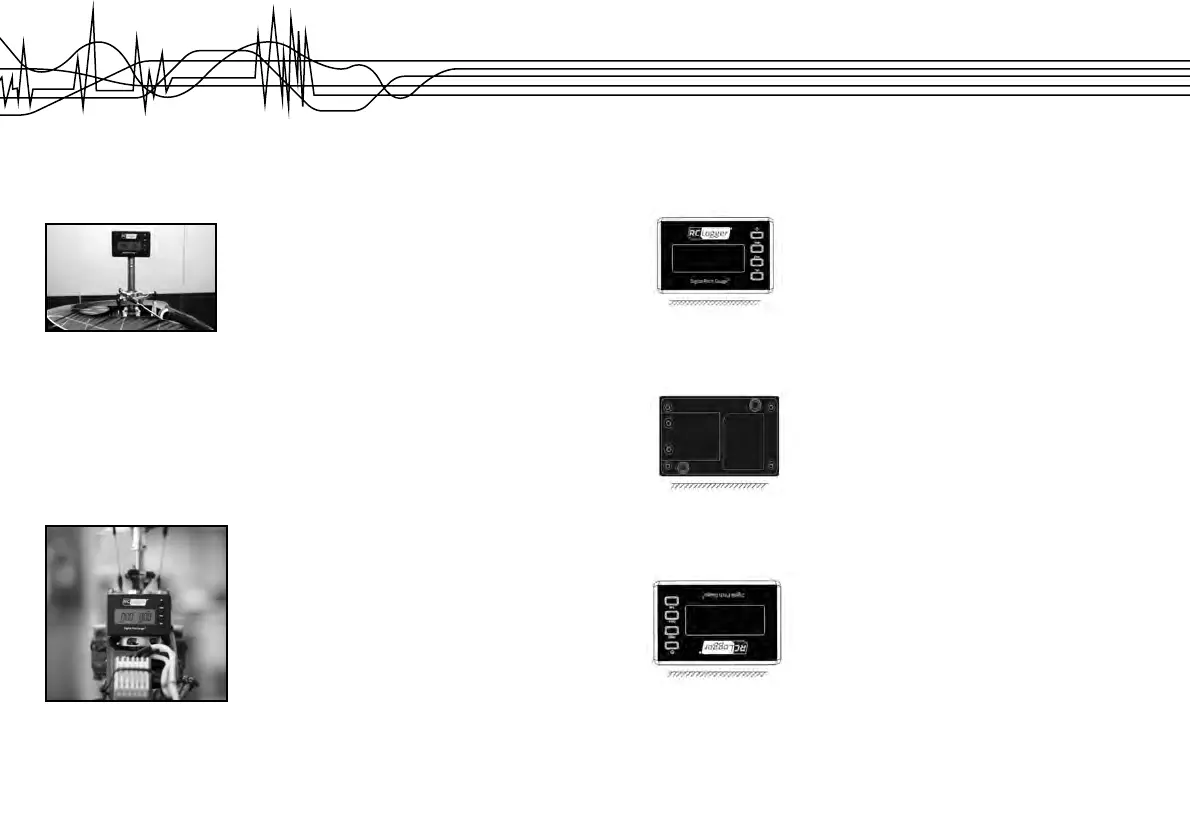
Setting the main shaft as the reference
1. Place your RC helicopter on a stable horizontal surface.
2. If there is any curve cover on the main shaft, remove it. Attach the pitch gauge to the main shaft using
the magnet at the top, or place the pitch gauge on the main shaft.
3. Press the “Zero” button (9) to set the reference level immediately. In order to avoid any impact on
measurement accuracy through vibration from pressing the button, you can use the delay set zero
function. Press and hold the “Zero” button (9) for approx. 1.5 seconds. You will hear a beep sound three
times (counting down), and then the reference level will be set.
4. To switch back to absolute measurement mode, press the “Zero” button (9) again.
Setting the motor as the reference
1. Place your RC helicopter on a stable horizontal surface.
2. Place the pitch gauge on the motor, or attach it to the motor using the magnet at the top.
3. Press the “Zero” button (9) to set the reference level immediately. In order to avoid any impact on
measurement accuracy through vibration from pressing the button, you can use the delay set zero
function. Press and hold the “Zero” button (9) for approx. 1.5 seconds. You will hear a beep sound three
times (counting down), and then the reference level will be set.
4. To switch back to absolute measurement mode, press the “Zero” button (9) again.
27
14. Im Display wird „--05--“ angezeigt. Dies bedeutet, dass sich die Pitch-Einstelllehre nun in
Kalibrierungsschritt 5 befi ndet.
15. Platzieren Sie die Pitch-Einstelllehre wie unten abgebildet waagrecht auf dem Boden oder einer
anderen waagrechten Oberfl äche.
16. Im Display wird „--06--“ angezeigt. Dies bedeutet, dass sich die Pitch-Einstelllehre nun in
Kalibrierungsschritt 6 befi ndet.
17. Platzieren Sie die Pitch-Einstelllehre wie unten abgebildet waagrecht auf dem Boden oder einer
anderen waagrechten Oberfl äche.
18. Im Display wird „--07--“ angezeigt. Dies bedeutet, dass sich die Pitch-Einstelllehre nun in
Kalibrierungsschritt 7 befi ndet.
19. Platzieren Sie die Pitch-Einstelllehre wie unten abgebildet waagrecht auf dem Boden oder einer
anderen waagrechten Oberfl äche.
20. Im Display wird „--08--“ angezeigt. Dies bedeutet, dass sich die Pitch-Einstelllehre nun in
Kalibrierungsschritt 8 befi ndet.
21. Platzieren Sie die Pitch-Einstelllehre wie unten abgebildet waagrecht auf dem Boden oder einer
anderen waagrechten Oberfl äche.