26
8. Im Display wird „--02--“ angezeigt. Dies bedeutet, dass sich die Pitch-Einstelllehre nun in
Kalibrierungsschritt 2 befi ndet.
9. Platzieren Sie die Pitch-Einstelllehre wie unten abgebildet waagrecht auf dem Boden oder einer
anderen waagrechten Oberfl äche.
10. Im Display wird „--03--“ angezeigt. Dies bedeutet, dass sich die Pitch-Einstelllehre nun in
Kalibrierungsschritt 3 befi ndet.
11. Platzieren Sie die Pitch-Einstelllehre wie unten abgebildet waagrecht auf dem Boden oder einer
anderen waagrechten Oberfl äche.
12. Im Display wird „--04--“ angezeigt. Dies bedeutet, dass sich die Pitch-Einstelllehre nun in
Kalibrierungsschritt 4 befi ndet.
13. Platzieren Sie die Pitch-Einstelllehre wie unten abgebildet waagrecht auf dem Boden oder einer
anderen waagrechten Oberfl äche.
15
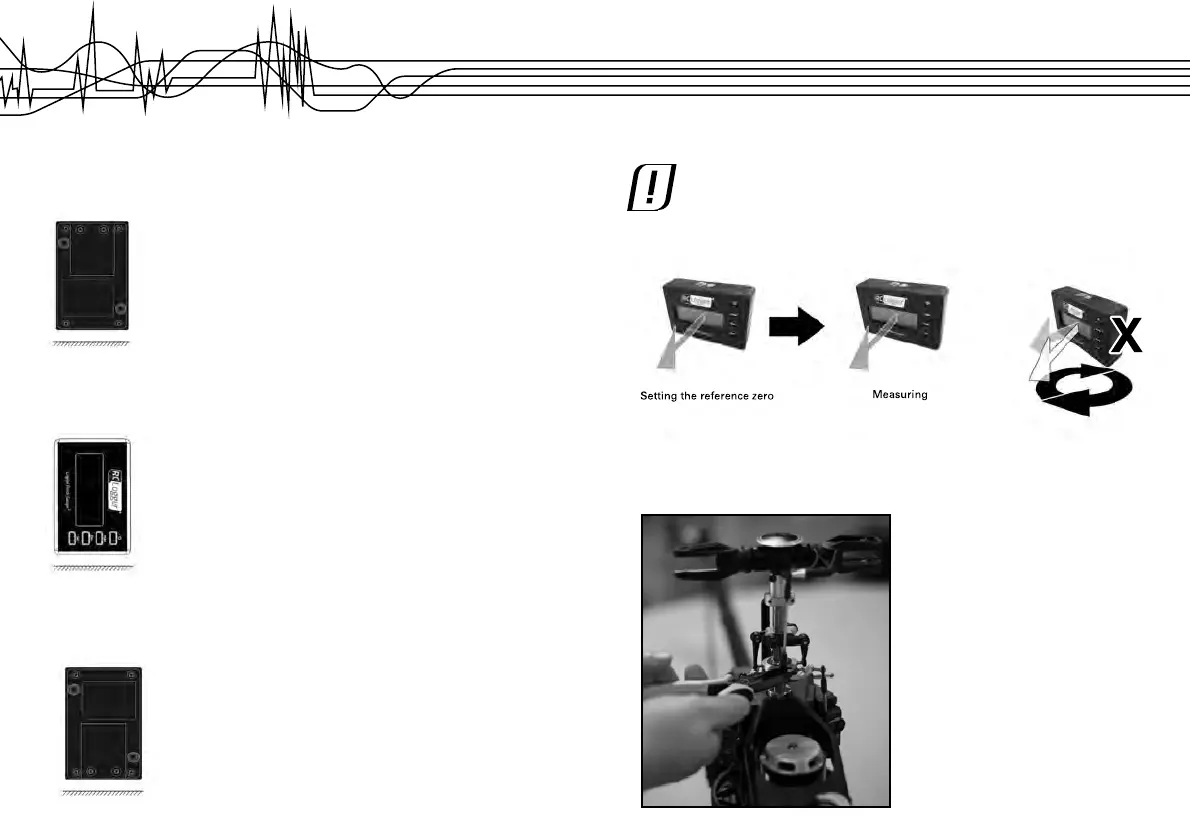
11. STARTING THE MEASUREMENT
Do not connect the motor while measuring.
Before every measurement, set the reference zero of the pitch gauge. Keep the
orientation of the pitch gauge during the measurement. If you need to measure at a
different orientation (e.g. measuring the tail rotor blade after the main rotor blade), set
the reference zero at the new orientation again.
Measuring the swashplate
1. Remove one of the joints between the swashplate and the main shaft with a proper tool.