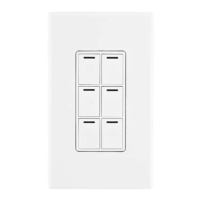
Wireless 2, 3, and 6-Button
Keypad Installation Guide
Supported Models and Requirements
• C4-KP2-ZWireless2-ButtonKeypad
• C4-KP3-ZWireless3-ButtonKeypad
• C4-KP6-ZWireless6-ButtonKeypad
Specications
ThisControl4
®
multi-buttonKeypadisintendedforuseinaControl4system.Itinstalls
inastandardwallboxusingtypicalwiringstandardsandcommunicatestotheControl4
systemusingawirelessconnection.Thespecicationsaredescribednext.
Power:
120VAC+/-10%50/60Hz
400mW
ThisdevicerequiresaneutralAC
connection.
Supported Load Types:
NotApplicable.Thisdevicedoesnotdirectlycontrol
aload.
Communications:
IEEE802.15.4,2.4GHz,15-channel,spread
spectrumradio
Warnings and Considerations
WARNING! Installinaccordancewithallnationalandlocalelectricalcodes.
WARNING! ImproperuseorinstallationcancauseSERIOUSINJURY,
DEATHorLOSS/DAMAGEOFPROPERTY.
WARNING!Ifyouareunsureaboutanypartoftheseinstructions,consulta
qualiedelectrician.
WARNING!ToreducetheriskofSERIOUSINJURYorDEATH,turnOFF
localelectricalpowerbeforeinstallingthisproduct,andbeforeinstalling,
removing,orreplacingkeycaps.
IMPORTANT!Usingthisproductinamannerotherthanoutlinedinthis
documentvoidsyourwarranty.Further,Control4isNOTliableforany
damageincurredwiththemisuseofthisproduct.See“Limited2-Year
Warranty.”
IMPORTANT! DoNOTuseapowerscrewdrivertoinstallthisdevice.Ifyou
do,youmayovertightenthescrewsandstripthem.
Installation Instructions
Ensurethatthelocationandintendedusemeetthefollowingcriteria:
• Whenreplacingatraditional3-wayswitch,refertothe“Two-Location”sample
wiringcongurationsprovidedinthefollowingdocuments:
Wireless Dimmer Installation Guide
Wireless Switch Installation Guide
• Installinaccordancewithallnationalandlocalelectricalcodes.
• TherequiredwallboxsizeisspeciedbytheNEC(NationalElectricalCode).
Theinternalwallboxvolumeoccupiedbythismulti-buttonkeypadis5.0cubic
inches.
• Therangeandperformanceofthewirelesscontrolsystemishighlydependent
onthefollowing:(1)distancebetweendevices;(2)layoutofthehome;(3)walls
separatingdevices;and(4)electricalequipmentlocatedneardevices.
• Ifyouareplanningtouseengravedkeycapsfor3-Buttonand6-ButtonKey-
pads,DONOTcontinueuntilyouhavereadthe“ReplaceKeycaps”section.
• Ifinstallingamulti-buttonkeypadinamulti-ganginstallation,DONOTcontinue
untilyouhavereadthe“Multi-GangInstallations”section.
1.
4. Ifyouneedto“ReplaceKeycaps”ordo“Multi-GangInstallations,”refertothose
sectionsbeforecontinuing.
WARNING!Aswithanyelectricaldevice,improperuseorinstallationcan
causeSERIOUSINJURYorDEATH.Itisimportantthatyouunderstandthe
particularwiringcongurationofyourinstallationbeforeproceeding.Note:The
wallboxwiringshowninthisdocumentisanexample.Yourwirecolorsand
functionsmaydiffer.IfyouarenotsurewhichwiresaretheHot,Neutral,and
Groundwires,haveatrainedelectriciandotheinstallation.
6.
7.
Fitthewiresbackintothewallbox.Bendthewiresinazigzag
patternsothattheyeasilyfoldintothewallbox.
IfyouareusingtheControl4push-on(screwless)wallplate
thatshippedwithyourmulti-buttonKeypad:
Operation and Conguration
Oninitialpowerup,theunitwillashtheRed/Green/Blue(RGB)LEDswhichcanbe
programmedwithdifferentcolorsfordifferentstatesorcolorpreferences.Tosetupthis
KeypadforusewithaControl4system,refertotheComposer Pro User Guide.
Troubleshooting
IfoneormoreLightEmittingDiodes(LEDs)arenotlit:
• EnsurecircuitbreakerisnotturnedOFFortripped.
• Checkforproperwiring,suchastheexampleinStep5.Youmayalsoneedtocontact
atrainedelectrician.
• Forhelpontheinstallationoroperationofthisproduct,emailorcalltheControl4
TechnicalSupportCenter.Pleaseprovideyourexactmodelnumber.Contact
support@control4.comorseethewebsitewww.control4.com.
IMPORTANT!Notgroundingthisproductaccordingtotheprecedingmay
resultinaninstallationlessimmunetodamagecausedbyelectrical
disturbances,suchaslightning,andvoidthewarranty.
IMPORTANT! Thisisanelectronicdevicewithintricatecomponents.Handle
andinstallwithcare!
WARNING!ToreducetheriskofSERIOUSINJURYor
DEATH,turnOFFlocalelectricalpowerbeforeinstallingthis
product.
2. Turnoffthelocalelectricalpowerbyeitherswitchingoffthecircuitbreakerorremov-
ingthefusefromthefusebox.ToensurethewiresdoNOThavepowerrunningto
them,useaninductivevoltagedetector.
3. Prepareeachwire.Wireinsulationshouldbe
strippedback5/8ofaninchfromthewireend
(asshown).
5. Identifyandconnectthemulti-button
Keypadwirestothewallboxwiresusing
thewirenuts.
Note:Wallboxwirescandifferdepend-
inguponhowtheboxwaswiredbyyour
electrician.
Towirethemulti-buttonKeypad,connect
andcapthewireswithawirenutas
indicatedinthefollowingtable.
Multi-Button Keypad Wires
(2,3, or 6-Button)
Wires in Wall Box
White(neutral) White(neutral)
Green(ground) Green(ground)
Black(hot) Black(hot)
a.
b.
Alignthemulti-buttonKeypadtothewallboxandfasten
itwithscrews.Tightenthescrewsuntilthebacksideof
themetalyokeplateisevenwiththewallsurface,butno
further.Overtighteningcanwarpthemulti-buttonKeypad
andcausemechanicalmalfunction.
Withthewallplate’sremovalslotfacingdown,pushthe
wallplateontotheKeypad’sblackplasticsub-plate.
8. IfyouareusingaDecora-stylescrew-onwallplate:
a.
b.
c.
Removethemulti-buttonKeypad’sblackplasticsub-plate
andstoreitforfutureuse(incaseyoulaterdecidetouse
theControl4wallplate).
Alignthemulti-buttonKeypadtothewallboxandfastenit
withscrews.
Fastenthewallplatetothemulti-buttonKeypaditwith
screws.
9.
10.
TurnONpoweratthecircuitbreakerorreplacethefusefrom
thefusebox.
EnsurethatallLEDsonthefrontarelit.
Replace Keycaps
Note:Appliesto3-buttonand6-ButtonKeypadsonly.
WARNING!ToreducetheriskofSERIOUSINJURYorDEATH,turnOFFthe
localelectricalpowerbeforeinstalling,removing,orreplacingkeycaps.
Control4offersstandardengravedkeycapsandcustomengravedkeycaps(bothsold
separately)toenableyoutopersonalize3-Buttonand6-ButtonKeypads.
Note:Customengravingisnotavailablefor2-ButtonKeypads.
Ifyouarereplacingkeycaps:
1. Turnoffthelocalelectricalpower.
2. Removethescrew-lessorscrew-onwallplatefromthe
multi-buttonKeypad.
3. Removetheblackplasticsub-platefromthemulti-button
Keypadbyremovingthescrewatthetopandbottomofthe
device.
4. PinchbothsidesoftheKeycapretaineratbothends—
workingrstatthetop,thenthebottom—togentlyremove
theretainer.DONOTprytheretaineroffwithascrew
driver.
5. RemovethedefaultKeycapsfromtheKeycapretainerand
replaceeachonewiththeengravedKeycapofyourchoice.
BesuretoplacetheLEDatthetop.
6. Carefullysnaptheretainerbackintoplace,takingcarenot
todamagetheretainerclips.
7. Reattachthesub-platewiththescrews.Reattachthewall
plate.
Multi-Gang Installations
If using a Decora-style screw-on multi-gang wall plate:
Removetheblackplasticsub-platefromeachdevice,justasyouwouldforasinglede-
vice(seeStep8in“InstallationInstructions”),andstoreitforfutureuseincaseyoulater
decidetousetheControl4wallplate.
TIP: Foreaseofinstallation,eachdevice’syokeplatemustbeevenand
alignedinaatplanesothatthemulti-gangsub-platecansitatagainstall
ofthedevices.Thiscanbeaccomplishedbyinitiallynotscrewingthedevices
tightlyagainstthewallbox,leavingabout1/8ofaninchgapbetweenthewall
andtheyokeplates.Thisallowseachdevicetomoveandconformtothesub-
plate.Usingthenewscrewssuppliedwiththemulti-gangsub-plate,securethe
multi-gangsub-platetoalldevicestocreateasinglestructure.Thensecure
thestructurebytighteningthewallboxscrewstheremaining1/8ofaninch.
Donotover-tightenanyofthescrewsoryouwillmis-aligntheatplaneofthe
multi-gangwallplate.
Multi-ganginstallationsarecongurationsinwhichtwo(2)ormoredevicesareinstalled
side-by-sideinthesamewallbox.Formulti-ganginstallations:
If using a Control4 push-on (screw-less) multi-gang wall plate:
Removetheindividualblackplasticsub-platefromeachdeviceandreplacethemwiththe
multi-gangsub-platethatshippedwithyourControl4multi-gangwallplate.Theuseofthe
multi-gangsub-plateinherentlyalignsandspaceseachdeviceproperly.
Care and Cleaning
• DoNOTpaintthemulti-buttonkeypadoritswallplate.
• DoNOTuseanychemicalcleanerstocleanthemulti-buttonkeypad.
• Cleansurfacewithasoftdampclothasneeded.
Regulatory Compliance
FCC
FCCID:R33C4KP3Zforthe2and3-ButtonKeypad
FCCID:R33C4KP6Zforthe6-ButtonKeypad
ThisdevicecomplieswithPart15oftheFCCRules.Operationissubjecttothefollowing
twoconditions:(1)thisdevicemaynotcauseharmfulinterference,and(2)thisdevice
mustacceptanyinterferencereceived,includinginterferencethatmaycauseundesired
operationofthisdevice.
Sonfonctionnementestsoumisauxdeuxconditionssuivantes:(1)cetappareilnedoit
pascauserd’interférencesnuisibleset(2)cetappareildoitacceptertouteinterférence
reçue,ycomprislesinterférencesquipeuventcauserunmauvaisfonctionnementdu
dispositif.
ThisequipmenthasbeentestedandfoundtocomplywiththelimitsforaClassBdigital
device,pursuanttoPart15oftheFCCRules.Theselimitsaredesignedtoprovide
reasonableprotectionagainstharmfulinterferenceinaresidentialinstallation.Thisequip-
mentgenerates,uses,andcanradiateradiofrequencyenergyand,ifnotinstalledand
usedinaccordancewiththeinstructions,maycauseharmfulinterferencetoradiocom-
munications.However,thereisnoguaranteethatinterferencewillnotoccurinaparticular
installation.Ifthisequipmentdoescauseharmfulinterferencetoradioortelevisionrecep-
tion,whichcanbedeterminedbyturningtheequipmentoffandon,theuserisencour-
agedtotrytocorrecttheinterferencebyoneormoreofthefollowingmeasures:•
• Reorientorrelocatethereceivingantenna.•Increasetheseparationbetweenthe
equipmentandreceiver.
• Connecttheequipmentintoanoutletonacircuitdifferentfromthattowhich
thereceiverisconnected.
• Consultthedealeroranexperiencedradio/TVtechnicianforhelp.
IMPORTANT!Anychangesormodicationsnotexpresslyapprovedbythe
partyresponsibleforcompliancecouldvoidtheuser’sauthoritytooperatethis
equipment.
ETL Statement
ETLControlNumber:3129831
ThisproducthasbeentestedbyETLandwasfoundtocomplywiththeStandardfor
SafetyforIndustrialControlEquipment:
• UL244A3rdedition:2003;StandardforSolidStateControls
forAppliances.
• CSAStandardC22.2#14-05:2005;IndustrialControlEquipment.
Industry Canada
IC:7848A-C4KP3Zforthe2and3-ButtonKeypad
IC:7848A-C4KP6Zforthe6-ButtonKeypad
ThisClassBdigitalapparatuscomplieswithCanadaICES-003.
CetappareilnumériquedelaclasseBestconformeàlanormeNMB-003duCanada.
Operationissubjecttothefollowingtwoconditions:(1)thisdevicemaynotcauseinterfer-
enceand(2)thisdevicemustacceptanyinterference,includinginterferencethatmay
causeundesiredoperationofthedevice.
L’opérationestsujetteauxdeuxconditionssuivantes:(1)cedispositifpeutnepascauser
l’interférenceet(2)cedispositifdoitacceptern’importequelleinterférence,ycompris
l’interférencequipeutcauserlefonctionnementpeudésirédudispositif.
WARNING!WARNING!GroundtheWirelessKeypadinaccordancewiththe
NationalElectricCode(NEC)requirements.AlthoughtheKeypad’saluminum
yokeplateandgreengroundwirearedirectlybondedtogetherinsidethe
keypad,DONOTrelysolelyupontheyokeplate’scontactwithametalwall
boxforadequategrounding.UsetheKeypad’sgroundwiretomakeasecure
connectiontothesafetygroundoftheelectricalsystem.

 Loading...