EasyManua.ls Logo

Control 4 C4-TSWMC7-EG-BL - User Manual

Control 4 C4-TSWMC7-EG-BL
10 pages
Print Icon
To Next Page IconTo Next Page
Loading...
NOTE: Video Intercom using 802.11b is not
recommended or supported for Video
Intercom. Control4 recommends Wireless-N
for Video Intercom. See “Wireless Network
Limitations” and “Power and Network
Installation Options.
• Option1:EthernetwithPoE. The Ethernet
network connection is provided through the PoE
Injector. No additional wiring is needed.
• Option2:EthernetwithAC. Connect the Touch
Screen to one of the RJ-45 LAN ports on the
gateway/router using the RJ-45 Ethernet cable.
• Option3:WiFiwithAC. The internal WiFi will
communicate with the LAN’s WAP. If the LAN has
a WAP set up, no additional wiring is needed.
Supported Models
• C4-TW7C0-BL - 7 Inch Wall Mount Capacitive
Touch Screen with Camera, Ethernet/WiFi, PoE/
Universal Voltage, Black
• C4-TW7C0-WH - 7 Inch Wall Mount Capacitive
Touch Screen with Camera, Ethernet/WiFi, PoE/
Universal Voltage, White
Associated SKUs:
• C4-TSWMC5-EG-WH – 5” In-Wall Touch Screen,
White (no camera)
• C4-TSWMC7-EG-WH – 7” In-Wall Touch Screen,
White (no camera)
• C4-TSWMC5-EG-BL – 5” In-Wall Touch Screen,
Black (no camera)
• C4-TSWMC7-EG-BL – 7” In-Wall Touch Screen,
Black (no camera)
Box Contents
Carefully unpack the contents of the box, and make
sure the following items are included. If any item is
missing or damaged, please contact your Control4
Reseller.
• 7” In-Wall Touch Screen with Camera
• Power box (used to power the Touch Screen)
• Two (2) screws to attach the power box
• Warranty card
Introduction
The Control4® 7” In-Wall Touch Screen with Camera
oers complete system control in an elegant and
compact design. This Touch Screen is equipped
with a capacitive Touch Screen and four (4)
programmable shortcut buttons plus Audio and
Video Intercom (with a built-in camera) using SIP.
The available power options are AC power or Power-
over-Ethernet (PoE); the network options are WiFi
or Ethernet connections. This Touch Screen supports
new construction or retrofit installations.
• AC. AC power is used to power the Touch
Screen when using an Ethernet or WiFi network
connection.
• PoE. PoE is used to power the Touch Screen
when using an Ethernet or WiFi network
connection.
The following table shows the available network
options with power.
• Ethernet with PoE
• Ethernet with AC
• WiFi with AC
7” In-Wall Touch Screen
with Camera
Installation Guide
1
Question and Answer IconNeed help?

Do you have a question about the Control 4 C4-TSWMC7-EG-BL and is the answer not in the manual?

Summary

Introduction

Product Overview

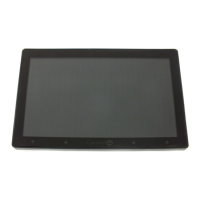
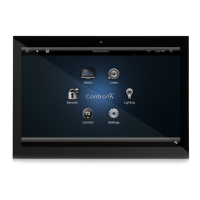
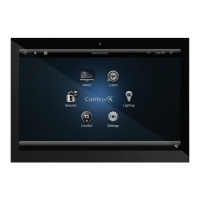
Describes the Control4 7" In-Wall Touch Screen with Camera, its features, and design.

Power and Network Options

Details available power (AC/PoE) and network (WiFi/Ethernet) connection options.

Supported Models

Touch Screen Models

Lists supported 7" In-Wall Touch Screen models with camera.

Associated SKUs

Lists associated SKUs for 5" and 7" In-Wall Touch Screens, with and without cameras.

Box Contents

Included Items

Lists the items included in the box for the 7" In-Wall Touch Screen with Camera.

Specifications

Screen and Wireless Specifications

Details screen resolution, camera specs, and wireless LAN capabilities.

Accessories

Power Injector

Information about the Control4 PoE Injector (AC-POE1-B) sold separately.

Back Box Options

Details available back box kits for new construction and retrofit installations.

Requirements

System and Back Box Requirements

Specifies the need for a Home Controller and a pre-installed Control4 7" Touch Screen back box.

Ethernet with PoE Power Requirements

Lists requirements for Ethernet connection using PoE power, including injector and cables.

Ethernet with AC Power Requirements

Lists requirements for Ethernet connection with AC power, including network and AC power access.

Wireless with AC Power Requirements

Lists requirements for WiFi connection with AC power, including network and AC power access.

Front and Rear Panel Descriptions

Front Panel View

Identifies the display and shortcut buttons on the front of the Touch Screen.

Rear Panel Connections

Describes wire connections and the RJ-45 port for Ethernet on the rear panel.

Dimensions

Provides front, back box, and power box dimensions for the 7" Touch Screen.

Touch Screen Removal

Instructions on how to remove the Touch Screen from the wall using a small hole.

Touch Screen Placement

Recommended Placement

Guidance on placing the Touch Screen at eye level for optimal use and camera visibility.

LED Indicator

Status and Booting Information

Explains the meaning of the LED on the Touch Screen for camera status and booting.

Installation

Safety Precautions

Important safety warnings before installing, including turning off power.

Prerequisites

Ensures a 7" Touch Screen back box is installed as per documentation before proceeding.

Power and Network Installation Options

Overview of choosing between Ethernet/WiFi and PoE/AC power for installation.

Option 1: Ethernet Connection with PoE

PoE Injector Setup

Steps for setting up an Ethernet connection using a PoE Injector for power and network.

Option 2: Ethernet Connection with AC

AC Power Setup

Details the Ethernet connection requiring both neutral and hot AC power connections.

Option 3: WiFi Connection with AC

WiFi and AC Power Setup

Describes setting up a WiFi connection with AC power, requiring a WAP and power source.

Wireless Network Limitations

Discusses potential WiFi performance degradation with multiple devices or multicast handling.

Power Installation

AC Power Connection Steps

Step-by-step guide for connecting AC power to the Touch Screen via a terminal block.

AC Power Connection Steps

Completes the AC power connection by securing wires and sliding the power box into place.

Power Over Ethernet (PoE) Connection

PoE Injector Connection Steps

Steps to connect the PoE Injector to AC power, network, and the Touch Screen's power box.

Configuration

Configure for Wireless

Guides for connecting to a WiFi network via the Touch Screen's settings menu.

Network Configuration Steps

Details on enabling WiFi, selecting network name, security, and typing the password.

Static IP Configuration

Optional steps to set a static IP address for the Touch Screen if DHCP is not used.

Configure in Composer Pro

Adding and Configuring the Driver

Instructions on adding and configuring the In-Wall 7" Touch Screen V2 driver in Composer Pro.

Troubleshooting

Boot Up Issues

Describes the LED behavior and expected wait time during the Touch Screen's boot-up process.

Restore to Factory Default

Steps to restore the Touch Screen to factory defaults, including accessing the restore switch.

Removing the Touch Screen

Instructions on how to remove the Touch Screen to access the factory restore switch.

Engaging the Restore Switch

Details using a paper clip to engage the factory restore switch on the Touch Screen.

Post-Restore Actions

Steps to reattach the Touch Screen and what happens after a factory restore (reboot, firmware update).

Warnings;Considerations

Electrical and Environmental Warnings

Covers circuit breaker requirements, heat dissipation, and avoiding water/humidity.

Usage and Handling Precautions

Advises against using sharp objects and highlights potential property damage from improper use.

General Usage and Warranty

Important notes on warranty voidance due to misuse and adherence to electrical codes.

Heat and Ventilation

Highlights the product's heat generation and the need for adequate room ventilation.

Grounding and Usage Locations

Specifies grounding requirements and that the product is for dry, residential use only.

Magnet Safety

Warns about strong magnets affecting medical devices and magnetic media; provides safety distances.

Third-Party Trademarks

Libertas Firmware Copyright

Copyright statement for Libertas Firmware used in Touch Screens.

GNU General Public License

Terms and conditions for copying, distribution, and modification of the Program under GNU GPL.

Regulatory;Safety;Other Information

Regulatory Information

Directs users to the Control4 website for regulatory information.

Patent Information

Lists patents protecting the product and patents under which it is licensed.

Warranty Information

Provides information about the limited 2-year warranty and a link for details.

About this Document

Document Part Number and Revision

Details the document part number and revision date.

Control 4 C4-TSWMC7-EG-BL Specifications

General IconGeneral
BrandControl 4
ModelC4-TSWMC7-EG-BL
CategoryTouch Panel
LanguageEnglish

Related product manuals