ChlorMakerChlorMaker Manual Manual 1010
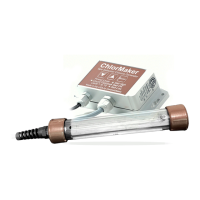
ChlorMaker-IL MaintenanceChlorMaker-IL Maintenance
The ChlorMaker has three buttons and four lights built into the overlay on the control box, allowing you The ChlorMaker has three buttons and four lights built into the overlay on the control box, allowing you
to view and change the power level, switch chlorine generation modes (to view and change the power level, switch chlorine generation modes (BoostBoost), and more. The lights ), and more. The lights
indicate the salt level and the current mode (chlorine generation or standby).indicate the salt level and the current mode (chlorine generation or standby).
Power OnPower On
To turn on the ChlorMaker, plug the power supply into the outlet. As it turns on, it will ash the To turn on the ChlorMaker, plug the power supply into the outlet. As it turns on, it will ash the WhiteWhite and and
RedRed ( (Salt LowSalt Low)) lights a number of times, indicating the software version. Then, the lights a number of times, indicating the software version. Then, the White White , , RedRed, , Blue Blue
((Salt OKSalt OK)), and , and Green Green ((Salt HighSalt High) lights will ash, in that order.) lights will ash, in that order.
Chlorine generation will start after a few seconds. Until then, the Chlorine generation will start after a few seconds. Until then, the WhiteWhite light will ash every ten seconds light will ash every ten seconds
to indicate standby mode.to indicate standby mode.
Making Chlorine (Salt Level Indication)Making Chlorine (Salt Level Indication)
When making chlorine, ChlorMaker will indicate with a solid light if the salt level is high, low, orWhen making chlorine, ChlorMaker will indicate with a solid light if the salt level is high, low, or
normal, along with visible bubbles coming from the electrode.normal, along with visible bubbles coming from the electrode.
This reading is actually a measure of how much electrical current is being drawn to the plates in the This reading is actually a measure of how much electrical current is being drawn to the plates in the
electrode, so if there are extra minerals in your water or salt sources (e.g. well water or Dead Sea Salt), electrode, so if there are extra minerals in your water or salt sources (e.g. well water or Dead Sea Salt),
they may add to the reading. they may add to the reading. Only the actual salt (NaCl) in the water will produce chlorine though.Only the actual salt (NaCl) in the water will produce chlorine though.
This may cause the ChlorMaker to run with the This may cause the ChlorMaker to run with the GreenGreen light on, which is not a cause for concern and light on, which is not a cause for concern and
will not hurt the electrode. As described below, the will not hurt the electrode. As described below, the GreenGreen light is just a warning to not add more salt, to light is just a warning to not add more salt, to
avoid a shutdown. avoid a shutdown.
We recommend starting with lower salt and seeing if that produces enough chlorine, since it is easier to We recommend starting with lower salt and seeing if that produces enough chlorine, since it is easier to
add salt than it is to remove it. Plus, running with minimal salt will help your ChlorMaker electrode last add salt than it is to remove it. Plus, running with minimal salt will help your ChlorMaker electrode last
longer.longer.
If the lights are on solid, your ChlorMaker is generating chlorine:If the lights are on solid, your ChlorMaker is generating chlorine:
• • Solid Solid GreenGreen——Salt Level HighSalt Level High, current between 2.0 and 2.4 amps, current between 2.0 and 2.4 amps
• • Solid Solid BlueBlue——Salt Level NormalSalt Level Normal, current between 1.0 and 2.0 amps, current between 1.0 and 2.0 amps
• • Solid Solid RedRed——Salt Level LowSalt Level Low, current below 1.0 amps, current below 1.0 amps
• • Solid Solid GreenGreen & & RedRed—current has exceeded the maximum of 2.4 amps and the ChlorMaker has —current has exceeded the maximum of 2.4 amps and the ChlorMaker has
shut down to protect the power supply and the electrodeshut down to protect the power supply and the electrode
• • Drain out some water and rell with fresh water to dilute the salt levelDrain out some water and rell with fresh water to dilute the salt level
• • Then, cycle power or press the Then, cycle power or press the BoostBoost button to have it check again button to have it check again
Note: Note: If a chlorine cycle was started by pressing the If a chlorine cycle was started by pressing the BoostBoost button (as opposed to automatically turning button (as opposed to automatically turning
on), the above lights may ash instead of being solid.on), the above lights may ash instead of being solid.
At least once every two weeks, inspect the electrode:At least once every two weeks, inspect the electrode:
• • Open the spa’s equipment panel, and turn the spa off at the circuit breaker panel.Open the spa’s equipment panel, and turn the spa off at the circuit breaker panel.
• • Locate the in-line cell and check Locate the in-line cell and check the clear part of the tube body, the clear part of the tube body, visually inspecting the titanium visually inspecting the titanium
plates.plates.
• • If there is any buildup, shut off the water (or use the plug to seal the cell) and remove the If there is any buildup, shut off the water (or use the plug to seal the cell) and remove the
electrode for cleaning with a mild acid, e.g. vinegar or pH down. See the respective entry in the electrode for cleaning with a mild acid, e.g. vinegar or pH down. See the respective entry in the
Troubleshooting Guide for more details on how to clean.Troubleshooting Guide for more details on how to clean.
• • Reinstall the newly cleaned electrode.Reinstall the newly cleaned electrode.
WhiteWhite
WhiteWhite
WhiteWhite
ChlorMaker OperationChlorMaker Operation
 Loading...
