8
•
Activate «Along the wall» mode via the mobile app. At
the end of cleaning, the robot will stop and automati-
cally return to the charging station.
Temporary stop of the robot during cleaning (Pause)
•
If during the operation of the robotic vacuum cleaner
you need to pause, press the corresponding button in
the mobile app.
•
To continue cleaning, press the button of the current
cleaning mode again.
Notes: If the robot is switched on and no control buttons
are pressed during 5 minutes, it will automatically switch to
the sleep mode. The button (16) indicator will go out. In this
case press the button (16) of the robot once again to switch
back to the active mode.
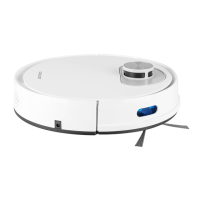
Return of the robot to the charging station
•
When the robot’s battery is discharged, the vacuum
cleaner will notify about it by voice message, after
which it will automatically return to the charging station.
•
You can also forcibly send the vacuum cleaner to the
charging station by pressing the corresponding button
in the mobile app, you will hear the corresponding voice
message and the vacuum cleaner will perform the set
command (pic. 13).
Note:
•
It is recommended to turn on the robot for the first
time from the charging station. It allows to decrease
the time necessary to find the charging station after
cleaning.
•
Do not turn off the power to the charging station of
the robot during operation, since the algorithm pro-
vides for return to the charging station after cleaning
is completed.
•
It is not recommended to change the location of the
charging station, this may lead to inaccuracies in the
operation of the navigation system.
•
For the correct robot’s work and return to the charg-
ing station, it is necessary to ensure a free distance in
front of the charging station of at least 1.5 meters; on
the sides – at least 0.5 meters.
Wet cleaning mode
In this mode, the robot performs wet cleaning of the floor
using the attachment (30) with the microfiber cloth (29).
•
Press the key (22) and remove the water tank (21) from
the robot body, then unplug it (31) and pour sufficient
amount of clean water into the tank, plug it (Fig. 14).
•
Wet the microfiber cloth (29) and install it on the wet
floor cleaning attachment (30), then install the attach-
ment with the cloth on the water tank (21) and insert
the tank back into the robot body until it clicks (Fig. 15).
•
Press the button (16) « » of the robot to switch the
wet cleaning mode on, you will hear the voice mes-
sage «Starting wet cleaning». To suspend the selected
mode, press the buttons again.
Warning:
– To extend the service life of the water tank, it is recom-
mended to use clean water or softened water.
– Please do not use the wet cleaning function on the
carpet.
– At the end of wet cleaning, clean the water tank.
– It is recommended to wash and dry the cloth from the
attachment (29) after each wet cleaning to prevent the
appearance of smell or mold.
– After 60 minutes of cleaning, it is recommended to clean
the cloth (29) to reduce water consumption.
– If you do not plan to carry out wet cleaning, it is neces-
sary to remove the attachment (30) from the robot.
Enabling Wi-Fi pairing mode
(Only to be used in accordance with the COOLFORT
mobile app instruction manual)
• Robot is connected to the charging station:
– press and hold the « » button (16) for more than
5 seconds – you will hear a sound notification and the
« » Wi-Fi indicator (15), as well as the « » button
indicator (16) will slowly begin to flicker.
• Robot is not connected to the charging station:
– switch the robot on by using the «I/O» power
switch (20);
–
press and hold the button (16) « » more than
5 seconds, you will hear a voice message, and the
Wi-Fi indicator (15) « » and the button (16) indicator
« » will start blinking.
CLEANING AND MAINTENANCE
(Thoroughly study the VACUUM CLEANER ASSEMBLY
section before cleaning)
Cleaning the dust bin
• Open the robot upper lid (12) and pull the dust bin (11)
by the handle (27) (fig. 16).
• Press the dust bin lid lock (26) and open the lid (25).
• Remove the dust and garbage (fig. 17) from the dust
bin (11).
• Remove the filter holder (23) and extract the HEPA
filter (24) from it (fig. 18).
• Clean the dust box lid and the fine mesh using a tis-
sue (fig. 19) and the cleaning brush (37), remove any
foreign objects from the valve (28).
• Wash the dust bin (11) with warm running water.
Clean the HEPA filter (24) using the cleaning brush
(37) while carefully tapping it against a hard surface
(fig. 20).
• Let the dust bin and filter components dry naturally
(fig. 21). Keep them dry in order to extend their ser-
vice life.
Turbo Brush cleaning
• Remove the turbo brush frame holder (8), by pressing
the locks and pulling them upwards, in the direction of
arrows in Fig. 22. Then remove the turbo brush (10)
from its socket. Cut the entangled around the Brush
hair and thread with scissors and remove it, using the
cleaning brush (37).
• Clean the brush from dust and wipe it with a clean,
slightly damp tissue.
• Wipe the brush socket, suction orifice of the robot,
frame guard, and turbo brush driving shaft with a
clean, slightly damp tissue.
• Reinstall the brush in the following manner:
– Install one end of the brush on the driving shaft in
careful wiggling motions.
– Lower the other end of the brush into the socket
and secure it with the frame guard.
– Make sure that the frame is properly secured.
Side brushes cleaning (fig. 23)
It is best to remove any hair entangled around the brushes
before cleaning.
• To remove the side brush (2, 5), pull it upwards by
its two straps.
• Cut any hair and thread entangled around the driving
shafts with scissors.
• Cut any hair and thread entangled around the side
brushes with scissors.
• Clean the brushes from dust and wipe them with a
clean, slightly damp tissue.
 Loading...