9
•
Reinstall the side brushes, observing the color mark-
ings on the brushes and the driving shafts.
Cleaning the water tank (21) and the floor wet
cleaning accessory (9)
•
Press the key (22) and pull the water tank (21) out of
the robot vacuum cleaner body (fig. 24).
•
Remove the wet cleaning accessory (9) (fig. 25).
•
Remove the microfiber cloth (29), by pulling in the
direction of the arrow, depicted in Fig. 26.
•
Remove the plug (31) and drain any remaining water
from the water tank (21) (fig. 27).
•
Wash the water tank (21) with warm running water,
then wipe it, and let it dry (fig. 28 and 29).
•
Remove the filter guard screws at the bottom of the
water tank (21). Remove the Filter, wash it with warm
running water, let it dry, and reinstall it (fig. 30 and 31).
•
Wash the microfiber cloth (29), under a warm water
stream, then let it dry naturally (fig. 32 and 33).
Robotic vacuum cleaner body
and charging station cleaning
•
Clean and wipe the anti-drop sensors (1), located on the
lower part of the robot vacuum cleaner body (fig. 34).
•
If you hear squeaking while the vacuum cleaner is
moving, clean the axis of its front wheel (fig. 35).
•
Using a flat-head screwdriver, extract the front wheel
(4) from its socket and remove the metal axis. Remove
any hair and thread entangled around the axis. Using
the cleaning brush, clean the wheel socket and the
axis guards. Clear any dust and garbage off the wheel,
remove hair if it is present.
•
Insert the wheel into the axis and reinstall it back into
its socket. Make sure that nothing hinders free rotation
of the wheel (4).
•
Clear off any dust the battery charging contacts (3)
of the vacuum cleaner and the charging station con-
tacts (34) (fig. 36).
• Wipe the signal window (33) of the charging sta-
tion (32) (fig. 36).
• Wipe the bumper (13), keep the bumper clean, as it
hosts the movement sensors window (17) (fig. 37).
• Wipe the body of the vacuum cleaner with a clean,
slightly damp tissue, then wipe it dry.
• Do not submerge the vacuum cleaner body, charg-
ing station (32), power supply unit (36), power sup-
ply unit connector cable into water or any other
liquids. Make sure that no liquid enters the vacuum
cleaner body.
• Do not use solvents or abrasives for the cleaning of
the vacuum cleaner body, charging station, or the
power supply unit.
Removing battery
• Before you dispose of the vacuum cleaner, remove
the battery and submit it to the appropriate recycling
facility. Do not burn the vacuum cleaner, even if it
is badly damaged, without removing the battery to
avoid battery explosion.
• It is best to have the battery removed during pro-
longed periods of storage of the vacuum cleaner.
• Remove the two fastening screws of the battery lid (6)
and remove the lid.
• Extract the battery and extract the battery connector
from the socket inside the compartment.
• Reinstall the lid (6) and the fastening screws.
STORAGE
• Clean the vacuum cleaner, in accordance with the
«Cleaning and maintenance» section before pro-
longed periods of storage.
• Switch the robot off, using the «I/O» power
switch (20).
• Store in the original packaging.
• Keep the vacuum cleaner in a dry cool place unreach-
able by children or people with disabilities.
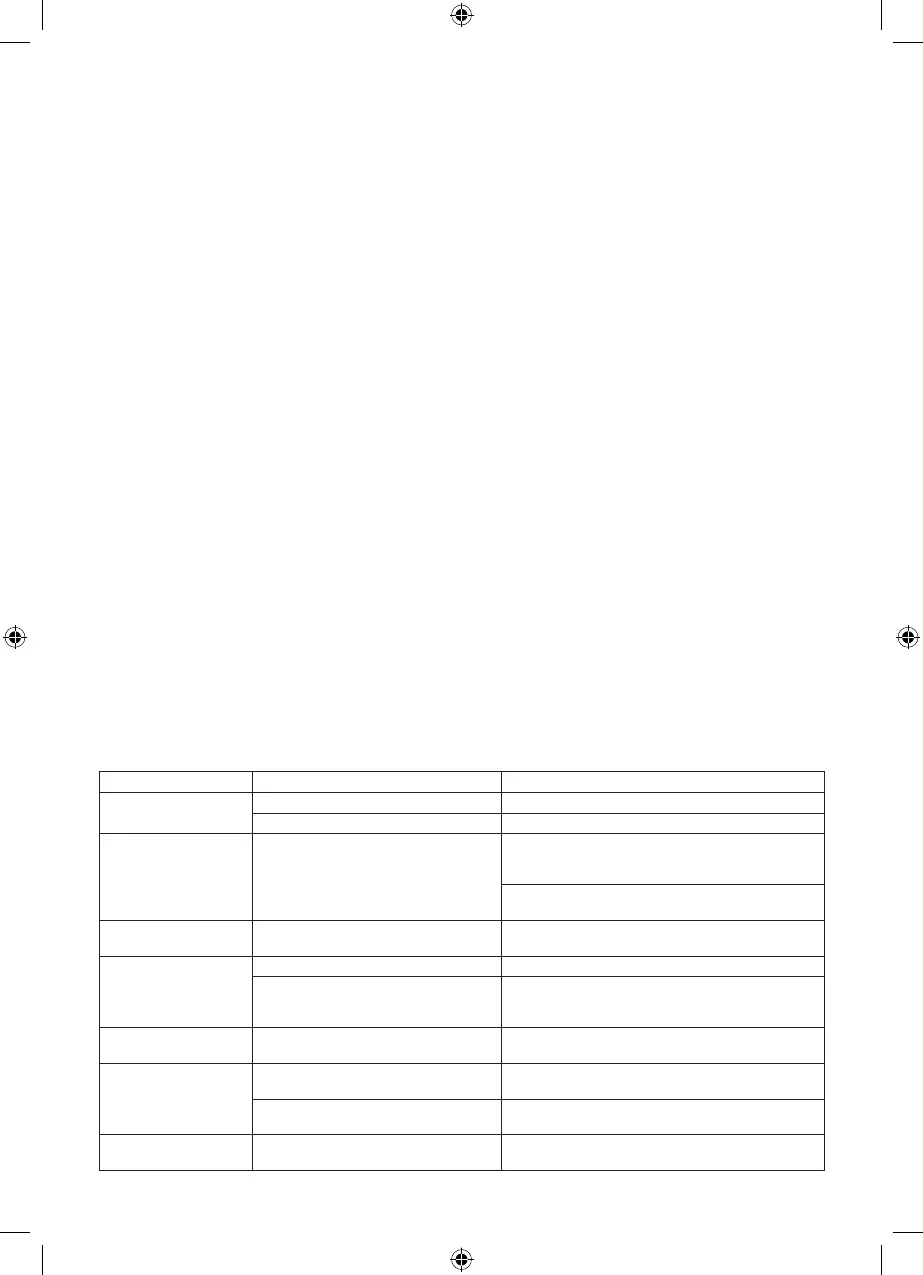
Troubleshooting
The robot will notify you of possible malfunctions using a light indicator and sound notifications.
Malfunction Possible causes Solution
Robot does not work The robot is powered off Use the power switch (20) to switch the robot on
The battery is fully depleted Charge the battery
Robot cannot be
charged
The robot is positioned incorrectly at the
charging station.
Make sure that the charging contacts (3) of the robot
are connected with the contacts of the charging sta-
tion (34)
Remove any debris from the charging contacts (3) of
the robot and from those of the charging station (34)
Robot reverses back-
wards
The anti-drop sensors (1) are jammed Wipe the sensors (1) with a dry tissue.
Robot spins in place The signal window (17) is blocked Wipe the window (17) with a dry tissue
The bumper is stuck (13) (the bumper
is stuck in a specific position, with a for-
eign object probably caught behind it)
Adjust the bumper (tap it slightly, the bumper is sup-
posed to have the same length gap throughout the
entirety of its perimeter, relative to the body)
Left/right wheel driving
wheel malfunctions (7)
The wheels are blocked by foreign
objects (thread, hair, dust, etc.)
Clear the wheels
Left/right side brush
malfunctions
The brushes have been installed incor-
rectly
Reinstall the brushes correctly
The brushes are blocked by foreign
objects (thread, hair, dust, etc.)
Clear the brushes
Dust bin malfunctions The dust bin has been installed incor-
rectly
Reinstall the dust bin correctly
 Loading...