Do you have a question about the Coonara grange and is the answer not in the manual?
Heater must be installed by an authorized technician and placed on a flat level surface.
Check for scratches/dents; use a screwdriver, not a drill, for glass fitting.
Details specifications for Grange model, gas input, heat output, efficiency, and approvals.
Lists zero clearance, energy rating, controls, ignition, air intake, fan, and flue options.
Do not operate before reading manual, block appliance, store flammables nearby, remove panels, enclose, or modify.
Safety guard on glass door prevents burns; secondary guard recommended for children/infirmed.
Appliance must be installed by an authorised person per AS/NZS 5601 and manufacturer instructions.
Ensure flue terminal is clear, no combustible objects nearby, and power/gas supply is connected.
Explains first-time firing odour, thermostat operation, heat settings, and fan start-up.
Instructions for turning off the heater and fan cool-down period.
Do not place items on appliance, store flammables, spray aerosols; supervise children.
Automatic pre-purge, auto shut-off, and over-temperature protection are detailed.
Emphasizes installation by authorized person per AS/NZS 5601.
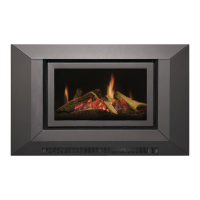
Grange inbuilt heater is zero clearance; installation requires specific flue kits and flexible hoses.
Air intake restrictor plate removal for horizontal flues longer than 1 meter.
Step-by-step guide to remove the tray for servicing internal components.
Details connecting flue terminal to pipes, feeding through cavity, and sealing.
Steps for determining location, cutting holes, and fitting the flue cowl.
Instructions for setting NAT gas (1.1 KPA) and LPG (2.75 KPA) pressure.
Procedures for accessing the firebox for freestanding and inbuilt models.
Step-by-step guide for correctly attaching the heater door.
Explains starting procedures, heat settings, and log placement.
Steps for marking location, checking flue terminal, and cutting openings in stud walls.
Process for installing through a wall requiring a weather cover, including gas and flue pipe routing.
Describes the weather cover's features and sealing requirements for water entry prevention.
Diagram illustrating console installation with exposed vertical flue pipe.
Diagram showing the optional flue box cover for vertical flue installations.
Diagram shows horizontal flue kit installation with optional air transfer system on a concrete slab.
Diagram shows horizontal flue kit installation with air transfer on a stump floor.
Diagram illustrating under-floor horizontal flue installation for internal walls.
Diagram showing rear flue installation with an optional offset flue box.
Diagram shows inline duct fan, flexible duct, and rear duct box connection.
Provides width, height, and depth measurements for the firebox casing.
Details dimensions related to console installation.
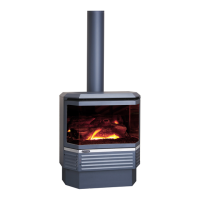
Overall height, width, depth, and packed weight for the freestanding model.
Detailed instructions for adjusting maximum and minimum outlet pressure using specific components.
Warning to ensure correct operation by returning the modulator plastic cap E to its original location.
Illustrates the electrical connections for the remote controller, gas valve, and fans.
Diagram and labels for the pressure switch connections (P1, P2).
Instructions and diagram for correctly placing logs, twigs, and cross logs in the firebox.
Steps for consumers to follow when making a warranty claim.
States the warrantor (Shamic Sheetmetal) and the product components covered by warranty.
Details warranty applicability, exclusions like modification, misuse, and transit damage.
Mentions consumer law rights for replacement, refund, or repair for major failures.
Recommends annual service by qualified person and cleaning the fascia grill.
How to clean the appliance using a damp cloth, avoiding solvents.
Checklist before making a service call: power, gas, and flue terminal status.
Possible causes and remedies for the appliance failing to ignite.
Troubleshooting for issues like appliance going out, low operation, fan not working, or cutting out.
Addresses excessive carbon, flame height, lift-off, and unit failing to heat.
Comparative table of overall height, width, depth, and packed weight for both models.
Information on contacting Shamic Sheetmetal for service.
Detachable form for returning purchase details for warranty registration.
| Heating Capacity | Up to 280m2 |
|---|---|
| Fuel | Wood |
| Material | Steel |
| Emissions Standard | AS/NZS 4013:2014 |
| Flue Size | 150mm |