07
SECTION 03
WALL MOUNTING
(NOTE: If Trouser Press is free standing following steps do not apply)
WARNING: Make sure the wall is suitable and that there are no hidden electricity,
water or gas supply pipes or any other hidden services, if in doubt seek advice
from a suitably qualified tradesman.
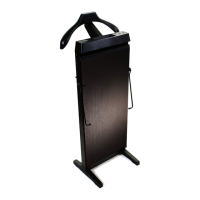
CORBY 3300/4400 Contents: 2 x large wall plugs, 2 large screws, 1 small wall
plug, 1 small screw, 1 star washer.
NOTE: Screws and wall plugs supplied are suitable for most types of solid walls.
• Measure a point 940mm above the skirting board or a minimum of 1092mm above
the floor and lightly mark with a horizontal line (Diagram 1).
• Mark the desired centre position of the press on the line.
• Mark points 160mm either side of the centre position (Point A on Diagram 2).
• Drill holes to suit large wall plugs provided.
• Insert the two large wall plugs into the holes and fit screws with 6mm protruding.
• Hang the press on the screws.
• Mark the position of retaining screw (Point B on Diagram 3).
• Lift press from the wall and drill hole suitable for the small wall plug at point B.
• Fit the small wall plug into hole.
• Hang press back on wall and fix with a small screw through point B (Diagram 3).
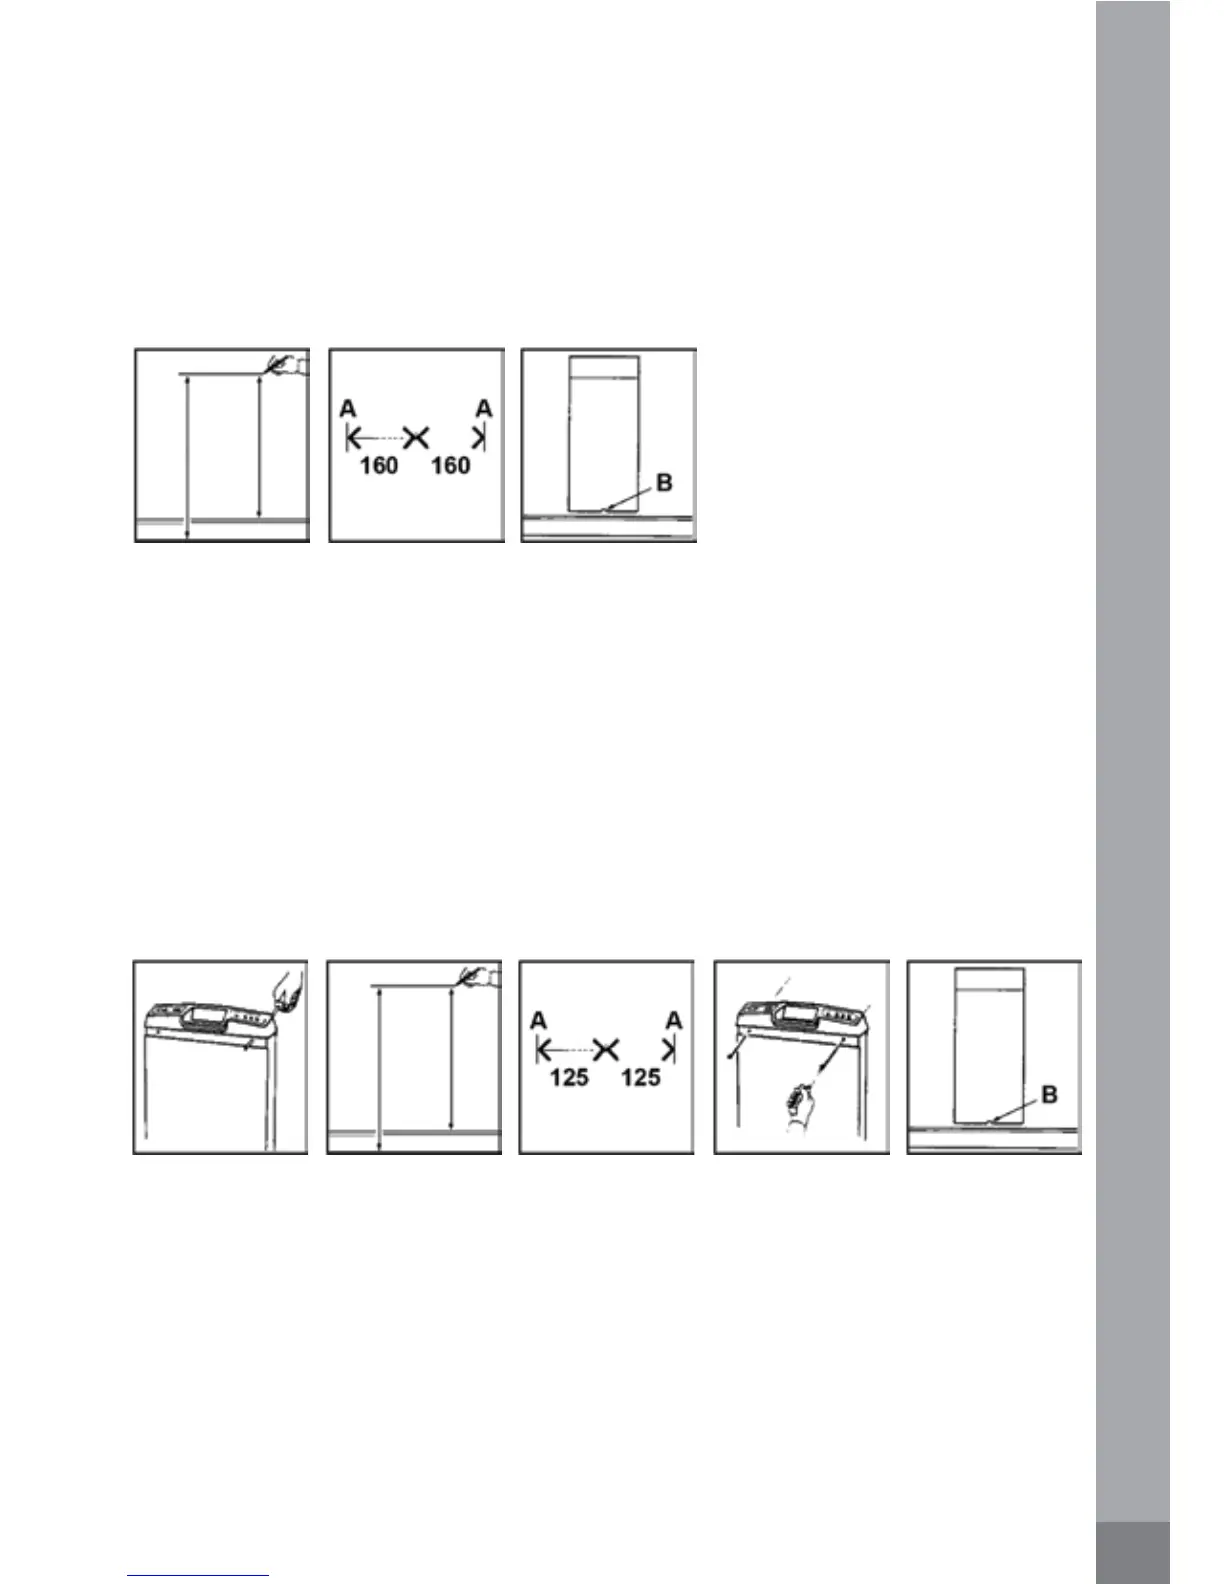
CORBY 7700 Contents: 2 x large wall plugs, 2 long screws, 1 small wall plug,
1 small screw, 1 star washer.
NOTE: Screws and wall plugs supplied are suitable for most types of solid walls.
• Push out wall-mounting tube caps from rear using a screwdriver (Diagram 1).
• Measure a point 940mm above the skirting board or a minimum of 1092mm above
the floor and lightly mark with a horizontal line (Diagram 2).
• Mark the desired centre position of the press on the line.
• Mark points 125mm either side of the centre position (Point A on Diagram 3).
• Drill holes to suit large wall plugs provided.
• Secure Press to wall with long screws (Diagram 4), DO NOT tighten screws.
• Mark the position of retaining screw (Point B on Diagram 5).
• Remove long screws and lift press from wall
• Drill hole suitable for the small wall plug at point B, fit plug into hole (Diagram 5).
• Hang press back on wall with long screws(Diagram 4), DO NOT tighten screws.
• Fix with a small screw through point B (Diagram 5).
• Tighten the top two screws (Diagram 4).
1 2 3
1 2 3 4 5