EasyManua.ls Logo

Core 40062-1 - User Manual

Core 40062-1
2 pages
Print Icon
To Next Page IconTo Next Page
Loading...
STITCH LINE
9 PERSON LIGHTED INSTANT CABIN TENT - 14 x 9
Model No. 40062-1
1
Prepare for Setup
Select a level site clear of rocks, branches, and other hard or
sharp objects, to set up your tent.
Remove all contents from bag.
Unfold (6) leg poles from the pod shape. Unfold legs again at
joints, to lay tent þat. Center will stand up.
Two people can easily setup this instant tent in 60 seconds or less.
Contents & Repair Parts:
Center Hub #90491
Corner Joint
#91150
#91242
2
Lift Roof and Eave Poles
Grab roof poles and pull straight out to create tent’s cabin shape
(leg poles will angle at joints to partially stand up).
Side Hub #90138
LED Roof Pole #91881
LEG POLE
LED ROOF POLE
Not Pictured:
Awning Pole #91181
Carry Bag #91182
Rainþy #91183
Reþective Guyline
#91221
Battery Compartment
#91225
Extend Leg Poles
NOTE: DO NOT extend telescoping
poles until all legs and ceiling hubs are
elevated.
Extend each of the (6) leg poles until
the locking buttons “click,” and lock
the poles into place.
3
(continued on other side)
Stake Tent, Secure Ground
Vents and Guylines
Drive stakes at a 45º angle
through web loop at base of
tent to secure to ground.
(Detail 5)
Floor of tent should be taut when staked properly.
([[HJO9HPUϫ`
'UDSHUDLQþ\RYHUWHQWSODFLQJ
“CORE”
logo over door.
6QDSSODVWLFFOLSDWWDFKHGWRVWUDSORFDWHGDWFRUQHURIUDLQþ\RQWR
the upper portion of the button box on leg pole labeled RAINFLY.
(Detail 1)
,QVHUWDZQLQJSROHLQWRVOHHYHRQXQGHUVLGHRIUDLQþ\DERYHGRRU
(Detail 2)
Insert metal end of awning pole into hole on plastic grommet located
at each side of door. (Detail 3)
TLJKWHQVWUDSVRQUDLQþ\WRVHFXUH
$WWDFKKRRNDQGORRSWDERQWKHXQGHUVLGHRIWKHUDLQþ\WR
each pole. (Detail 4)
4
RAINFLY
SLEEVE
2
RAINFLY
1
4
3
PLASTIC
GROMMET
6
5
5
R
A
I
NF
L
Y
LOCKING
BUTTON
Stake Tent, Secure Ground Vents and Guylines
(continued)
/RFDWHJX\OLQHVDWWDFKHGWRWKHUDLQþy.
(Detail 6)
Stake out each guyline at a 45 degree angle.
Tighten guylines as needed by adjusting the slider up the cord.
Stake out ground vents on either side of tent (where air intake
graphics are).
5
Install Room Divider
NOTE: The divider curtain provides extra privacy in
your tent.
To install it, attach divider’s plastic toggles to corre-
sponding loops on the wall inside the tent.
(Detail 7)
6
7
CAUTION: USB is not compatible with charging external device.
IMPORTANT: Remove battery pack before taking down tent. Failure to do so will
drain the batteries and possibly damage the tent fabric.
Lighting Component:
Slide battery pack into
pocket located inside
the tent.
Add 4-D batteries to
empty battery pack.
(Batteries not included)
Zip up pouch, then plug
in battery pack cord
into lighting connector.
CABIN
NIGH T
LIGHT
Press buttons
on switch box
located on
either inside
or outside of
tent to turn on
lighting.
OPTION 1
OPTION 2
For optimized performance, use a Rechargeable Portable Power Pack
with a 5V, 1A output.
Slide Power Pack into
pocket located inside
the tent.
RE
CH
ARGEABLE
P
ORTABLE POWE
R
(n
ot
include
d
)
Rechargeable
Portable Power
Pack
(not included)
Zip up pouch, then plug
lighting connector into
port on Power Pack.
CABIN
NIGH T
LIGHT
Press buttons
on switch box
located on
either inside
or outside of
tent to turn on
lighting.
Lift up on corner joints until eave poles at 3-way side hubs are extended.
NOTE: 2 people will be needed to erect and extend the tent poles.
NOTE: Pressing the "NIGHT LIGHT" button activates
amber-colored lights to help preserve night vision
Corner Telescoping
Leg Pole
Side Eave Pole
#91241
Mid Eave Pole
Mid Telescoping Leg Pole
#91240
#91241
Question and Answer IconNeed help?

Do you have a question about the Core 40062-1 and is the answer not in the manual?

Summary

Prepare for Tent Setup

Site Selection and Initial Pole Unfolding

Choose a level site, remove contents, and unfold leg poles flat.

Erecting the Tent Structure

Lifting Roof and Eave Poles

Lift corner joints until eave poles extend, then pull roof poles straight.

Extending Leg Poles

Extend leg poles until locking buttons click, ensuring poles are elevated.

Attaching Rainfly and Securing Tent

Attaching the Rainfly

Drape rainfly over tent, snap clips, insert awning pole, and secure straps.

Staking Tent and Guylines

Stake tent at 45 degrees through web loops and secure guylines.

Installing Interior Features

Room Divider Installation

Attach divider's plastic toggles to corresponding loops on the tent wall.

Using the Lighting Component

Lighting Component Option 1

Insert batteries, slide pack into pocket, zip pouch, plug cord into connector.

Lighting Component Option 2

Slide Power Pack into pocket, zip pouch, plug lighting connector into port.

Tent Take Down Instructions

Frequently Asked Questions

Safety Warnings and Cautions

Flame and Heat Source Precautions

Keep tent fabric away from flames; avoid fuel burning devices and smoking.

Environmental and Setup Warnings

Avoid overhead power lines, potential lightning, and position tent into wind.

Condensation and Storage Advice

Minimize condensation with ventilation; dry tent thoroughly before storing.

Stake Removal and UV Exposure

Pull stakes directly; avoid prolonged UV exposure which damages fabric.

Product Care and Treatments

Protective Coating Information

Avoid sprays that compromise coatings; use seam sealer for moisture protection.

Warranty Information

One-Year Limited Warranty

Covers defects in materials/workmanship for one year; excludes normal wear and tear.

Overview

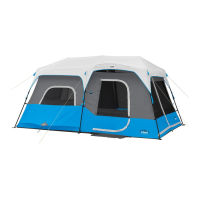
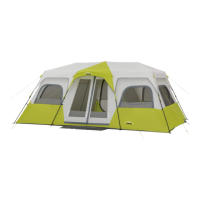
The device described in the manual is the CORE 9 PERSON LIGHTED INSTANT CABIN TENT - 14 x 9, Model No. 40062-1.

Function Description:

This is a large, instant cabin-style tent designed for recreational use, accommodating up to 9 people. Its primary function is to provide shelter and a comfortable camping experience. A key feature is its "instant" setup, which can be completed by two people in 60 seconds or less. The tent also includes an integrated lighting system, offering two power options, and a room divider for added privacy. It is designed as a 2-3 season tent, suitable for mild to moderate weather conditions, but not recommended for severe weather.

Important Technical Specifications:

  • Capacity: 9 Person
  • Dimensions: 14' x 9' x 78" (427 cm x 274 cm x 198 cm)
  • Setup Time: Approximately 60 seconds (with two people)
  • Fabric: Flame-resistant fabric meeting CPAI-84 specifications (NOT fire-proof). The fabric is also factory-treated for water-resistance, though it is not waterproof.
  • Lighting System Power Options:
    • Option 1: 4-D batteries (not included) in an empty battery pack.
    • Option 2: Rechargeable Portable Power Pack (not included), with a recommended output of 5V, 1A for optimized performance.
  • Lighting Feature: "NIGHT LIGHT" button activates amber-colored lights to help preserve night vision.
  • Seams: Factory-sealed with water-resistant tape.
  • Ventilation: Includes ground vents for airflow, which can be cinched shut in colder weather.
  • Electrical Port: A wall plug symbol indicates a port for an electrical cord to access the tent, closing fully when not in use.
  • Warranty: 1-Year Limited Warranty against defects in materials or workmanship.

Usage Features:

  • Instant Setup: The tent features a pre-attached pole system. Setup involves unfolding leg poles from a pod shape, extending them at joints, lifting corner joints to extend eave poles, and pulling roof poles straight out to create the cabin shape. Leg poles then angle at joints to partially stand up.
  • Rainfly Attachment: The rainfly drapes over the tent, with a "CORE" logo over the door. It attaches via plastic clips to leg poles, an awning pole inserted into a sleeve and grommets above the door, and hook-and-loop tabs to each pole. Guylines on the rainfly are staked out at a 45-degree angle and tightened with sliders.
  • Staking: Stakes are driven at a 45° angle through web loops at the base of the tent to secure it to the ground, ensuring the floor is taut. Ground vents on either side of the tent are also staked out.
  • Room Divider: A divider curtain can be installed for privacy by attaching its plastic toggles to corresponding loops on the tent wall.
  • Lighting Operation:
    • For Option 1 (D-batteries): Insert 4-D batteries into the battery pack, slide the pack into an internal pocket, zip up the pouch, and plug the pack cord into the lighting connector.
    • For Option 2 (Rechargeable Power Pack): Slide the power pack into an internal pocket, zip up the pouch, and plug the lighting connector into the port on the power pack.
    • Lighting is controlled by buttons on a switch box located on either the inside or outside of the tent.
  • Wind Conditions: For best results in windy conditions, position the narrow end of the tent into the wind.
  • Condensation Management: Condensation can occur due to water vapor. It is not leakage. Minimizing it involves removing wet clothing and ensuring good ventilation through the tent.
  • Portability: Comes with a carry bag for storage and transport.

Maintenance Features:

  • Cleaning: Clean the tent with a soft sponge, mild soap, and tepid water. Scrub gently, remove all soap, and let it dry in sunlight.
  • Storage: Always dry the tent thoroughly and brush off caked dirt before storing. Do not pack stakes inside the tent; use a separate storage bag.
  • Seam Sealing: While factory-treated, additional moisture protection can be achieved by applying a seam sealing compound. This is recommended during initial setup and prior to each camping season.
  • Battery Removal: IMPORTANT: Remove the battery pack before taking down the tent to prevent battery drain and potential damage to the fabric.
  • Staking Precautions: STAKES SHOULD BE REMOVED BY PULLING ON THE STAKE ITSELF. NEVER PULL ON THE TENT TO REMOVE STAKE.
  • UV Exposure: Prolonged exposure to UV rays can cause fabric to fade and deteriorate, which is not covered by the warranty.
  • Replacement Parts: Replacement parts are available by contacting customer service.
  • Warranty Service: Contact customer service for warranty service, repair parts, or product questions. The warranty is valid only for products purchased from approved and authorized distributors.

Core 40062-1 Specifications

General IconGeneral
BrandCore
Model40062-1
CategoryTent
LanguageEnglish