J | CORNELIUSPOOLS.COM | 12775, BRAULT, MIRABEL, QC, J7J 0C4 11
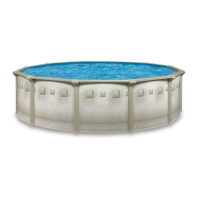
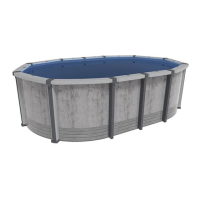
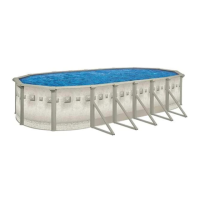
2. STEPS TO INSTALL YOUR OVAL POOL
6 Tools required.
7 - 18 Layout, ground preparation and ground levelling (in areas
prone to nutgrass (Southern U.S.) sterilize soil with approved
chemical).
19 Checkandlayoutparts.
20 Preassemble angle and bottom brace on all buttress posts.
21 - 24 Fasten tension straps together and attach to bottom brace of
buttress assembly. The number of straps and buttress
assemblies are specific to each size of pool.Confirm with parts
list and instructions.
25 - 30 To fasten bearing plate to buttress post, position over the
straps pushing down on tension straps until bearing plate
holes align with buttress post holes. Secure with proper
hardware. Bend up tabs on bottom of bearing plates using a
screwdriver and a hammer. No bottom track required on
bearing plate – use tabs to hold wall.
31-36 Assemble connectors and tracks at ends of oval (note - no
track required along bearing plate - use tabs to hold wall).
Slide curved bottom track into notch and track guide at
bottom of buttress post. Level and square the buttress
assemblyandtracks.
37 - 48 Position and level patio stones at connectors and at ends of
buttress braces.
49-57 Addfloorsandanduncoilwallintotrackstartingmidwayata
connector (#52-#53) - securing with pegs and string (or have
5-6 people hold wall up).Once unwound, adjust tracks at
connectorsto makewallboltholes lineup.Securewall with
hardware using every hole and secure very tightly with wrench
(screw head on water side of wall). Tape over screw heads
using duct tape.
58 - 59 Position and attach posts and tape in place.
60 - 62 Spread, smooth and compact sand floor finish with a cove at
the wall.
63 - 68 Unroll liner, spread out, gather up and put inside pool,
overlappingthewalluntilfloorisfreeofwrinkles.Snapinner
combing (12020) over liner and wall to secure liner. Adjust fit
and start to add water. Overlap on liner may be folded up
under the ledge - do not cut.
69-73 Installtoptracksandconnectorsinplace.
74 - 76 Install top ledges, caps and foot collars.
77-80 Assembleskimmer/inlet,hosesandfilteraccordingtoseparate
manufacturer’s instructions.
NOTES:
• POOL MUST BE BUILT ON SOLID, LEVEL AND NON-FILLED AREA.
• ENSURE WALL JOINTISBEHINDA POST WITH THESKIMMER ANDINLETPOSITIONED WHEREYOU WANT THEFILTER (#54).
• ENSURE ALL WALL BOLTS ARE TIGHTENED SECURELY TO A MINIMUM TORQUE SPECIFICATION OF 5 FOOT POUNDS.
• DO NOT ASSEMBLE WALL ON A WINDY DAY.
* THIS INSTALLATION IS FOR AN OVERLAP LINER. FOR OTHER LINER TYPES, CHECK LINER BOX FOR INSTRUCTIONS.
(following numbers on installation sheet)
 Loading...