Standard Recommended Procedure 003-1069-AEN | Issue 1 | July 2019 | Page 2 of 6
2. Tools Required
• Phillips-head screwdriver
• Scissors
• 216B tool (can wrench)
• Pencil, pen or marker
3. Additional Materials (Purchased Separately)
May or may not be required depending on your application.
• Grounding kit (HDWR-GRND-KIT)
• Inner door lock kit (HDWR-LOCK-KIT)
• Padlock for front door
• Mounting hardware
• Buer tube fan-out kit (FAN-XX25-YY)
• CCH splice cassette (CCH-CSXX-YY-P00ZZ)
4. Mount the Housing
Step 1: Select a at vertical surface to prevent warping.
Step 2: Determine mounting location.
Step 3: Use a pencil, pen, or marker to mark the wall through the holes in the mounting brackets.
Step 4: Set unit aside and drive the mounting hardware (not provided) in at these locations leaving a 1/8-in
gap.
Step 5: Place housing on mounting hardware and tighten.
5. Housing Preparation (to maintain NEMA ratings)
IMPORTANT: If you are installing outside plant cable or temperature uctuates widely along any part of the
cable, the strength members of the cable must be strain-relieved. Failure to do so may result in
damage to the cable as temperature varies. Other situations only require the cable to be strain-
relieved by sheath retention only.
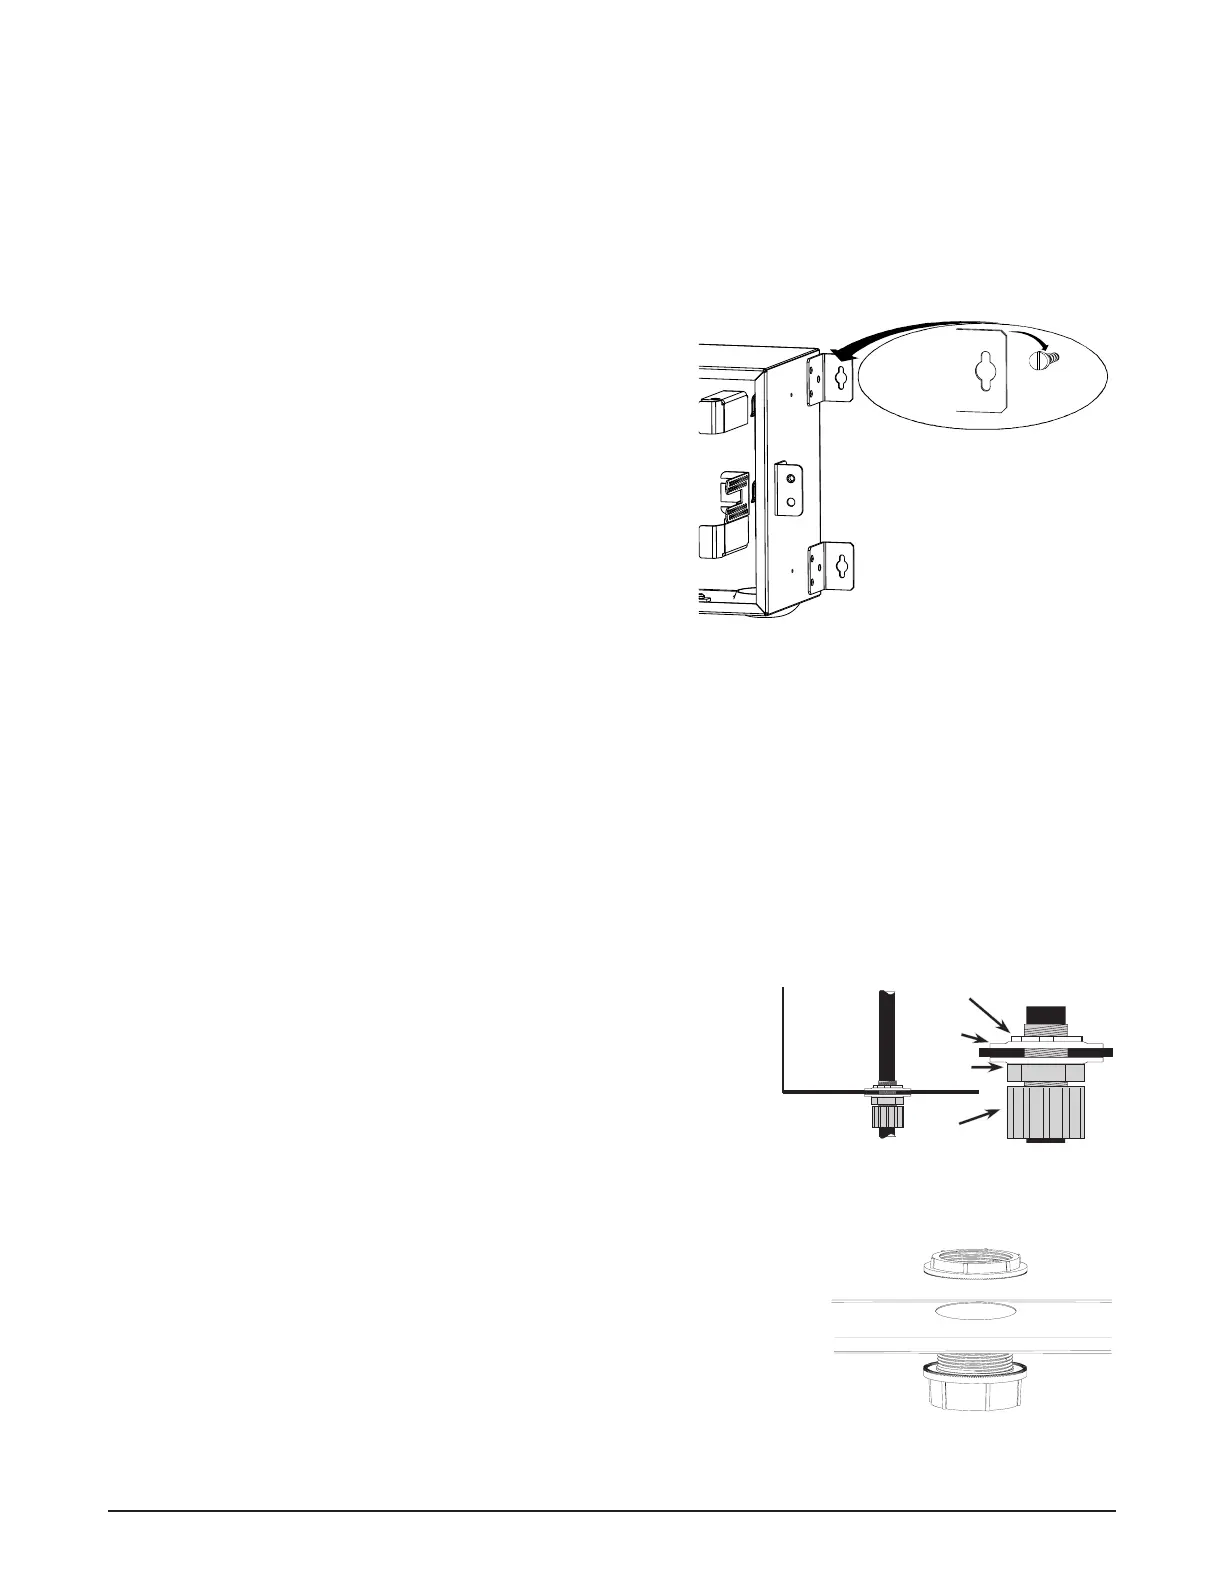
5.1 Install cord connectors
Step 1: Remove the grommets or knockouts, as applicable.
Step 2: Install cord connector with the knurled nut on the
outside of the housing.
Step 3: Orient the washers so that there is a gap between them
in the center as they are clamped together.
Step 4: Secure the cord connector on the inside of the housing
using the provided lock nut.
Step 5: Thread the cable through the tting and tighten the nuts.
5.2 Install conduit ttings
Step 1: Feed the cable through the ttings with the lager portion of the
tting on the outside of the housing and the smaller tting on the
inside.
Step 2: Screw the two ttings together.
IMPORTANT: For strength member strain-relief, use OSE-CBL-3X as the cable entry port tting. Install according
to the instructions provided with the kit.
Mounting Screws Not Provided
TPA-6575
Housing
Lock Nut
Reducing
Washer
Cord
Connector
Knurled
Nut
KPA-2176
KPA-2177
 Loading...