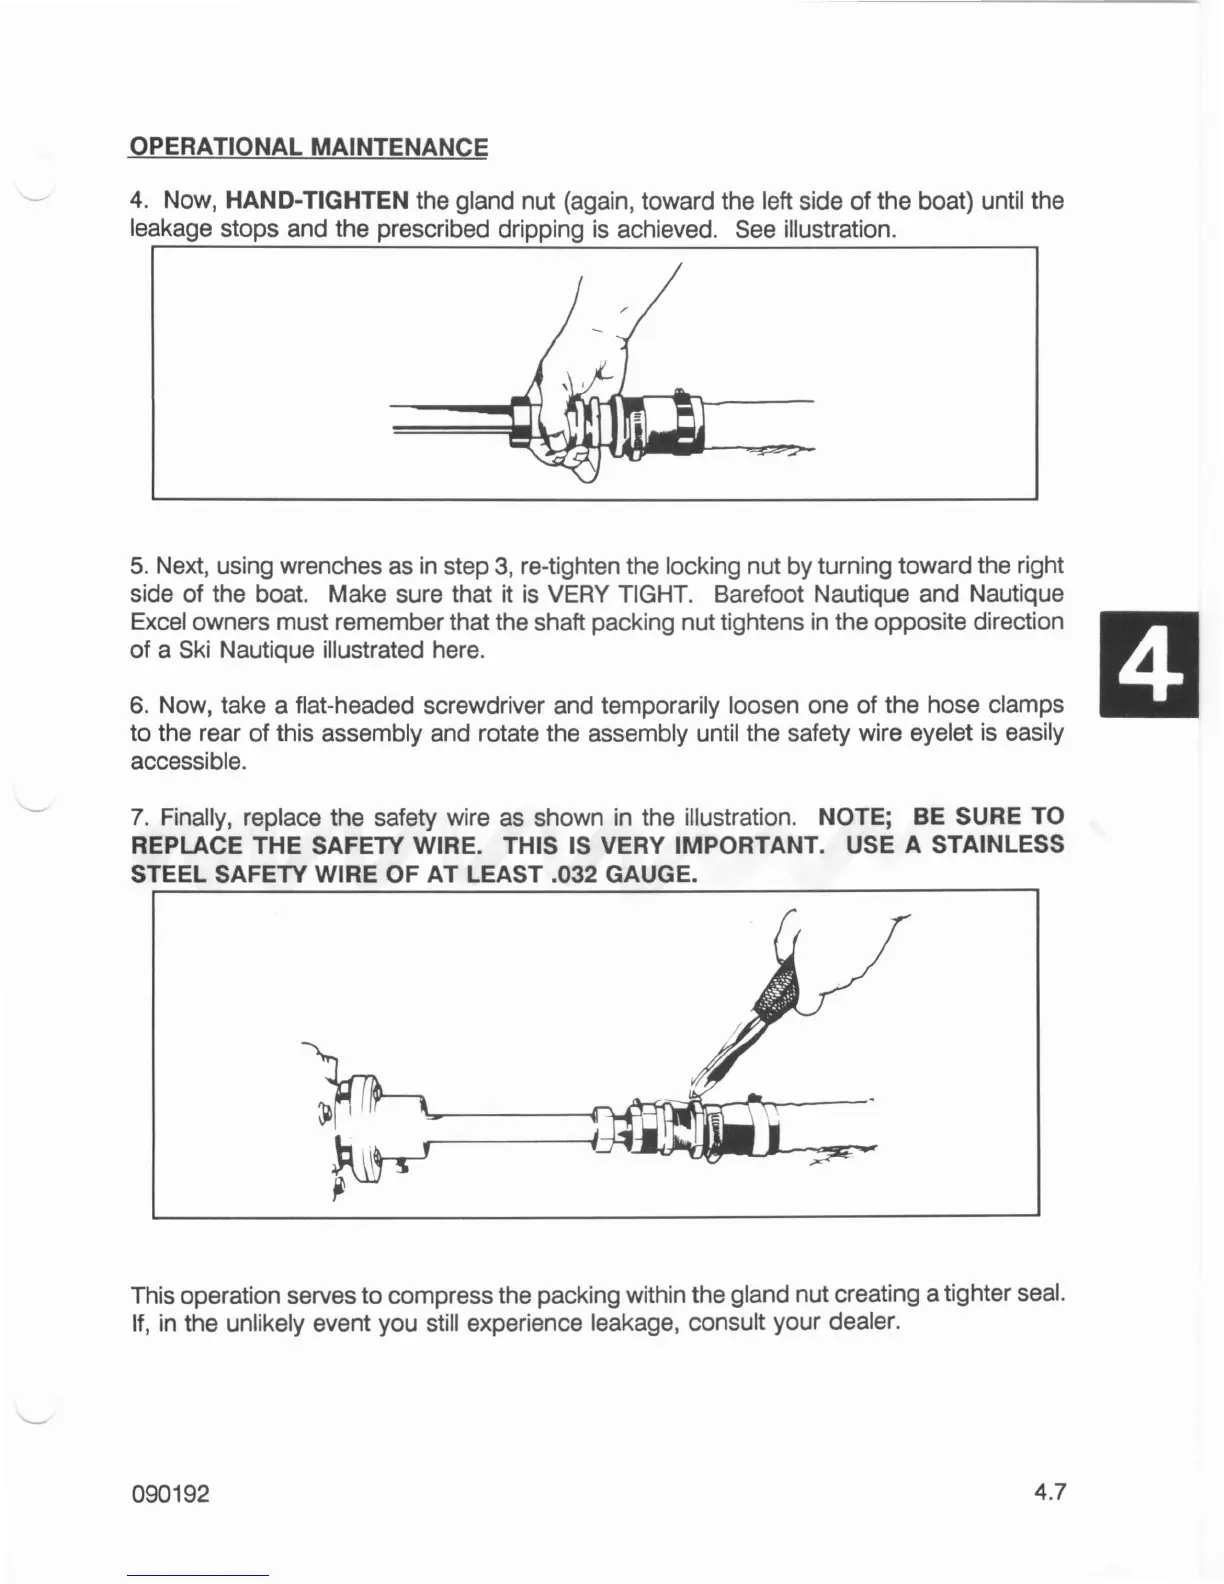
OPERATIONAL MAINTENANCE
4.
Now, HAND-TIGHTEN the gland nut (again, toward the left side of the boat) until the
leakage stops and the prescribed dripping
is
achieved.
See
illustration.
5.
Next, using wrenches as
in
step
3,
re-tighten the locking nut by turning toward the right
side of the boat. Make sure that it
is
VERY TIGHT. Barefoot Nautique and Nautique
Excel owners must remember that the shaft packing nut tightens
in
the opposite direction
of a
Ski
Nautique illustrated here.
6.
Now, take a flat-headed screwdriver and temporarily loosen one of the hose clamps
to the rear of this assembly and rotate the assembly until the safety wire eyelet
is
easily
accessible.
7.
Finally, replace the safety wire as shown in the illustration. NOTE;
BE
SURE TO
REPLACE THE SAFETY WIRE. THIS
IS
VERY IMPORTANT. USE A STAINLESS
STEEL SAFETY WIRE OF
AT
LEAST .032 GAUGE.
This operation serves to compress the packing within the gland nut creating a tighter seal.
If,
in
the unlikely event you still experience leakage, consult your dealer.
090192
4.7
 Loading...