简体中文
步骤 1:拆 卸 现 有 的 PSU
警告!为 了 确 保 功 能 正 常 ,请 仅 使 用 PSU 中随附的 DC 线缆,除非您的旧美商海盗船线缆是同类型的原装线缆。使用前请
确认您的现有线缆类型!
如 果 您 要 装 配 新 系 统 ,请 跳 到 步 骤 2:
1. 从墙上插座或 UPS 以及现有的电源拔掉交流电源线。
2. 拔掉显卡、主板以及所有其他外围设备的所有电源线。
3. 按照机箱手册的指示进行操作,并拆下现有 PSU。
4. 继续执行步骤 2。
步骤 2:安 装 新 电 源
1. 确保电源的交流电源线未连接。
2. 按照机箱手册的指示进行操作,并使用提供的螺钉安装电源。
3. 将 24 引脚 (ATX12V) A44线 缆 连 接 到 主 板 。将 8 引脚+12V (EPS12V) 线缆连接到主板。
a. 如果主板带有 8 引脚 +12V 插 座 ,将 8 引脚线缆直接连接到主板。
b. 如果主板带有 4 引 脚 插 座 ,从 8 引脚线缆上拆下 4 引脚线缆,然后将拆下的 4 引脚线缆直接插入到主板。
c. 某些主板需要 8 引脚和 4 引脚混合线缆,请尽可能多地使用 EPS12V 线缆,请勿将它们误认为是 PCIe 线缆。
4. 连接 PCI-Express 线缆、SATA 和外围线缆 (PATA)。
a. 将 PCI-Express 线缆连接到 PCI-Express 显卡的电源插座(如果需要)。
b. 将 SATA 电源线缆连接到 PSU,然后连接到需要电源的 SATA 设备。
c. 将 PATA 线缆连接到 PSU,然后将任何必须的外围设备连接到 4 引脚 Molex 接头。
5. 将交流电源线连接到电源,并通过将开关拨到“开”位置(标有“I”字 样 )打 开 电 源 。
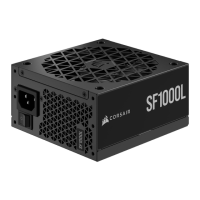
安装全新的 SF-L SERIES 电源
简体中文
© 2022 CORSAIR MEMORY, Inc. All rights reserved. CORSAIR and the sails logo are
registered trademarks of CORSAIR in the United States and/or other countries. All other
trademarks are the property of their respective owners. Product may vary slightly from
those pictured.
49-002592 AA
Warranty: corsair.com/support/warranty
Phone: (888) 222-4346
Web: corsair.com
Support: support.corsair.com
Blog: corsair.com/blog
Forum: forum.corsair.com
YouTube: youtube.com/corsairhowto

 Loading...