Maintaining the Unit Maintaining the Unit
Maintaining dust bin and ltration system
Note: Do not wash HEPA lter in a washing machine. Do not dry it with a hairdryer. Only handwash
and air dry it. Make sure to dry it before installation.
It is suggested that the dust cup be cleaned after each use. When the HEPA lter is blocked with too
much dust, it needs to be cleaned. In order to achieve better cleaning and ltering eect, it is
necessary to replace the HEPA lter according to the cleaning environment and frequency. After a long
period of use, the rolling brush may be entangled with hair and other items. Please clean regularly to
maximize product eciency.
Replacing the battery pack
Note: If the unit is not used for long time, please take out the battery back and store in good a cool
and dry place.
Please pull it up as shown in gure 4 until a click sound is heard. Then press the battery pack release
button and pull it back to take it out.
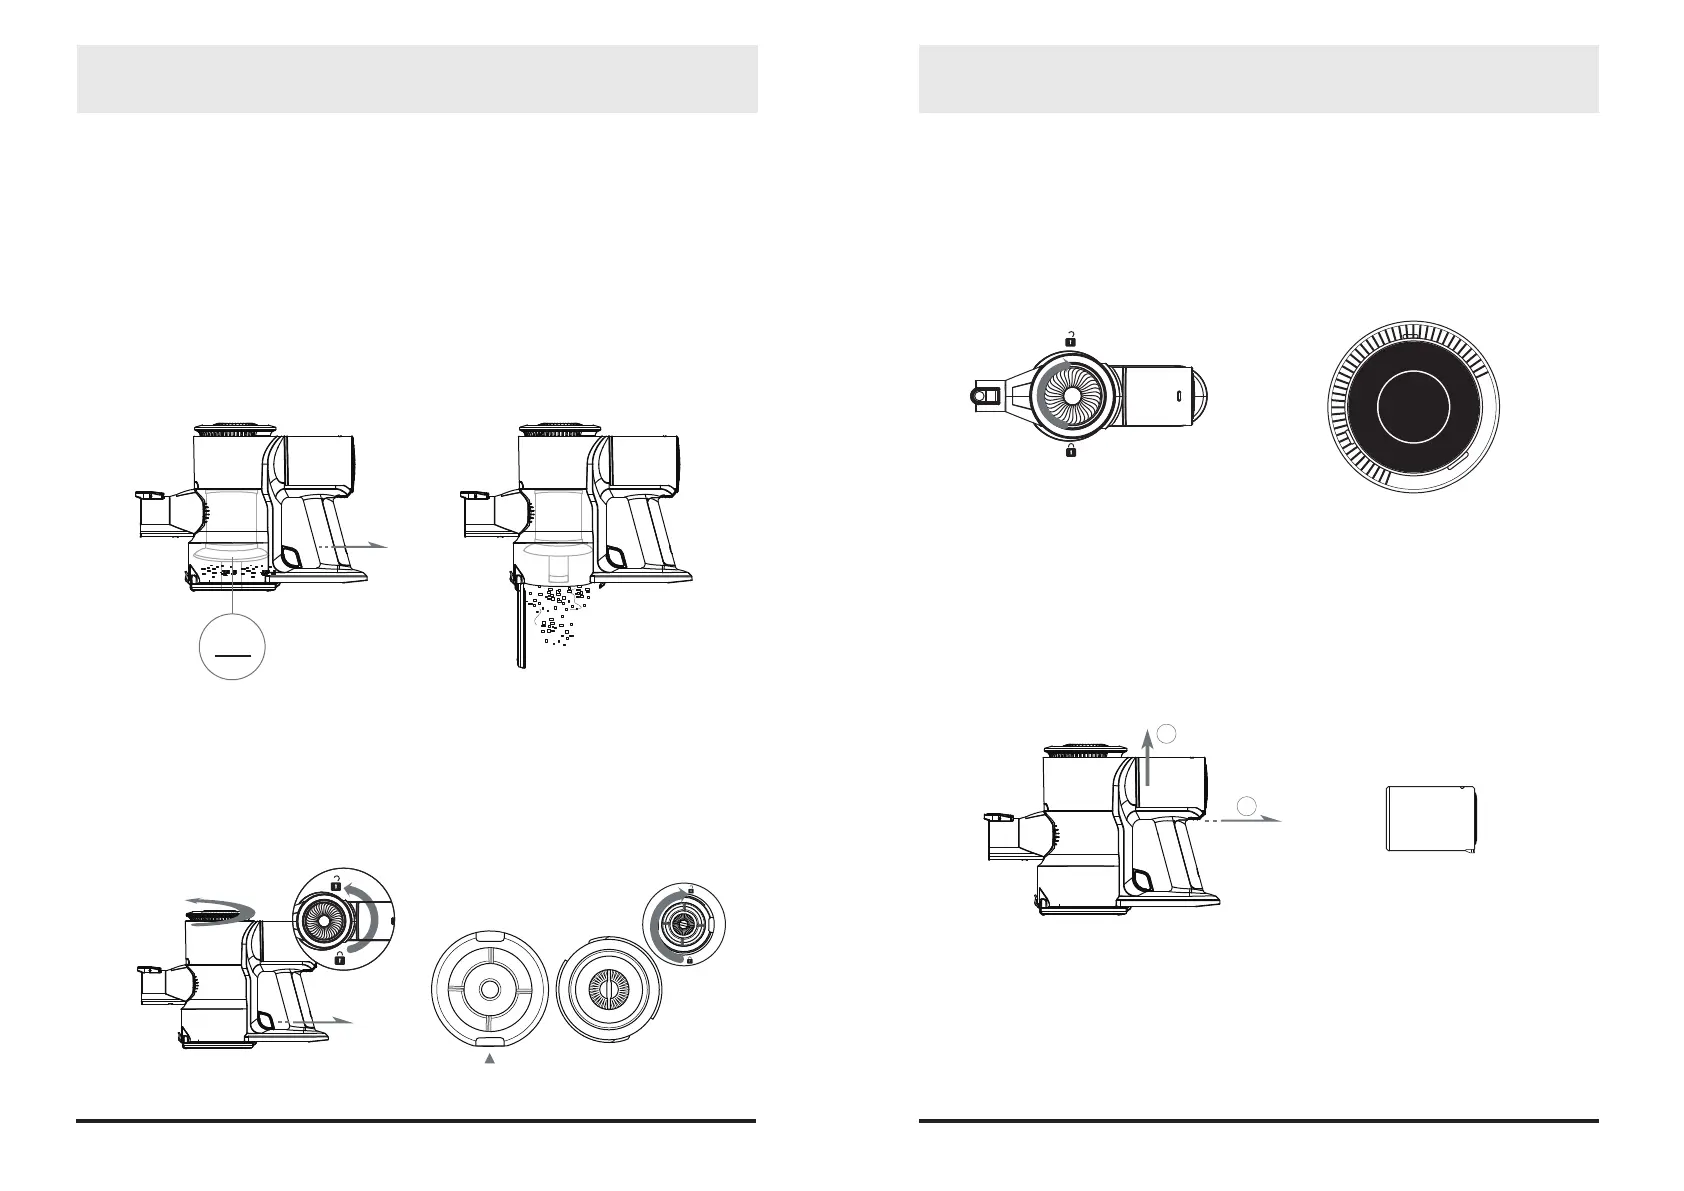
1. Cleaning the dust bin
Press the release button to empty the bin.
2. Cleaning the HEPA lter
Put the main engine above the garbage can, hold the air inlet interface of the unit, pull the switch of
the dust bin, and rotate in the direction shown in gure 1, then pull up the motor bin and separate the
motor bin from the dust bin, remove the HEPA lter from the dust bin, grab the lter assembly, rotate
the lter bar in the component in the direction shown in gure 2, and separate the HEPA from the lter
assembly. Wash the HEPA lter with clean water and dry it thoroughly and install it into the unit.
Note: When installing the HEPA lter, please align the position marked by the triangle icon in Figure 2
with the air inlet interface.
3. Cleaning exhaust foam
Hold the unit tightly, rotate the exhaust air vent in gure 3, take out the black foam, clean it with
water , dry it thoroughly and install it back into the unit.
1110
MAX
1 2
4
3
1
2
 Loading...