2
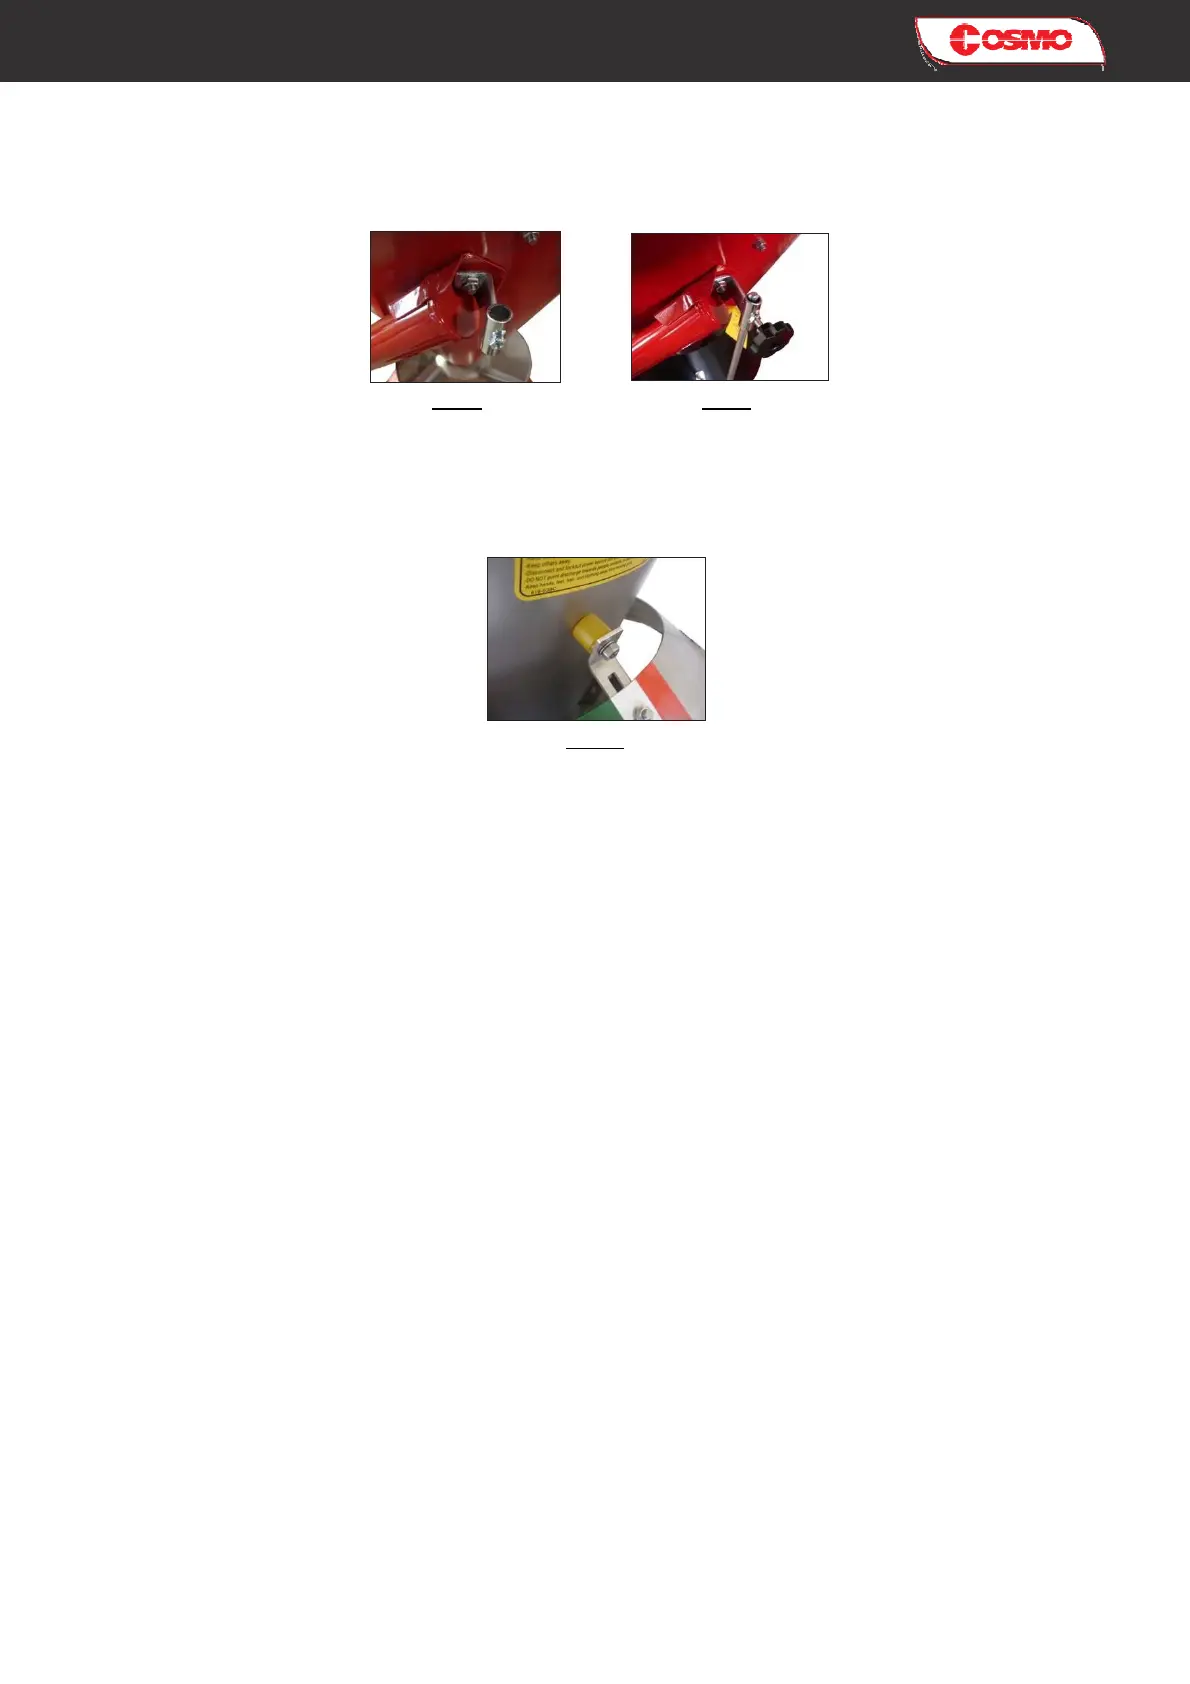
As soon as the parts these parts are assembled, fix the brackets (rif. 11 e 12) on the frame, by screws and
nuts (pict 3).
Insert the rods into the supports and adjust the desired height with the knobs (rif. 1) (pict 4).
Now, once the limiter position has been chosen, adjust the bracket (rif. 9) in a way that the anti-vibration
mount (rif. 5) makes complete contact on the surface of the hopper (pict 5).
FOTO 5