EasyManua.ls Logo

Costway Christmas Tree User Manual

Costway Christmas Tree
2 pages
To Next Page IconTo Next Page
Page #1 background imageLoading...
Page #1 background image
THIS INSTRUCTION BOOKLET CONTAINS IMPORTANT SAFETY INFORMATION. PLEASE READ AND KEEP FOR FUTURE REFERENCE.
EN
DE
FR
ES
IT
PL
With your inspiring rating, COSTWAY will be more consistent to offer you EASY
SHOPPING EXPERIENCE, GOOD PRODUCTS and EFFICIENT SERVICE!
Mit Ihrer inspirierenden Bewertung wird COSTWAY konsistenter sein, um Ihnen EIN
SCHÖNES EINKAUFSERLEBNIS, GUTE PRODUKTE und EFFIZIENTEN SERVICE zu
bieten!
Avec votre évaluation inspirante, COSTWAY continuera à fournir une EXRIENCE
D’ACHAT PRATIQUE, des PRODUITS DE QUALITÉ et un SERVICE EFFICACE !
Con su calificación inspiradora, COSTWAY será más consistente para ofrecerle
EXPERIENCIA DE COMPRA FÁCIL, BUENOS PRODUCTOS y SERVICIO EFICIENTE.
Con la tua valutazione incoraggiante, COSTWAY sarà più coerente per offrirti
ESPERIENZA DI ACQUISTO FACILE, BUONI PRODOTTI e SERVIZIO EFFICIENTE!
Dzięki twojej opinii COSTWAY będzie mógł oferow jeszcze WYGODNIEJSZE
ZAKUPY, LEPSZE PRODUKTY i SPRAWNIEJS OBSŁUGĘ KLIENTA.
Christmas Tree
USER’S MANUAL
US office: Fontana UK office: Ipswich AU office: Truganina
DE office: Hamburg
FR office: Saint Vigor d'Ymonville
PL office: Gdańsk
Question and Answer IconNeed help?

Do you have a question about the Costway Christmas Tree and is the answer not in the manual?

Costway Christmas Tree Specifications

General IconGeneral
ColorGreen
Lights IncludedYes
Assembly RequiredYes
TypeArtificial
MaterialPVC

Summary

Christmas Tree User Manual Introduction

Customer Service & Experience

Highlights COSTWAY's commitment to providing an easy shopping experience, good products, and efficient service based on customer ratings.

Christmas Tree Assembly Instructions

Assembly Step 1: Base Assembly

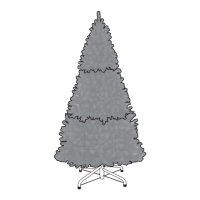
Assemble Part D base with 1pc Bolt, then place the base stand on a flat surface.

Assembly Step 2: Bottom Section

Stack Part C bottom section onto the base stand.

Assembly Step 3: Middle Section

Stack Part B middle section onto the bottom section.

Assembly Step 4: Top Section

Stack Part A top section onto the middle section.

Assembly Step 5: Connect Lights

Connect plugs on parts A, B, C, attach adapter E, and insert into wall outlet to turn on lights.

Assembly Step 6: Arrange Branches

Spread out the tree branches and arrange them to your reference.

Important Safety Warning

Warning about plastic caps on poles: remove useless ones before assembly. If broken or missing, it's not a concern.
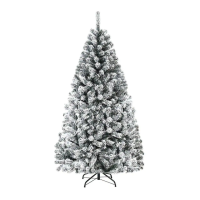
Related product manuals