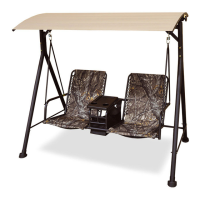
Do you have a question about the Courtyard Creations RUS487W-WM and is the answer not in the manual?
| Brand | Courtyard Creations |
|---|---|
| Model | RUS487W-WM |
| Category | Outdoor Furnishing |
| Language | English |
Use correct bolts and do not tighten until assembly is complete.
Do not discard packaging until all parts and fittings are checked.
Keep children away during assembly; adult supervision is required during use.
Retain assembly instructions for future reference.
Quote FQC NO. when contacting the service center. Toll-free number and fax provided.
Lists necessary tools: Phillips Screwdriver, Nut Wrench, Hex. Key Wrench.
Detailed list of all parts required for assembly, identified by part number, material code, and quantity.
Fasten front and rear upright supports at the top using bolts, washers, and nuts. Keep bolts loose.
Insert upright supports into the top cross beam. Tighten all nuts and bolts.
Fasten lateral cross braces to upright supports using bolts, washers, and plastic nuts.
Fasten the rear cross brace to rear upright supports. Tighten all nuts and bolts.
Insert leg caps into all of the base feet.
Slide canopy/frame connectors onto the canopy and fasten with screws, ensuring teeth face inward.
Fasten canopy/frame connectors to the top cross beam using plastic screws.
Insert seat arms into front support brace and back support brace, aligning labels and holes.
Attach seat assemblies' backs to seat arms and support braces using bolts and washers.
Fasten the table bottom front support to the table top using a bolt, washer, and plastic washer.
Insert table bottom braces into table bottom front supports, aligning labels and holes.
Fasten table bottom braces to front and back support braces using screws and bolts with washers.
Place the basket into the table bottom front support and back support brace, securing with velcro straps.
Fasten swing arm tubes to seat arms using bolts, washers, and plastic nuts.
Hook suspension springs into the top holes of both swing arm tubes.
Hang suspension springs into holes on angled braces of the top cross beam.
Double check bolt tightness and cover with bolt caps.
Wash with mild soap and water, rinse, and dry. Do not use bleach or solvents.
Use furniture covers, inspect/tighten fasteners regularly, and store in a dry area off-season.
User should always inspect the swing before each use.
Place on level ground, at least 6 feet from obstructions like fences or wires.
Regularly check nut/bolt tightness and ensure suspension springs are secure.
Remove canopy in heavy wind to prevent tipping and damage.
No responsibility for unauthorized repairs. Oil moving metal parts regularly.
Weight limit is 700 lbs.
Contact store or toll-free number for missing or damaged parts. Provide model and part numbers.
Call helpline for assembly difficulties before returning the item.
 Loading...