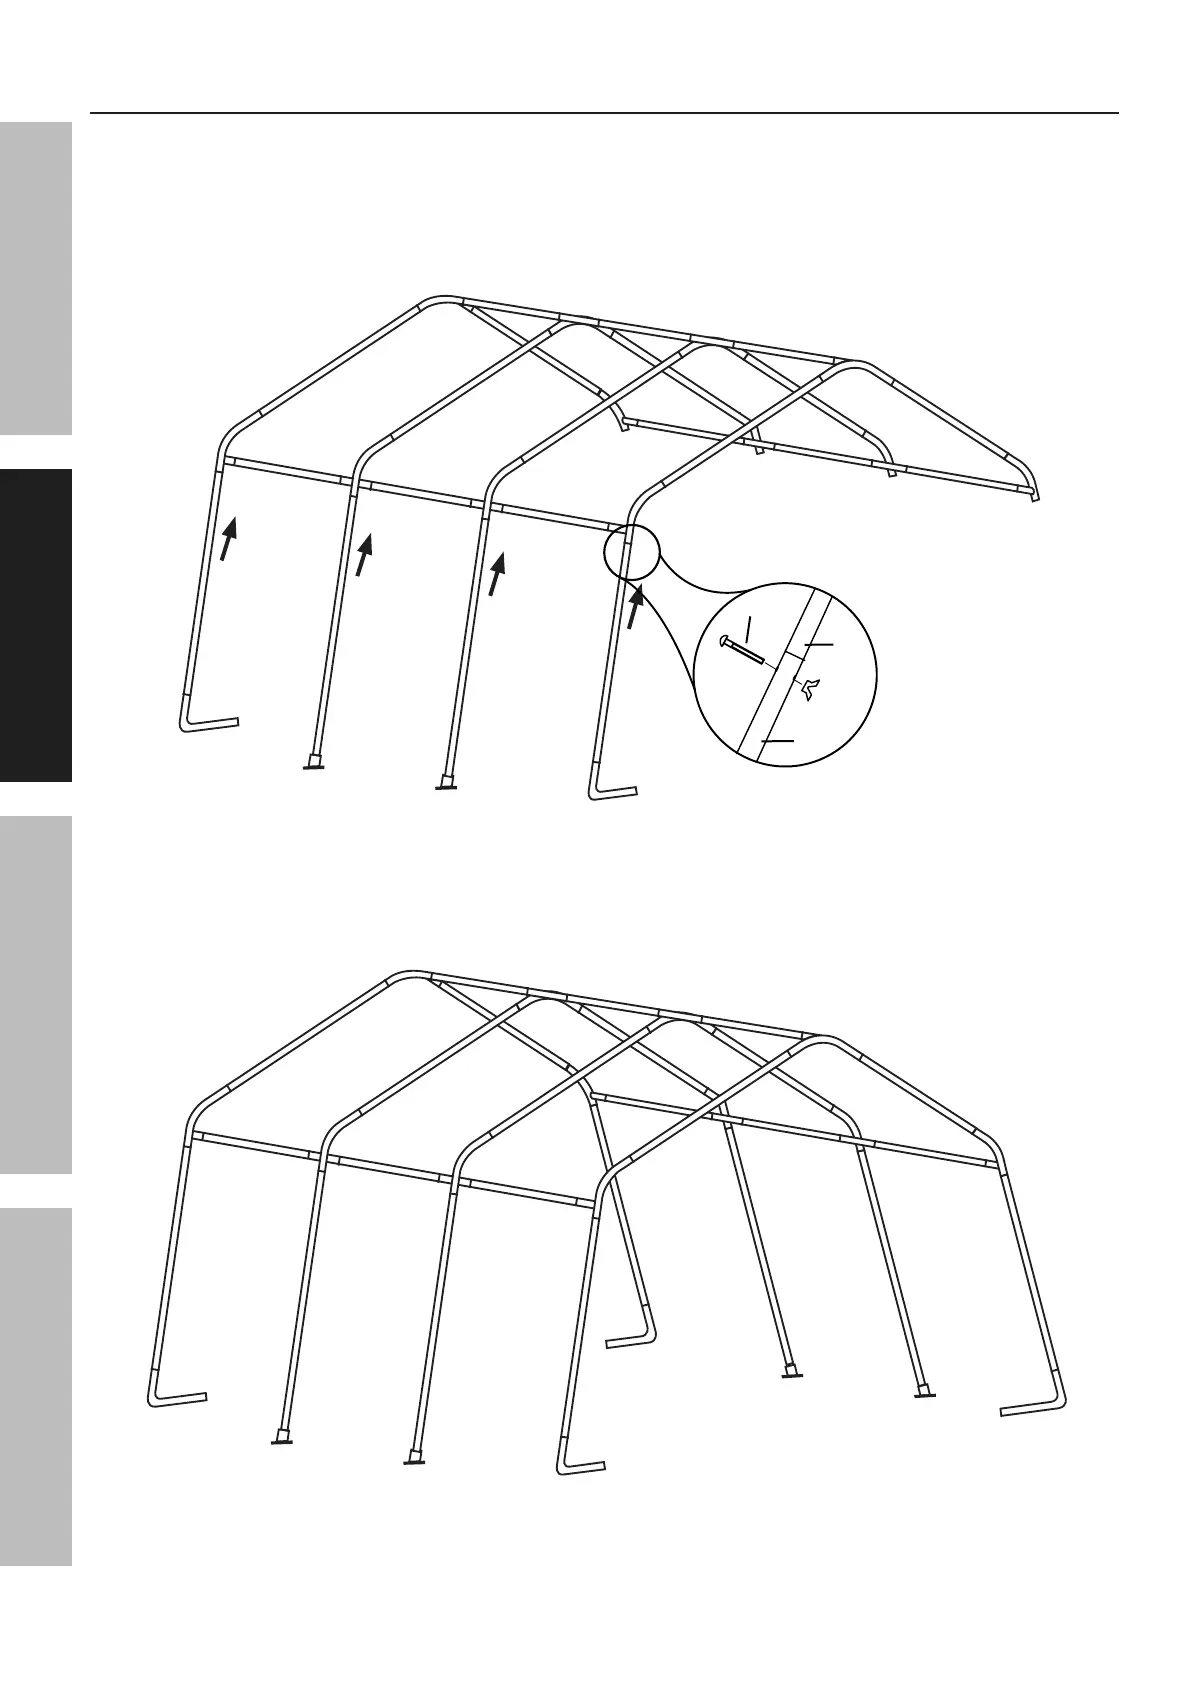
Stud Installation
1. With assistance, raise one side of the roof assembly.
2. Install the Center Studs (1) into the 4‑Way Side Connectors (B1), and the Corner Studs (2) into the 3‑Way
Side Connectors A/B (A1, A2) with the Corner Legs (6) facing inward. Align holes and insert four M8x45
Round Head Bolts (20) and secure with Wing Nut as shown in Figure G. Do not tighten nuts on the bolts
for the front and rear tubes. They will need to be removed to install the front and rear canopy walls.
A2
2
1
6
B1
A1
A1
B1
2
2
1
6
20
Figure G: Stud Installation
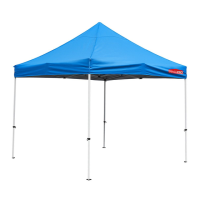
3. After all four Studs (1, 2) are in place,
rest that side of the assembly on the
ground, and raise the other side.
4. Install four Studs on the other side of the
roof, as explained in step #2, above.
A
B
A2
A1
B1
1
2
3
4
6
A
B
A2
A1
B1
B1
B1
1
1
1
2
2
2
3
3
3
3
3
3
3
4
4
4
4
4
4
4
4
6
6
6
Figure H: Studs Installed on Both Sides.
5. Make sure all parts assembled up to this point are firmly joined together.
Page 8 For technical questions, please call 1-888-866-5797. 62860
SAFETY OPERATION MAINTENANCESETUP