EasyManua.ls Logo

COX 3 Series - User Manual

COX 3 Series
4 pages
Print Icon
To Next Page IconTo Next Page
Loading...
Series 3
Single Component Applicator Range
IMPORTANT! READ BEFORE USE
IMPORTANT! LIRE AVANT TOUTE UTILISATION
¡IMPORTANTE! LEER ANTES DE USAR
COX North America Inc., 8181 Coleman Road, Haslett, Michigan USA
Phone: 800-822-8114 Fax: 517-339-3806
Email: sales@cox-applicators.com | www.cox-applicators.com
©COX North America, Inc. 2012
Every eort has been made to ensure that the information contained in this
leaflet was correct at the time of going to press. However, the company retains
the right to change any specification without notice, in line with the company’s
policy of continual product development.
Remove dust cap and seal thread (PTFE Teflon tape recommended).
Enlever le capuchon anti-poussière et apposer du ruban adhésif sur le filetage de
l’adaptateur (ruban adhésif de film de PTFE Teflon recommandé).
Retire la tapa antipolvo y aplique cinta de teflón a la rosca del adaptador (se
recomienda cinta de PTFE Teflon)
Fit airline adapter (supplied).
Monter l’adaptateur pneumatique (fourni).
Coloque el adaptador de la línea de aire (suministrado).
AIR SUPPLY
ALIMENTATION
D’AIR
SUMINISTRO
DE AIRE
1
2
Question and Answer IconNeed help?

Do you have a question about the COX 3 Series and is the answer not in the manual?

COX 3 Series Specifications

General IconGeneral
BrandCOX
Model3 Series
CategoryTools
LanguageEnglish

Summary

Air Supply Setup

Step 1: Prepare Thread

Remove dust cap and seal the thread using PTFE Teflon tape.

Step 2: Fit Airline Adapter

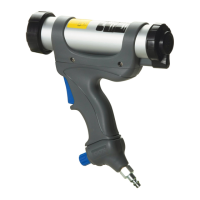
Fit the supplied airline adapter to the applicator.

Cartridge Preparation

Step 3: Attach Airline Connection

Attach the airline connection, which is not supplied.

Step 4: Prepare Cartridge Nozzle

Remove or cut the cartridge nozzle to the desired position and angle.

Step 5: Secure Nozzle

Secure the nozzle to the cartridge if applicable.

Step 6: Insert Cartridge

Remove the front cap and insert the cartridge into the gun.

Step 7: Secure Front Cap

Replace the front cap and ensure it fits tightly to the barrel.

Sachet;Pouch Preparation

Step 4: Prepare Sachet Tip

Remove the tip of the sachet using sharp cutters.

Step 5: Insert Sachet Nozzle

Remove applicator cap and insert the sachet nozzle.

Step 6: Place Sachet in Barrel

Place the open sachet into the applicator barrel.

Step 7: Secure Sachet Cap

Replace the front cap to ensure a tight fit with the sachet.

Dispensing Material

Step 8: Adjust Material Flow

Rotate the knob to adjust the material flow rate.

Step 9: Dispense Material

Squeeze the trigger fully to dispense material and release to stop.