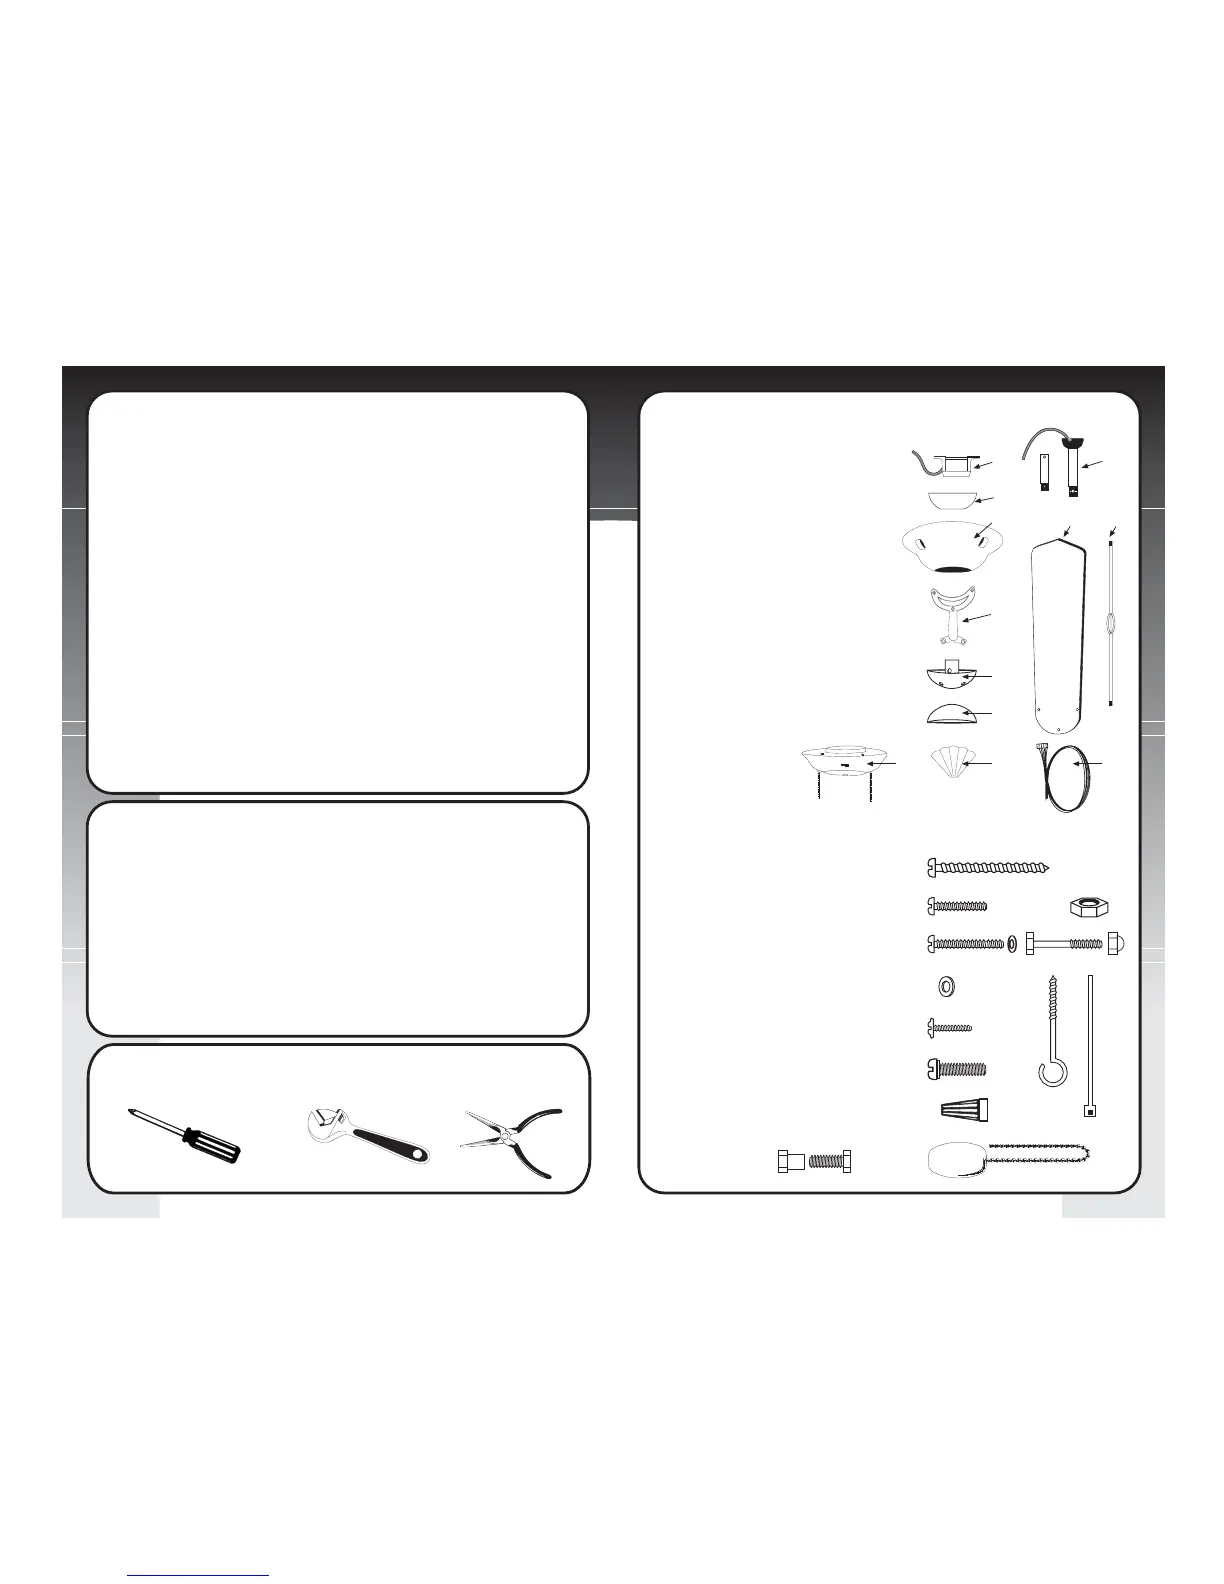
What You Have
PartsQuantity
1. Mounting Bracket 1
2. Down Rod Assembly 2
2" & 6" Rod Supplied
Use desired length)
3. Canopy 1
4. Fan Housing & Motor 1
5. Wood Blades 5
6. Blade Holders 5
7. Decorative Support Rods 3
8. Support Rod Distributor 1
8a. Distributor Cover 1
9. Switch Housing Assembly 1
10.Blade Ornaments 5
11.Wiring Harness 1
12.Balance Kit 1
Screw Package Quantity
S1. Wood Screws 2
S2. Screws (for Canopy) 3
S3. Bracket Screws & Washer 2
S4. Washers (for bracket) 2
S5. Blade Screws 16
S6. Motor Screws (4 screws on motor) 11
S7. Wire Connectors 4
S8. Pull Chains 2
S9. Hex Nuts for Support rods 3
S10. Safety Bolt & Nut 1
S11. "J" Hook 1
S12. Zip Tie 1
S13. Cable Clasp 1
S11 S12
S2
S3
S7
S6
S1
S5
S4
S8
S10
S9
12
3
4
6
8
10 11
5 7
8a
9
Tools You Need
1. Phillips Screwdriver 3. Needle Nose Pliers2. Adjustable Wrench
Read and Save These Safety Precautions
1. Turn off electricity at main switch before wiring or servicing fan in order to avoid
possible electrical shock.
2. All wiring must be in accordance with the National Electric Code (ANSI/NFPA 70-
1999) and local electrical codes. Electrical installation should be performed by a qualified
licensed electrician.
3. After making the wire connections, the wires should be spread apart with the grounded
conductor and the equipment-grounding conductor on the one side of the outlet box
and the ungrounded conductor on the other side of the outlet box.
4. The splices after being made should be turned upward and pushed carefully up into
the outlet box.
5. Conductor of a fan identified as grounded conductor to be connected to grounded
conductor of power supply, conductor of a fan identified as ungrounded conductor to
be connected to an ungrounded conductor of power supply, conductor of fan identified
for equipment grounding to be connected to an equipment-grounding conductor.
6. Fan should not be mounted in an area where it might get wet.
7. To r educe the risk of fire, electric shock or personal injury, mount to outlet box marked
"Acceptable for Fan Support" and use mounting screws provide with the outlet box.
8. For safety and best operating results, we recommend that you have a qualified electrician
assemble and install your fan.
9. WARNING: To reduce the risk of fire or electric shock, do not use this fan with any
solid state speed control device.
10. To reduce the risk of personal injury, do not bend the blade brackets when installing
the brackets, balancing the blades or cleaning the fan. Do not insert foreign objects
in between rotating fan blades.
Before Assembly
1. Make sure that the fan voltage (120) is compatible with your own electrical system.
2. Check to make sure that your carton contains all the parts mentioned in the parts list.
NOTE: When the motor is taken out of carton, please put it in a soft cloth to prevent any
damage on the ornamental surface.
CAUTION: Before installing, choose a location for mounting the fan where the blades have
at least 7 feet of clearance from all objects and floor. Mount an outlet box to the ceiling or
use an existing box.
CAUTION: Do not mount fan to sheet rock or drywall type materials. To insure proper
support, use the two #1 wood screws to secure mounting bracket to joist or beam. If the
location you choose does not have a suitable support beam, install a 2”X4” brace between
ceiling joists to support.
S13