15
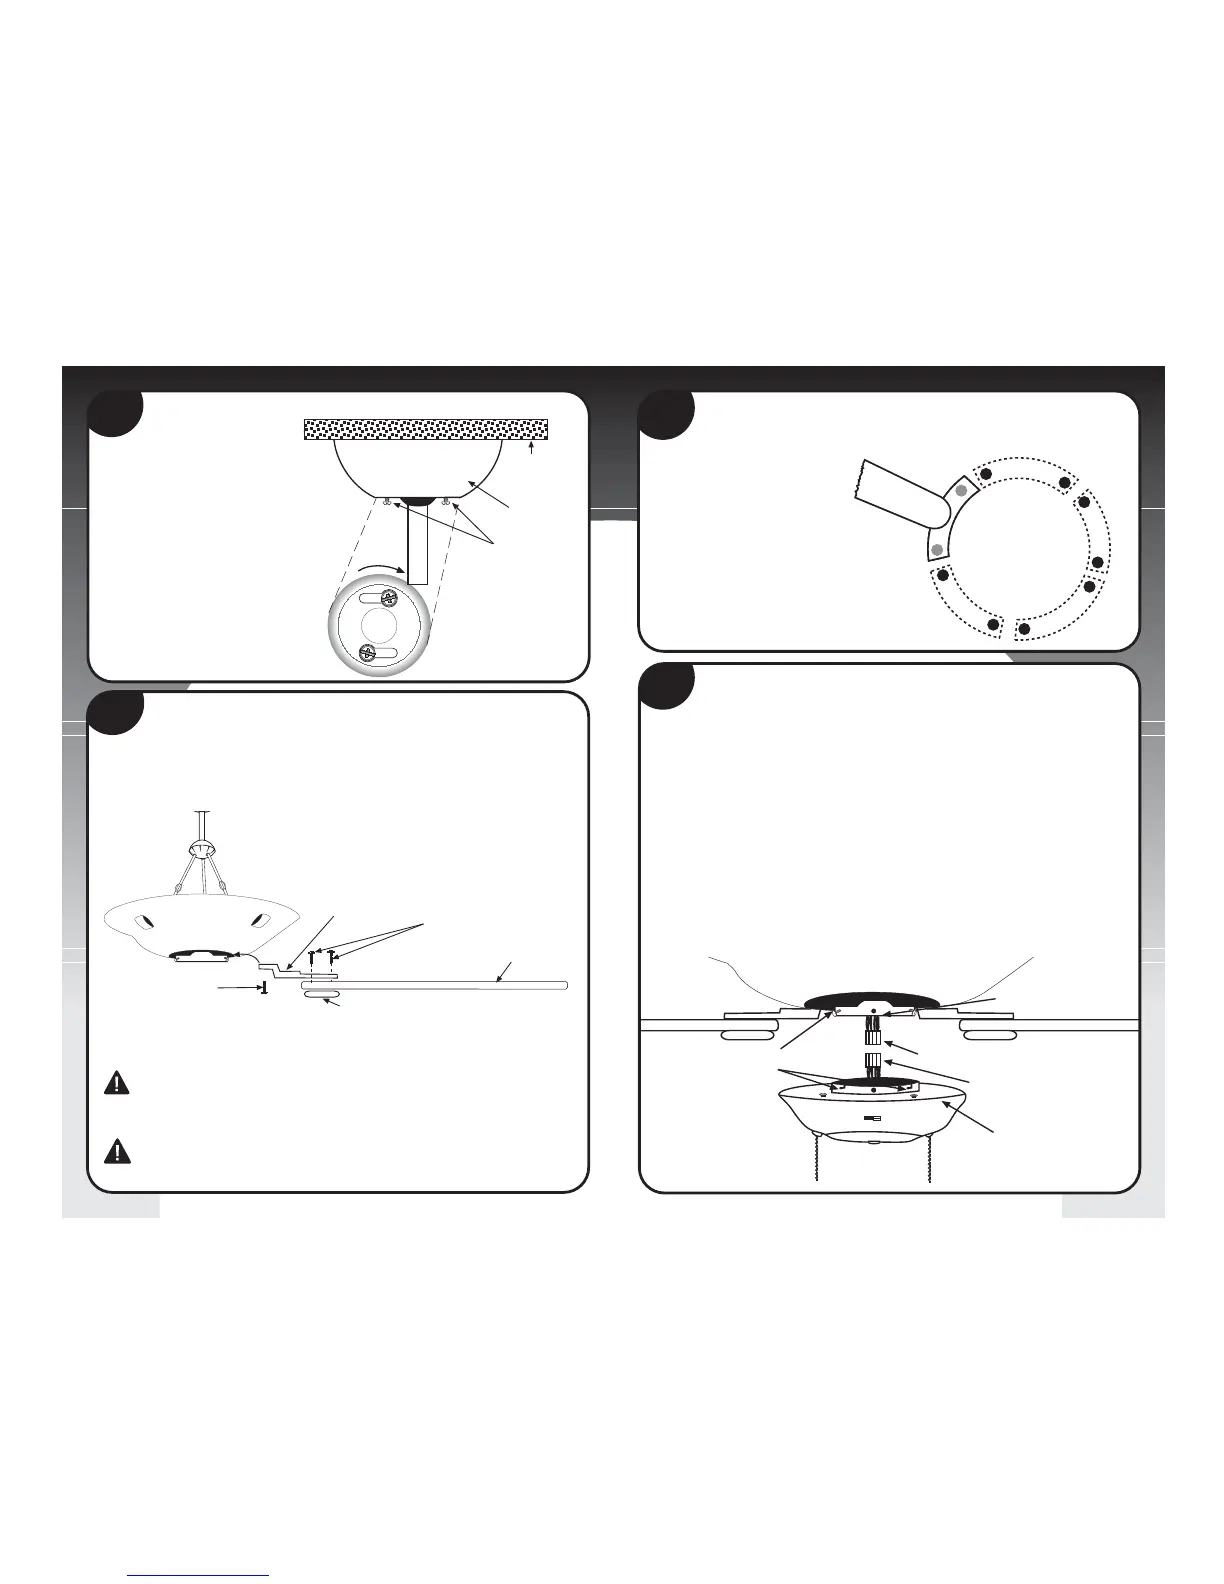
Step 15
1. To install the Switch Housing Assembly (#9), locate both modular wiring
plugs (A) and (B). One extends from the mounting plate (E) on bottom of
fan body and one extends from the Switch Housing (#9). Align the two
plugs so the latch on the side of the plugs will engage when pushed together.
Push the two plugs firmly together until latched.
2. Loosen 2 of the 3 screws (F) on mounting plate. Completely remove one
of the screws. Raise switch housing (#9) and align the mounting slots (D)
in the switch housing with the mounting screws (F) on the mounting plate
on bottom of fan body. Rotate the switch housing to the right until the two
screws are completely seated into mounting slots. Replace screw that was
removed. Tighten the three mounting screws securely.
IMPORTANT: Be sure that no wires are caught in mounting slots or pinched between
switch housing and mounting plate.
Remove rubber cushions,
saving motor screws for blade
installation. Using motor
screws (S5) provided, line up
holes from the blade arm with
the holes in the motor housing.
Tighten screws securely.
12
Step 12
Attach canopy (#3) to the
mounting bracket by placing
screws (S2) into slot in canopy.
Twist clockwise to lock into
place. Tighten screws firmly.
Bottom of Canopy
Screws (S2)
Canopy (3)
Ceiling
13
Step 13
For blade assembly, position blade holder (#6), blade (#5) and blade
ornaments (#10) so that all screw holes are aligned (as shown in figure
below). Using blade screws (S5), insert through top of blade holder, through
blade, and into blade ornament. Tighten securely.
CAUTION: Install blade holders to motor only after motor installation is complete.
This will prevent damage to the blade holders which have been carefully balanced.
IMPORTANT: Remove rubber cushions, saving motor screws for installation.
Blade Screws (S5)
Blade Holder (6)
Blade (5)
Blade Ornament (10)
Blade Holder
Screws (S6)
CAUTION
To reduce the risk of personal injury, DO NOT bend the blade arms when
installing them. When balancing the blades, or cleaning the fan, do not insert
foreign objects in between rotating fan blades.