8
INSTALLATION
AND USER GUIDE
TWO PIECE TOILET / TOILETTE DEUX PIÈCES
TT-8207-WL3, TT-8295-WL, TT-8297-WL3, TT-8207-WL4, TT-8296-WL
GUIDE D’INSTALLATION ET
D’UTILISATION
REVISED JULY 2022
RÉVISÉ JUILLET 2022
© 2022 FGI Industries Ltd. / FGI Canada Ltd. | CRAFT + MAIN® and logo design are registered trademarks of FGI Industries Ltd. / FGI Canada Ltd. / et la
conception de logotype sont des marques déposées de FGI Industries Ltd. / FGI Canada Ltd.
USA/ États-Unis : www.craftandmain.com | CANADA: www.craftandmain.ca
STEP 8
ÉTAPE 8
8
INSTALLATION
AND USER GUIDE
GUIDE D’INSTALLATION ET
D’UTILISATION
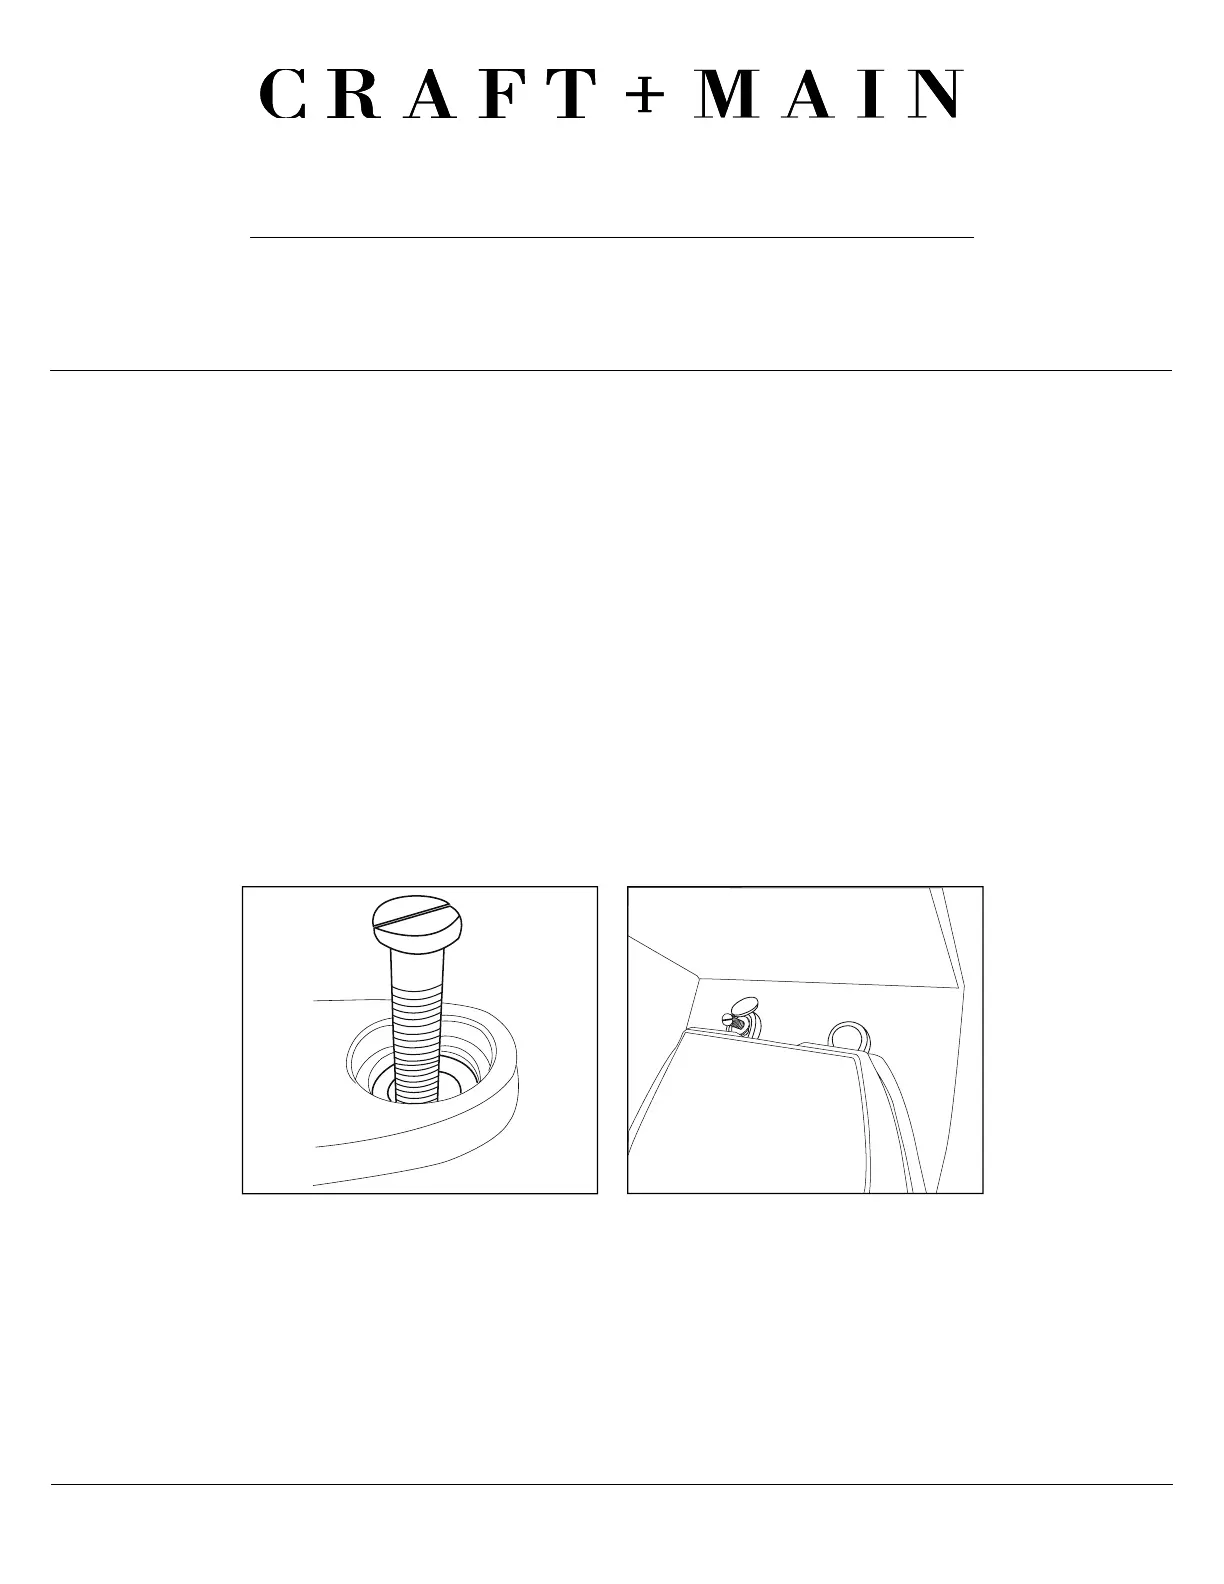
INSTALLING YOUR TOILET SEAT
POSE DU SIÈGE DE TOILETTE
Place the seat on the toilet, aligning the holes of the seat with the holes in the back of the toilet bowl.
Place washers onto the screws then insert the screw through the holes and secure it with the nut from the bottom of
the toilet, with the nut’s tapered end on top.
Secure nut from the bottom of toilet, use a regular screwdriver to tighten to fit (Figure 3).
CAUTION: DO NOT OVERTIGHTEN THE SCREW AS IT MAY CAUSE DAMAGE ON SEAT.
Push the decorative cap down (Figure 4).
Placez le siège sur la cuvette, en alignant les trous du siège sur les trous situés à l’arrière de la cuvette.
Introduisez les vis dans les trous et fixez-les avec les écrous par dessus la cuvette, le bord elé de l’écrou orienté vers
le haut.
Serrez les écrous depuis le bas de la toilette; utilisez un tournevis ordinaire pour bien serrer (Figure 3).
MISE EN GARDE : SERRER EXCESSIVEMENT LA VIS POURRAIT ENDOMMAGER LE SIÈGE.
Enfoncez le capuchon décoratif pour cacher la tête de la vis (Figure 4).
FIG 3
FIG 4