10
1
5
4
2 3
Emptying the Collection Tank
Installing & Cleaning Reusable Cloth Filter
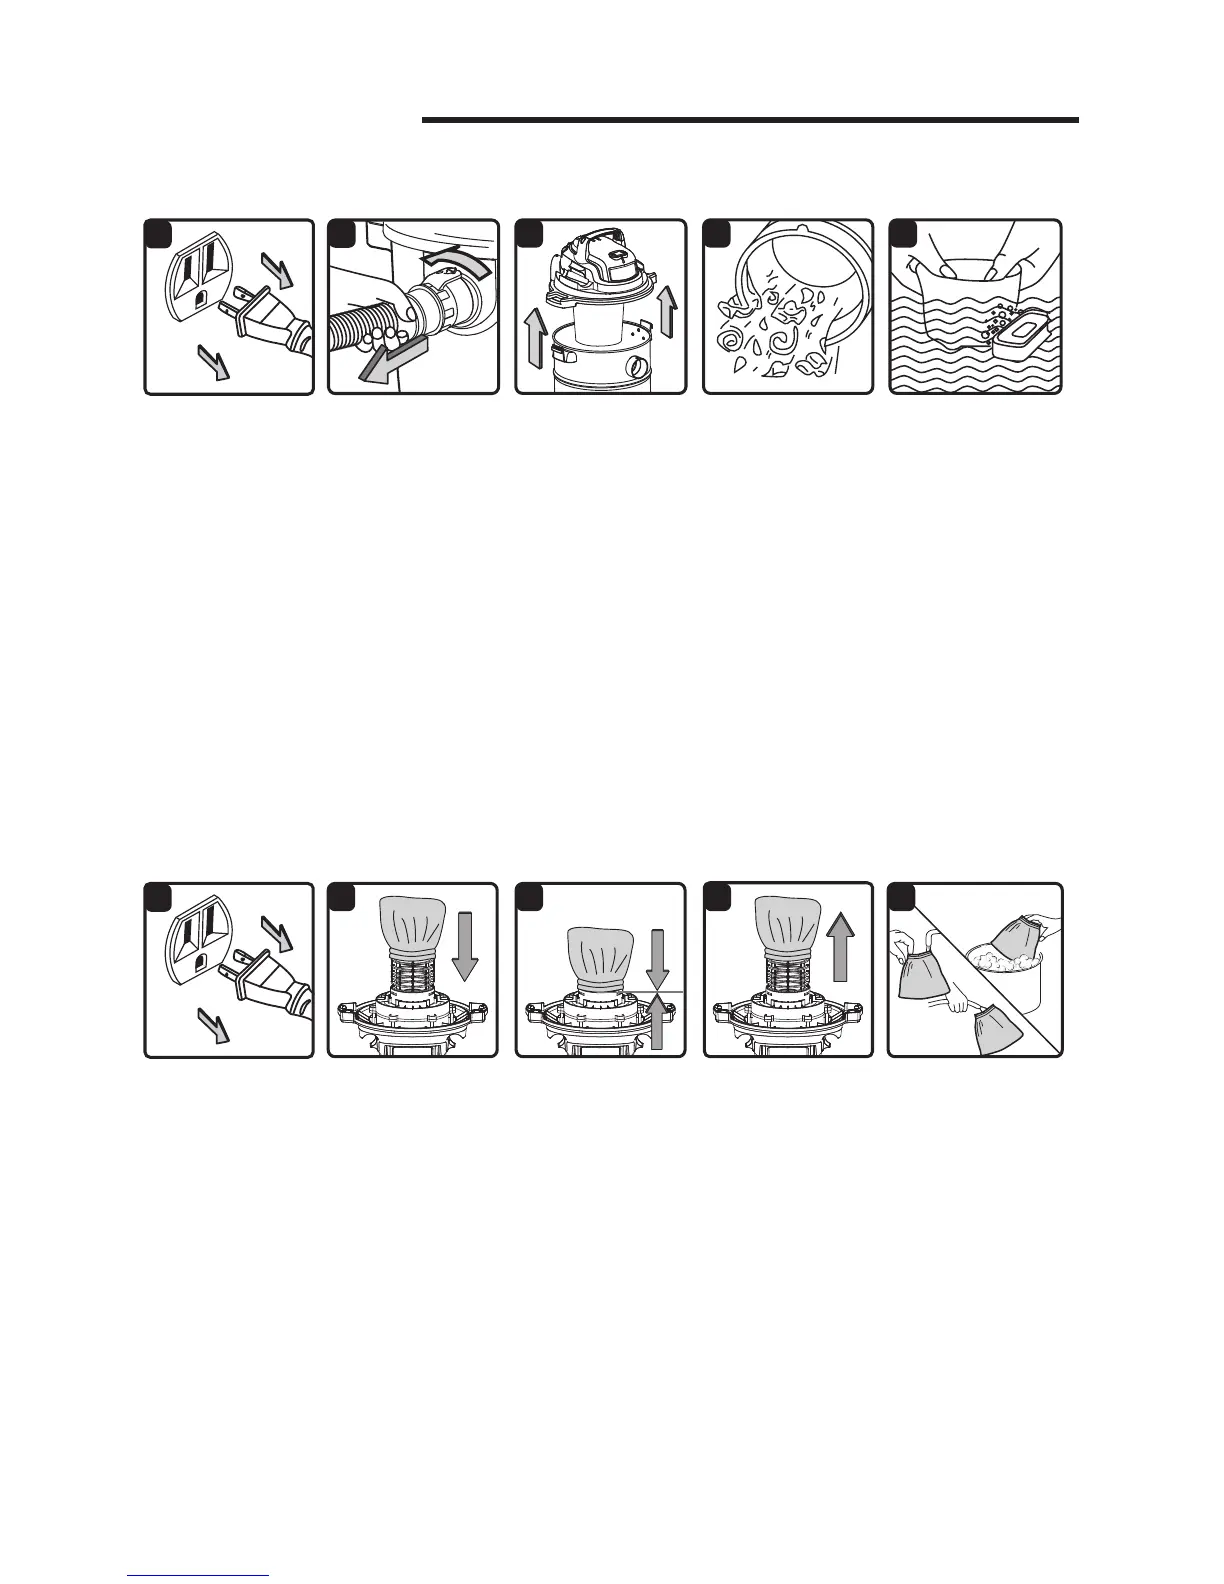
Maintenance
1. Verify that the power cord is
disconnected from the outlet. (Fig. 1)
2. Disconnect the hose from the
vacuum. (Fig. 2)
3. Undo the latches and remove the
power head from the collection tank.
(Fig. 3)
4. Clear all dirt or debris from the
collection tank and hose. (Fig. 4)
5. Clean or replace the lters. (Fig. 5)
6. Check the hose, attachments, and
power cord to verify that they have
not been damaged.
Installing Reusable Cloth Filter
1. Verify that the power cord is
disconnected from the outlet. (Fig. 1)
2. Remove power head and place in
the upside down position.
3. Slide reusable cloth lter down
over the lter cage making sure the
whole cage is covered. (Fig. 2 & 3)
4. Replace and lock the power head
onto the collection tank.
Removing and Cleaning Cloth Filter
1. Remove power head and place in
the upside down position.
2. Carefully remove the reusable cloth
lter from the lter cage. (Fig. 4)
Clean the lter by gently tapping or
brushing dirt o. Cleaning should
not be done indoors in living areas.
3. Use a mild soap and water solution
to wash reusable cloth lter and
rinse with clean water. (Fig. 5)
4. Allow the wet lter to air dry for 24
hours before installing onto the lter
cage.
NOTICE! The lter included is made of
high quality material designed to stop
small dust particles. The lter should
be used for dry pick-up only. A dry lter
is necessary to pick up dust. If the dust
lter is wet, it will clog quickly and be
very dicult to clean. Handle the lter
carefully when removing it for cleaning
and replacing it. Check the lters for
tears or small holes; a small hole can
let dust pass through and out of the
cleaner. Do not use a lter with holes or
tears; replace it immediately.
4 5
1
2
3