4, Removethechipperchutesupportbracefromthe frameby
removingthehexbolts.
5. Rotateimpellerassemblyby handuntilyoulocateone of two
chipperbladesin thechipperchuteopening.
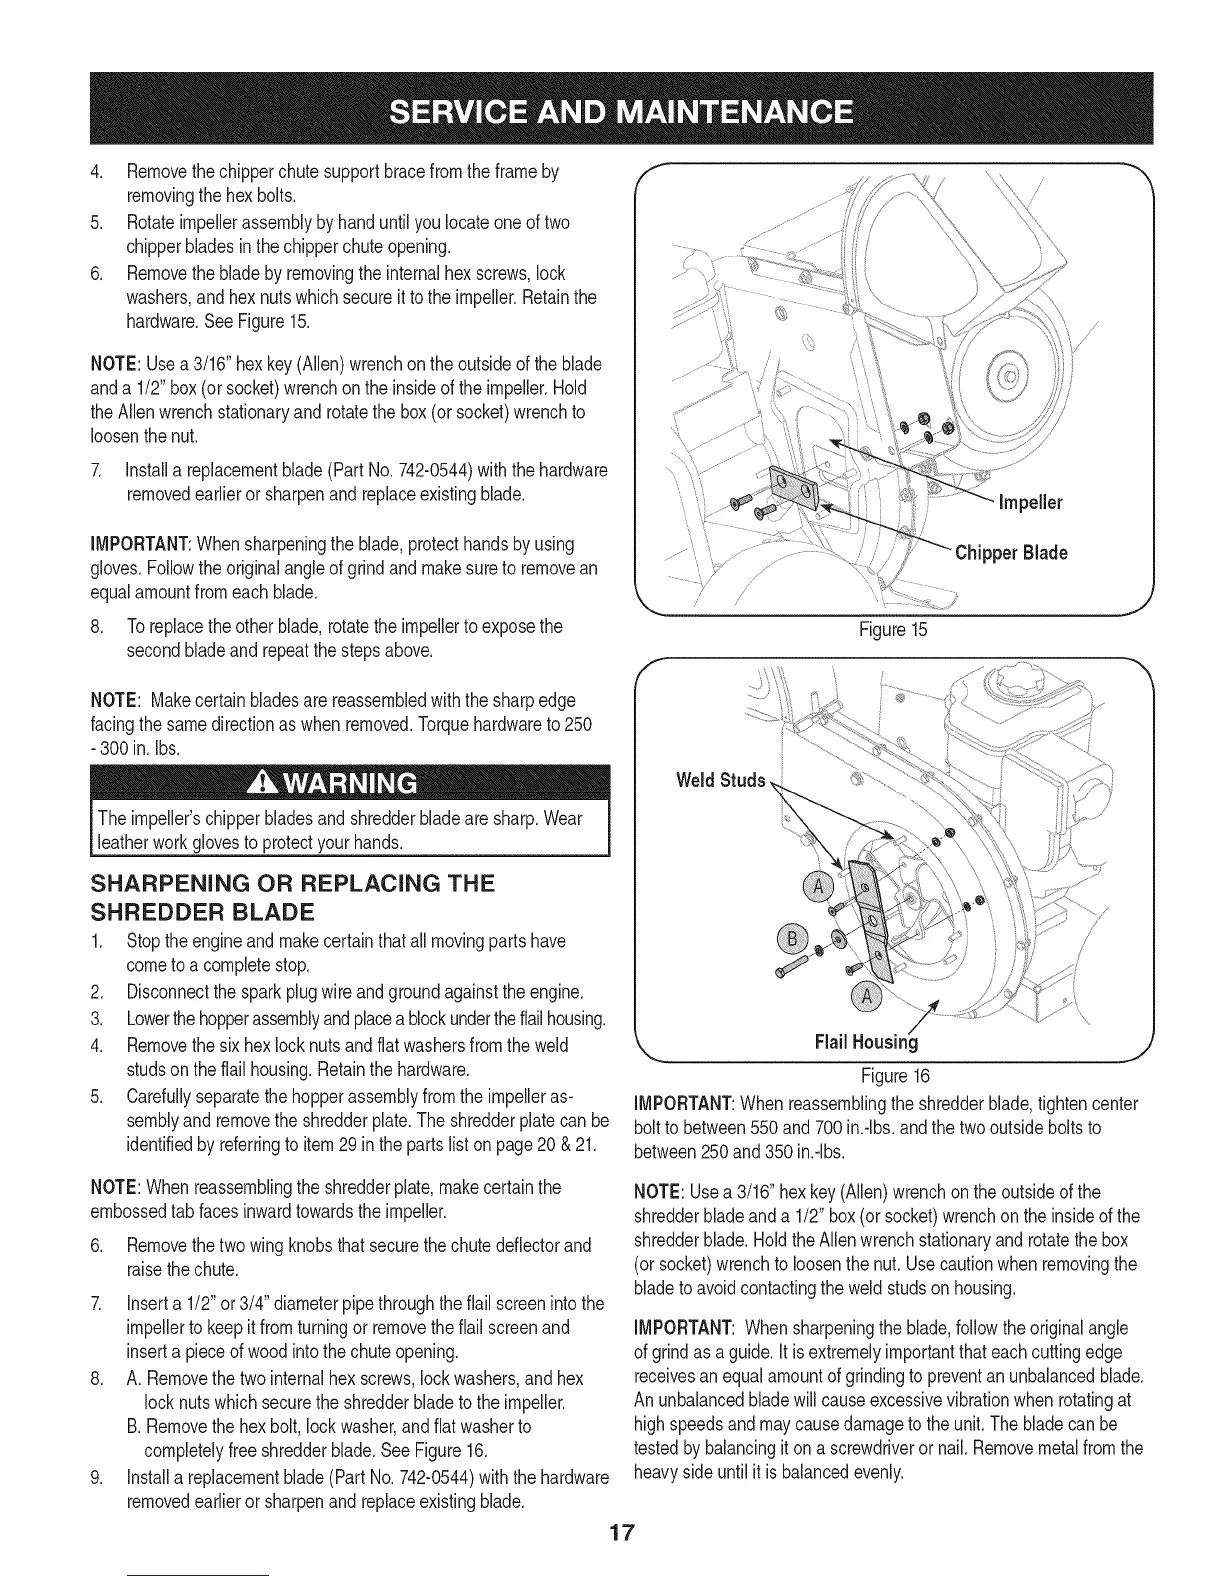
6, Removethebladebyremovingthe internalhex screws,lock
washers,andhexnutswhichsecureit tothe impeller.Retainthe
hardware,SeeFigure15,
NOTE:Usea3/16"hexkey(Allen)wrenchon theoutsideof theblade
anda 1/2"box(or socket)wrenchonthe insideof theimpeller.Hold
theAllenwrenchstationaryand rotatethe box(or socket)wrenchto
loosenthenut.
7. Installa replacementblade(PartNo.742-0544)withthe hardware
removedearlieror sharpenand replaceexistingblade.
IMPORTANT:Whensharpeningthe blade,protecthandsbyusing
gloves.Followthe originalangleofgrindandmakesureto removean
equalamountfromeachblade.
8. To replacetheother blade,rotatetheimpellerto exposethe
secondbladeand repeatthe stepsabove.
NOTE: Makecertainbladesare reassembledwiththe sharpedge
facingthesamedirectionas whenremoved.Torquehardwareto 250
- 300in.Ibs.
Theimpeller'schipperbladesand shredderbladearesharp.Wear
leatherworkglovestoprotectyour hands.
SHARPENING OR REPLACING THE
SHREDDER BLADE
1. Stopthe engineandmakecertainthatallmovingpartshave
cometoa completestop.
2. Disconnectthesparkplugwire andgroundagainsttheengine.
3. Lowerthehopperassemblyandplacea blockundertheflailhousing.
4. Removethesix hexlocknutsandflatwashersfromthe weld
studsonthe flailhousing.Retainthe hardware.
5. Carefullyseparatethe hopperassemblyfromthe impelleras-
semblyand removethe shredderplate.Theshredderplatecan be
identifiedby referringto item29in thepartsliston page20 &21.
Impeller
Blade
J
Figure15
Weld Studs,
/
Flail Housing
Figure16
IMPORTANT:When reassemblingtheshredderblade,tightencenter
boltto between550and700in.-Ibs,andthetwooutsideboltsto
between250and350in.-Ibs.
NOTE:Whenreassemblingtheshredderplate,makecertainthe
embossedtab facesinwardtowardstheimpeller.
6. Removethetwo wingknobsthatsecurethe chutedeflectorand
raisethe chute.
7. Inserta 1/2"or3/4" diameterpipethroughthe flailscreenintothe
impellertokeepit fromturningor removethe flailscreenand
inserta pieceof woodintothe chuteopening.
8. A. Removethe twointernalhex screws,lockwashers,andhex
locknutswhichsecurethe shredderbladeto theimpeller.
B.Removethe hexbolt,lockwasher,andflat washerto
completelyfreeshredderblade.SeeFigure16.
9. Installa replacementblade(Part No.742-0544)withthehardware
removedearlieror sharpenandreplaceexistingblade.
NOTE:Usea 3/16"hex key(Allen)wrenchontheoutsideof the
shredderbladeanda 1/2"box(or socket)wrenchon theinsideofthe
shredderblade.Holdthe Allenwrenchstationaryand rotatethebox
(orsocket)wrenchtoloosenthe nut. Usecautionwhenremovingthe
bladetoavoidcontactingtheweldstudson housing.
IMPORTANT:Whensharpeningthe blade,followtheoriginalangle
ofgrindas a guide.It is extremelyimportantthateachcuttingedge
receivesan equalamountof grindingtopreventan unbalancedblade.
An unbalancedbladewill causeexcessivevibrationwhen rotatingat
highspeedsandmaycausedamageto theunit.The bladecanbe
testedby balancingit on ascrewdriverornail. Removemetalfromthe
heavysideuntil itis balancedevenly.
17
 Loading...