CUSTOMER RESPONSIBiLITiES
IMPORTANT SERVICE MESSAGE
Perform the Maintenance Schedule listed in the chart
below to ensure the proper performance and long life of
your machine.
If you do not wish to service the machine yourself, you
can bring it to your local Sears Service Center for expert
service,
i
[
i
[=:t::: :_]
CAUTION
Before inspecting, cleaning or servicing the
machine, stop the engine and make sure that all
moving parts have come to a complete stop°
Disconnectthe spark plug wire and secure it away
from the sparkplug_
Failure to follow these instructions can result in
personalinjuryor propertydamage.
MAINTENANCESCHEDULE
SERVICE Before Every25 Every100 As Noted
EachUse Hours Hours
• T
1,2
CheckEngine OitLevel(Page28)
ChangeEngineOil (Page28)
ReplaceAir Filter (Page 28)
CleanCooling System (Page28)
Inspect Spark Arrester (if equipped)
Inspect Spark Plug (Page28)
CleanMachine
CheckBolts and Nuts (Page29)
•
I Every5
Hours
ti"
tp
I
t
•
• [
• I
4
"[ 2
t 3
T
_ 2
NOTE1- Changeoil afterfirst two hoursof newoperation,
NOTE2- Servicemorefrequentlyin extremelydustyor dirbjconditions.
NOTE3- If engineisequippedwitha sparkarrestor,cleanandinspectfordamageevery50operatinghours
NOTE4- Replaceyearlyor mereoftenif usedinextremelydustyor dirtyconditions
CHECK AND CHANGE ENGINE OIL
Q Check oil level every five operating hours and before
each use of the machine_
Q Change oil after first two hours of new operation and
every 25 operating hours thereafter, IMPORTANT:
Change oil more frequently when operating in
extremely dusty or dirty conditions,
To Check Oil Level
1. Place the machine on level ground.. Stop the engine
and make sure that all moving parts have come to a
complete stop. Disconnect the spark plug wire and
secure it away from the spark plug.
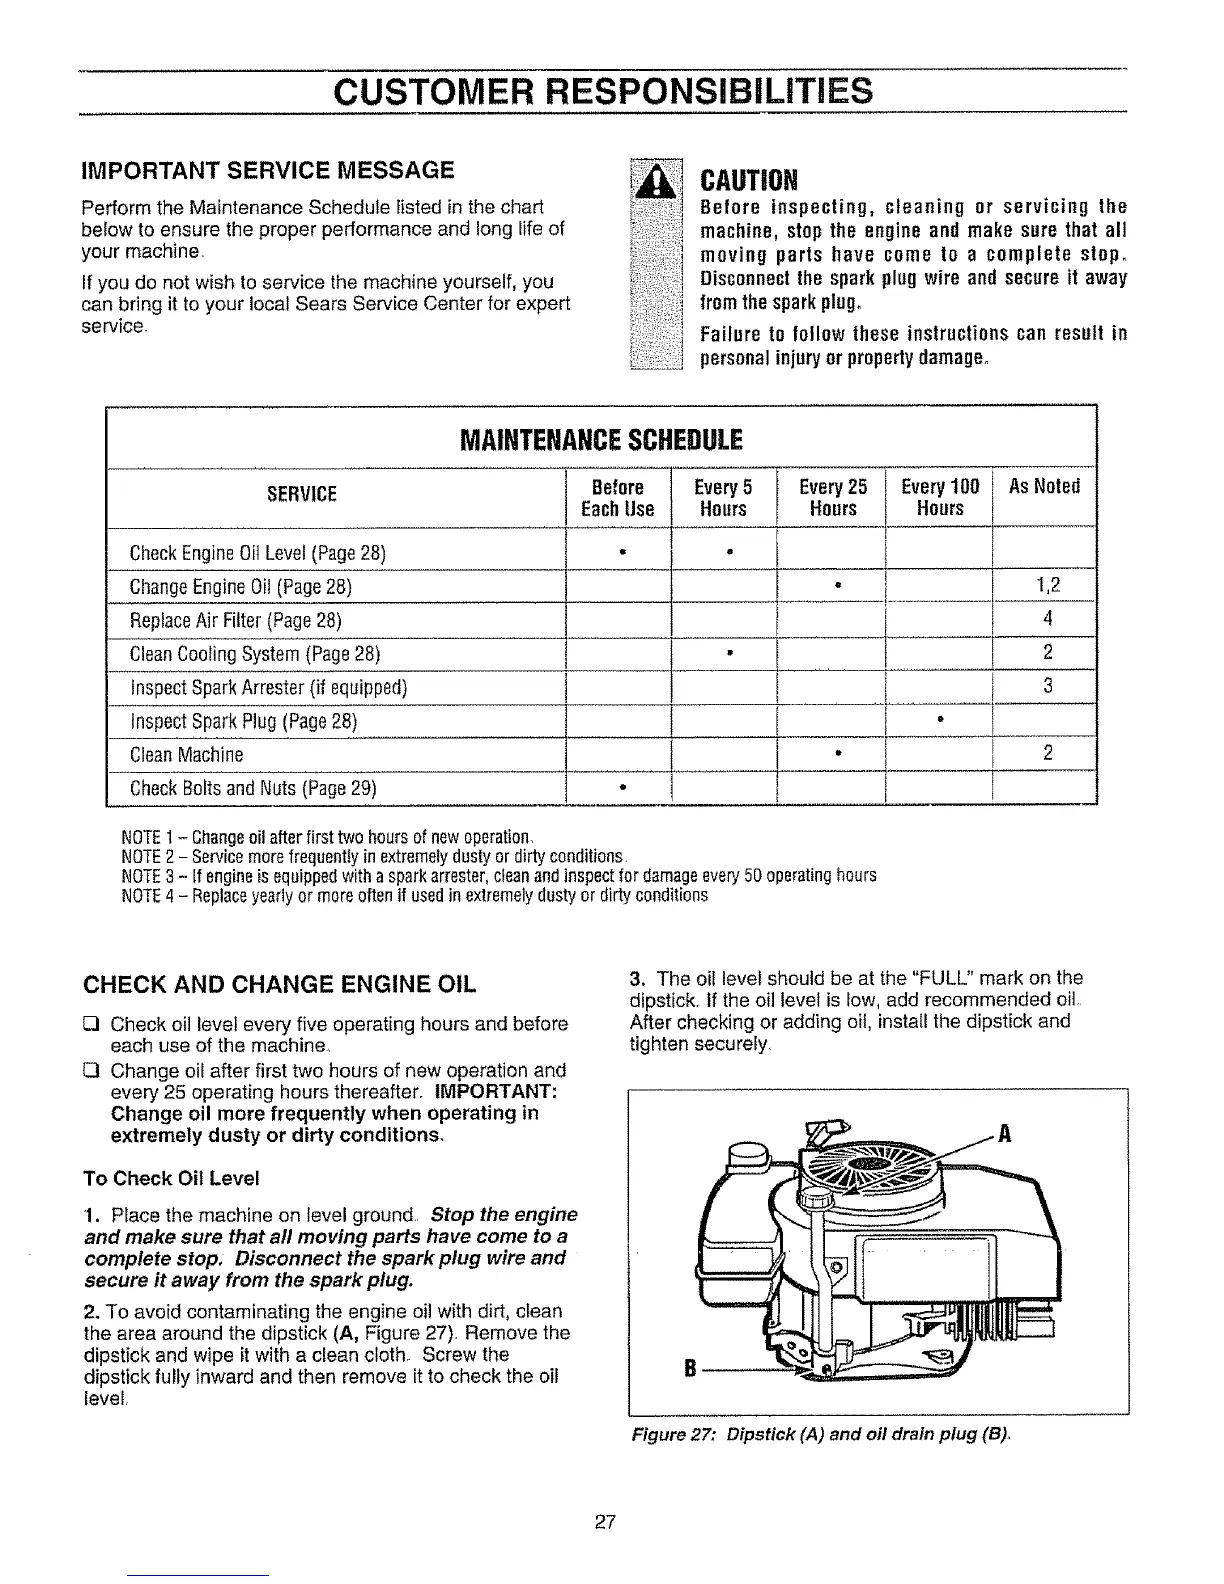
2. To avoid contaminating the engine oil with dirt, clean
the area around the dipstick (A, Figure 27). Remove the
dipstick and wipe it with a clean cloth. Screw the
dipstick fully inward and then remove it to check the oil
level,
3. The oil level should be at the "FULL" mark on the
dipstick. If the oil level is low, add recommended oil
After checking or adding oil, install the dipstick and
tighten securely.
Figure 27: Dipstick (A) and oil drain plug (B),
27




 To Next Page