This document is an operator's manual for a Craftsman Trimmer/Edger, specifically models 900.74547 (USA) and C935.51850 (Canada). It provides essential information regarding safety, operation, and maintenance of the device.
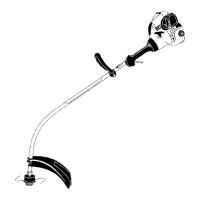
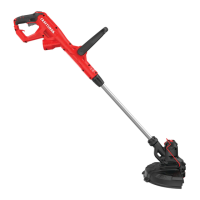
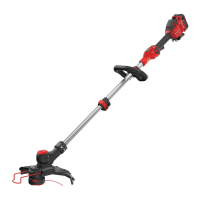
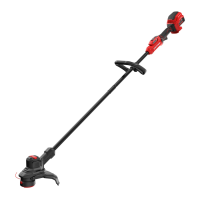
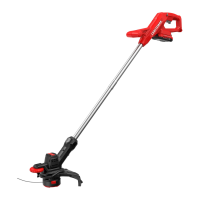
The Trimmer/Edger is a versatile gardening tool designed for both trimming and edging functions. It features a conversion button for easy switching between modes, an auxiliary handle for user comfort and control, and a built-in blower function to clear grass clippings from hard surfaces. The tool is powered electrically and uses a .065 inch (1.65 mm) diameter, round nylon line for cutting.
Technical Specifications:
- Models: USA Model 900.74547, Canada Model C935.51850
- Cutting Line: .065 inch (1.65 mm) diameter, ROUND nylon line
- Power Source: Electric (requires extension cord)
- Double Insulation: Yes, eliminating the need for grounding.
- Polarized Plug: Yes, for reduced risk of electric shock.
Safety Features and Warnings:
The manual emphasizes numerous safety precautions to ensure safe operation and prevent injury. These include:
- Eye Protection: Always wear safety spectacles or goggles conforming to ANSI Z87.1 (CAN/CSA Z94.3) while operating.
- Guard: The tool must always be operated with the guard firmly in place to protect the user.
- Bystander Safety: Keep all bystanders, especially children and pets, at least 100 feet (30m) away from the work area.
- Rebound Risk: When edging, stones, metal pieces, and other objects can be thrown at high speed. Work away from solid objects like walls, steps, large stones, or trees to reduce rebound injury.
- Accidental Starting: Do not carry the plugged-in tool with a finger on the trigger.
- Cord Management: Avoid abusing the power cord; keep it away from heat, oil, sharp edges, and the rotating line. Use the cord retainer to secure the extension cord.
- Environmental Conditions: Do not use electric tools in damp or wet locations, in rain, or in gaseous/explosive atmospheres.
- Storage: Store idle tools indoors in a dry, locked-up place out of reach of children.
- Ground Fault Circuit Interrupter (GFCI): GFCI protection is recommended for circuits or outlets used for the gardening appliance.
- Extension Cord: Use only extension cords suitable for outdoor use (e.g., SW-A, SOW-A, STW-A, STOW-A, SJW-A, SJOW-A, SJTW-A, or SJTOW-A). Ensure the extension cord is of the correct gauge to prevent power loss and overheating. A table is provided for minimum gauge requirements based on cord length and ampere rating.
- Double Insulation: While providing added protection against electrical insulation failure, it does not replace normal safety precautions.
- Polarized Plugs: The tool has a polarized plug (one blade wider than the other) and must be used with a suitable polarized extension cord.
- Chemical Exposure: Dust created by lawn and garden power tools may contain chemicals known to cause cancer, birth defects, or reproductive harm (e.g., crystalline silica, arsenic, chromium, compounds in fertilizers, insecticides, herbicides, and pesticides). Wear safety equipment like gloves and dust masks to reduce exposure.
Usage Features:
- Assembly: Requires a Phillips screwdriver (not supplied) for guard and auxiliary handle attachment.
- Guard Attachment: The two-piece guard snaps together and is secured with a 3/4 inch (19mm) screw. The line cut-off blade covering must be removed after installation.
- Auxiliary Handle Attachment: The handle pushes onto the metal shaft and is secured with a 2-1/2 inch (63.5mm) bolt and plastic knob.
- Extension Cord Attachment: An extension cord retainer is built into the switch handle. Double the cord about 8 inches (203mm) from the end, insert it into the slot, and hook the loop over the tab to secure it.
- Auxiliary Handle Adjustment: The handle can be adjusted for maximum comfort and control, allowing users to position it for a straight front arm during operation.
- Height Adjustment: The overall height of the trimmer can be adjusted by pressing the conversion button and moving the metal tube up or down until it "snaps" into one of the three rectangular recesses.
- Switching On/Off: Squeeze the trigger lever to turn on, release to turn off.
- Trimming Operation: Angle the unit and slowly swing it side to side (5°-10° angle).
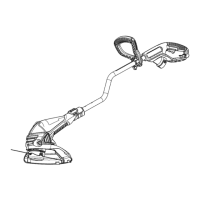
- Edging Operation: Unplug the unit, push the conversion button, and rotate the tube 180°. Pull the wire edge guide down into place.
- Blower Function: The motor's airflow funnels through the guard, providing a built-in blower to clear grass clippings from sidewalks and hard surfaces.
- Cutting Line / Line Feeding: The trimmer features an automatic self-feeding line hub. The nylon line will fray and wear, requiring more frequent feeding when cutting along sidewalks, abrasive surfaces, or heavier weeds. Do not tap the tool on the ground to feed the line.
Maintenance Features:
- General Maintenance: Follow instructions in the maintenance section. Inspect extension cords periodically and replace if damaged. Keep handles dry, clean, and free from oil and grease.
- Damaged Parts: Before further use, check guards and other parts for proper operation, alignment, binding, breakage, and mounting. Repair or replace damaged parts at an authorized service center using identical replacement parts.
- Air Intake Slots: Keep air intake slots clean to prevent overheating (Figure 15).
- Spool Replacement:
- To replace an empty spool, press the tabs and remove the cassette from the trimmer head. Remove the old spool from the cassette.
- Insert a new pre-wound AFS spool onto the cassette's post, ensuring the lever at the base of the cassette is in the correct position.
- Feed the cutting line through the eyelets, leaving about 4-3/8 inches (111mm) protruding.
- Align the cassette tabs with the housing notches and push until it snaps into place.
- Rewinding an Empty Spool:
- Remove the empty spool and any remaining line.
- Wind new line onto the uppermost part of the spool, inserting 3/4 inch (19mm) into an anchor slot.
- Wind the line neatly and in layers in the direction of the arrow on the spool, avoiding crisscrossing.
- Once the wound line reaches the recesses, cut the line and temporarily park it in the retention slots on the side of the spool.
- Line Maintenance: The trimmer line can dry out over time. Store pre-wound spools or bulk line in a sealed plastic bag with a tablespoon of water to maintain optimal condition.
- Cleaning: Plastic parts can be cleaned with mild soap and a damp cloth.
- Line Cutter Maintenance: The line cutter on the guard's edge may dull over time; periodically sharpen it with a file.
Troubleshooting:
- Slow Operation: Check if the cassette housing rotates freely and clean if necessary. Ensure the cutting line does not protrude more than 4-3/8 inches (111mm) from the cassette.
- Automatic Line Feed Failure:
- Keep tabs pressed and remove the cassette. Pull the cutting line until 4-3/8 inches (111mm) protrudes. If insufficient line remains, install a new spool.
- Align cassette tabs with housing notches and push until it snaps into place.
- If the line still protrudes beyond the cutting blade, trim it to the blade's length.
- If the issue persists, clean the cassette and housing, check if the cassette lever moves freely, and unwind/rewind the cutting line neatly.
The manual also includes information on Sears' warranty (one-year full warranty for defects, 90-day warranty for commercial/rental use) and contact details for Sears Parts & Repair Service Centers, as well as a link to "managemyhome.com" for additional support.