5
ENGLISH
strip suitable for outdoor use. Use of a device suitable
for outdoor use reduces the risk of electricshock.
• When using a power strip, be sure that its current
rating is not exceeded by the sum of the individual
device's currentratings.
• An extension cord must have adequate wire size
(AWG or American Wire Gauge) for safety. The smaller
the gauge number of the wire, the heavier the cord and
thus the greater its capacity. An undersized cord will
cause a drop in line voltage resulting in loss of power and
overheating. The following table shows the correct size
to use depending on total length of all extension cords
plugged together, and nameplate ampere rating. If in
doubt, use the next heaviergauge.
Minimum Gauge for Cord Sets
Volts
Total Length of Cord in Feet
(meters)
120V 25 (7.6) 50 (15.2) 100 (30.5) 150 (45.7)
Ampere Rating
American Wire Gauge
More Than Not More
Than
0 6 18 16 16 14
6 10 18 16 14 12
10 12 16 16 14 12
12 16 14 12 Not Recommended
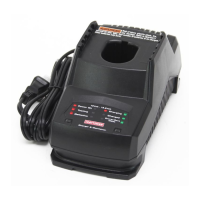
• Do not place any object on top of the charger or place
the charger on a soft surface that might block the
ventilation slots and result in excessive internal heat.
Place the charger in a position away from any heat source.
The charger is ventilated through slots in the top and the
bottom of thehousing.
• Do not operate the charger with a damaged cord
orplug. Have them replacedimmediately.
• Do not operate the charger if it has received a sharp
blow, been dropped or otherwise damaged in any
way. Take it to an authorized servicecenter.
• Do not disassemble the charger; take it to an
authorized service center when service or repair
is required. Incorrect reassembly may result in a risk of
electric shock, electrocution orfire.
• The charger is designed to operate on standard
120V household electrical power. Do not attempt to
use it on any other voltage. This does not apply to the
vehicularcharger.
• Foreign materials of a conductive nature, such as, but
not limited to, grinding dust, metal chips, steel wool,
aluminum foil or any buildup of metallic particles
should be kept away from the charger cavities and
ventilationslots.
• Always unplug the charger from the power supply
when there is no battery pack in thecavity.
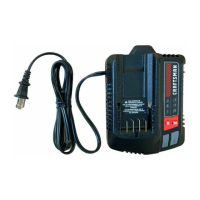
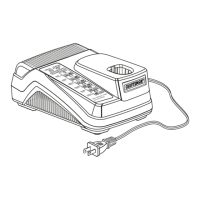
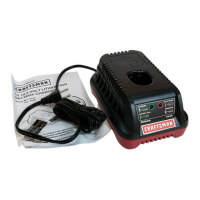
CHARGING A BATTERY (FIG. B, C)
NOTE: To ensure maximum performance and life of Li‑ion
battery packs, charge the battery pack fully before firstuse.
NOTE: Refer to label near charging light(s) on charger for
on/off and blink patterns.
1. Plug the charger into an appropriate outlet.
2. Connect the charger and battery pack, making sure the
battery pack is fully seated. Green charging light(s) will
continuously blink whilecharging.
3. Charging is complete when the green charging light(s)
remain(s) continuously ON. Battery pack can be left in
charger orremoved.
The charger will not charge a faulty battery pack. The charger
refusing to light could indicate a problem with the charger
or a faulty battery pack. Discontinue use and take both to an
authorized servicecenter.
NOTE: To remove the battery pack, some chargers require
the battery pack release button to bepressed.
WARNING: Only charge when battery temperature is
over 40° F (4.5°C) and below 104° F (40°C).
HOT/COLD PACK DELAY
When the charger detects a battery pack that is too hot
or too cold, it automatically starts a Hot/Cold Pack Delay,
suspending charging until the battery pack has reached an
appropriate temperature. The charger then automatically
switches to the pack charging mode. This feature ensures
maximum battery packlife.
A cold battery pack may charge at a slower rate than a warm
batterypack.
The hot/cold pack delay will be indicated by the green
light(s) continuing to blink and with the red light
continuously ON. Once the battery pack has reached an
appropriate temperature, the red light will turn OFF and the
charger will resume the chargingprocedure.
ELECTRONIC PROTECTION SYSTEM
Li‑ion tools are designed with an Electronic Protection
System that will protect the battery pack against overloading,
overheating or deep discharge. The tool will automatically
turn off and the battery pack will need to berecharged.
IMPORTANT CHARGING NOTES
1. Longest life and best performance can be obtained if
the battery pack is charged when the air temperature
is between 65°F–75°F (18°C– 24°C). DO NOT charge
when the battery pack is below 40°F (4.5°C), or above
104°F (40°C). This is important and will prevent serious
damage to the batterypack.
2. The charger and battery pack may become warm to the
touch while charging. This is a normal condition, and
does not indicate a problem. To facilitate the cooling of
the battery pack after use, avoid placing the charger or
battery pack in a warm environment such as in a metal
shed or an uninsulatedtrailer.
3. If the battery pack does not charge properly:
a. Check operation of receptacle by plugging in a lamp
or other appliance;
b. Check to see if receptacle is connected to a light
switch which turns power off when you turn out
thelights;
 Loading...