ENGLISH
10
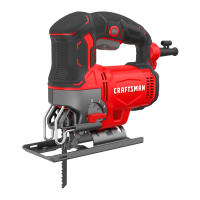
Cutting (Fig.L)
WARNING: Always use eye protection. All users and
bystanders must wear eye protection that conforms to
ANSI Z87.1
WARNING: Exercise extra caution when cutting
towards operator. Always hold saw firmly while cutting.
The blade should extend past the shoe
9
and the thickness
of the workpiece throughout the cut. Select the blade best
suitable for the material to be cut and use the shortest blade
suitable for the thickness of the material. Ensure the blade
extends down past the material to be cut throughout the
full stroke.
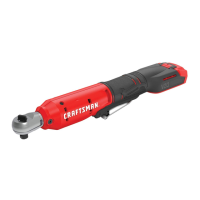
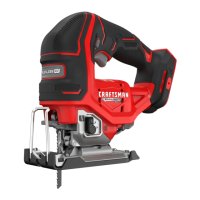
Proper Hand Position (Fig.K)
WARNING: To reduce the risk of serious personal injury,
ALWAYS use proper hand position asshown.
WARNING: To reduce the risk of serious personal
injury, ALWAYS hold securely in anticipation of a
suddenreaction.
Proper hand position requires one hand on the main
handle
3
. Keep other hand clear of cutter area.
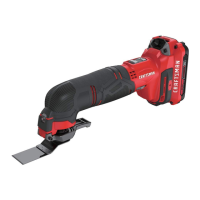
Installing and Removing the Battery Pack
(Fig.J)
CAUTION: Check that the tool is not locked on before
installing the battery pack. If the trigger switch is
locked on when the battery pack is installed, it will start
immediately. Damage to your tool or personal injury
may result.
NOTE: For best results, make sure your battery pack is
fullycharged.
To install the battery pack
1
into the tool handle, align the
battery pack with the rails inside the tool’s handle and slide it
into the handle until the battery pack is firmly seated in the
tool and ensure that it does notdisengage.
To remove the battery pack from the tool, press the release
button
2
and firmly pull the battery pack out of the tool
handle. Insert it into the charger as described in the charger
section of thismanual.
OPERATION
WARNING: To reduce the risk of serious personal
injury, turn unit off and remove the battery pack
before making any adjustments or removing/
installing attachments or accessories. An
accidental start‑up can causeinjury.
4. Once the desired bevel angle is achieved, slide the shoe
backward into the detent and lock the shoe into place as
shown in Fig.I.
To Set Shoe Back to 0°
1. Unlock theshoe.
2. Rotate the shoe back to 0°.
3. Slide the shoe back into the 0° positive stopposition.
4. Lock theshoe.
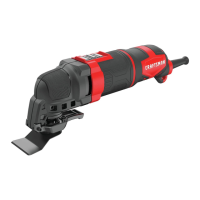
Beveling the Shoe (Fig.F–I)
To Bevel the Shoe
1. To unlock the shoe, pull the keyless bevel lever
8
to the
side as shown in Fig.F.
2. Slide the shoe
9
forward to release it from the 0°
positive stop position as shown in Fig.G.
3. The shoe can be beveled to the left or to the right as
shown in Fig.H. It has detents at 0°, 22.5°, and 45°. The
shoe can be manually stopped at any degree between
0° and 45°.
Removeable Anti‑Scratch Shoe Cover
(Fig.E)
The anti‑scratch shoe cover
10
should be used when cutting
surfaces that scratch easily, such as laminate, veneer orpaint.
To attach anti‑scratch shoe cover
10
, place the front of the
aluminum shoe
9
into the front of the anti‑scratch shoe
cover and lower the jig saw. The anti‑scratch shoe cover will
click securely onto the rear of aluminumshoe.
To remove anti‑scratch shoe cover, grasp the anti‑scratch
shoe cover from the bottom; holding onto the two rear
tabs
12
remove the anti‑scratch shoecover.
Blade Installation (Fig.D)
1. Push the blade release
6
down.
2. With teeth facing forward, insert the shank of the saw
blade
7
into the blade holder as far as it willgo.
3. Let go of the blade release.
4. Check to ensure blade is secure beforecutting.
ASSEMBLY AND ADJUSTMENTS
WARNING: To reduce the risk of serious personal
injury, turn unit off and remove the battery pack
before making any adjustments or removing/
installing attachments or accessories. An
accidental start‑up can causeinjury.
optimal depth leaving approximately 7/32” (5.5 mm) of the
screw exposed. Align the slots on the back of the charger
with the exposed screws and fully engage them in theslots.
NOTE: Do not attempt to mount CMCB101 charger under a
bench ortable.
NOTE: Only mount CMCB101 charger with the charging
lights pointed upward toward theceiling.
VersaTrack™
WARNING: Do not charge batteries while charger is
hung onTrackwall.
CRAFTSMAN chargers, except the CMCB101, can be
stored on CRAFTSMAN VersaTrack™ Trackwall. Hooks and
accessories are sold separately. Please refer to the VersaTrack™
Trackwall accessory sheet for furtherinformation.
NOTE: The CMCB101 charger is not CRAFTSMAN VersaTrack™
Trackwallcompatible.
SAVE THESE INSTRUCTIONS FOR
FUTURE USE