8
ENGLISH
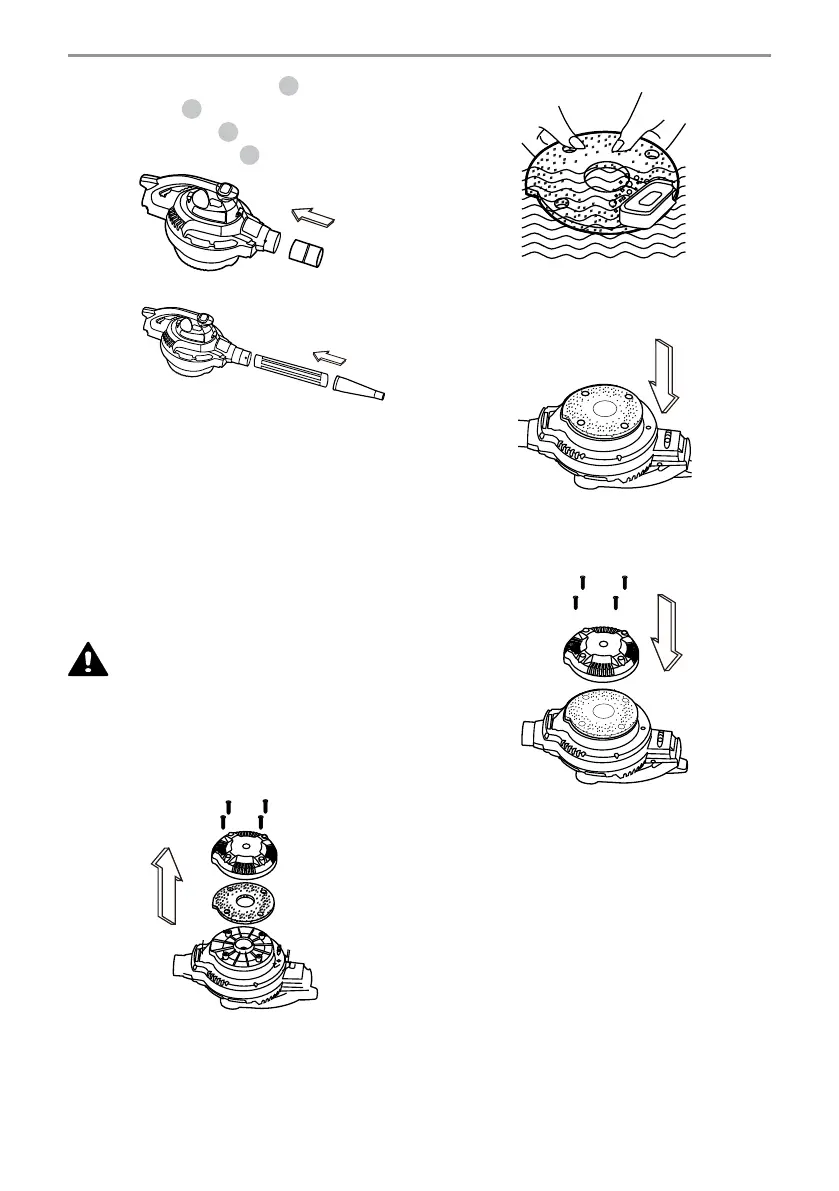
16. Insert the blower adapter
19
into the
blower port
15
and fit it with the desired
extension wands
18
and/or blower
concentrator nozzle
22
. Fig. 8 & 9.
Fig. 8
Fig. 9
17. Before turning on the blower, firmly hold
onto the handle. Plug the power cord into
the outlet. Turn the motor on by flipping
the switch to the ‘I’ ON position.
CLEANING THE BLOWER INTAKE
After using the blower, examine the bottom of
the blower for debris and blockages and remove
if found. To clean the foam pad of the intake.
WARNING:
VERIFY THAT THE
POWER CORD IS DISCONNECTED FROM THE
OUTLET.
18. Remove the four screws holding the intake
shield and lift off the shield. Fig. 10.
Fig. 10
19. Remove the foam pad from the blower and
clean the foam pad with soapy water and
allow to dry. Fig. 11.
Fig. 11
20. Replace the foam pad on to the blower
aligning the holes with the screw tabs.
Fig. 12.
Fig. 12
21. Reinstall the intake shield and the four
screws. Fig. 13.
Fig. 13
FILTER INSTALLATION AND CLEAN
UP
Dry Pick Up Operation
NOTICE: Clean or change the filter regularly
for best performance. ALWAYS USE THE
CARTRIDGE FILTER FOR DRY VACUUMING. If
the machine is used without the cartridge filter,
the motor will burn out and the warranty will be
voided. Always keep spare filters on hand.
NOTICE: The filters included are made of high
quality materials designed to stop small dust
particles. The cartridge filter should be used
for dry pick-up only. A dry cartridge filter is
 Loading...