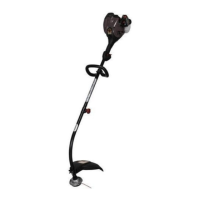
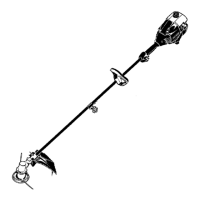
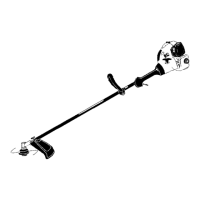
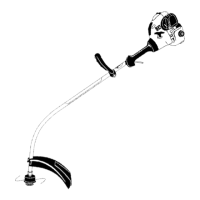
Do you have a question about the Craftsman Weedwacker 358.791042 and is the answer not in the manual?
Details the terms of the full warranty for the Craftsman Gas Weedwacker.
Warning about using specific trimmer attachments and avoiding blades/wire.
General warning about careless or improper use causing serious injury.
Guidance on wearing safety glasses, hearing protection, and protective clothing.
Defines safety distance from thrown objects and mentions keeping children/animals away.
Instructions to secure hair and remove loose clothing to prevent entanglement.
Specifies that the assist handle must be positioned below the arrow.
Strictly prohibits children from operating the unit.
Guidelines for storing the unit and fuel away from children and ignition sources.
Emphasizes using only identical replacement parts during servicing.
Warning to stop unit and disconnect spark plug before cleaning or servicing.
Caution regarding fire hazards when using or storing gasoline near flames/sparks.
Specifies the recommended fuel mixture ratio of unleaded gasoline and two-stroke oil.
Basic precautions for reducing risk of fire and injury when using gardening appliances.
Operator must be familiar with controls, use unit properly, and restrict use to trained persons.
Reiterates that children must not operate the unit.
Always wear safety glasses, face mask, heavy pants, long sleeves, boots, gloves, and foot protection.
Instructions to secure hair and remove loose clothing to prevent entanglement in moving parts.
Operate only when alert, not tired, ill, or under the influence of substances.
Recommendation to wear hearing protection during operation.
Warning about the danger of breathing exhaust fumes in enclosed spaces.
Keep handles free of oil/fuel and always keep the engine on the right side.
Hold unit firmly, keep it below waist level, and maintain firm footing on stable surfaces.
Keep body parts away from the hot muffler and spinning line to avoid burns/injury.
Use only in daylight/good light, and only for jobs described in the manual.
Stop unit and disconnect spark plug before maintenance, except for carburetor adjustments.
Inspect for damaged/loose parts, fuel leaks, and replace worn trimmer head parts.
Use only Craftsman line, install shields properly, and ensure correct trimmer head installation.
Ensure correct assembly and make carburetor adjustments with support and caution.
Use only recommended accessories/parts and have service done by Sears.
Mix and pour fuel outdoors, away from sparks/flames. Do not smoke while fueling.
Avoid spilling fuel, wipe up spills before starting, and move away from fueling site.
Stop engine and allow it to cool before removing the fuel cap.
Empty fuel tank and run engine to empty fuel lines/carburetor before storing or transporting.
Store unit and fuel where vapors cannot reach sparks or open flames.
Always store gasoline in a container approved for flammable liquids.
Allow engine to cool before storing or transporting the unit in a vehicle.
Empty fuel tank and run engine to empty fuel lines/carburetor before storage.
Store unit and fuel away from children and ignition sources.
Store unit so the line limiter blade cannot cause injury; unit can be hung by the shaft.
Unit is not equipped with anti-vibration system and is intended for occasional use.
Warning about potential nerve/blood vessel damage from prolonged use and seeking medical attention.
Inspect area for objects that can be thrown or entangled, causing injury or damage.
Use only for trimming, scalping, mowing; not for edging or hedge trimming.
Cut from left to right to direct debris away from the operator.
Read and follow warnings/instructions for each optional attachment used.
Ensure handlebar is installed correctly for brushcutter attachment use.
Inspect area for objects that can be thrown or wrapped around the shaft.
Blade rotates momentarily after trigger release, posing a cutting hazard.
Allow the blade to stop completely before removing it from the cut.
Throw away damaged blades and replace cracked/chipped parts before use.
Do not remove cut material or hold material while the engine is running or blade is moving.
Always keep the wheel and depth adjusting skid in contact with the ground.
Always push the unit slowly over the ground and stay alert for terrain hazards.
Inspect area for debris that can ricochet or cause injury/damage during operation.
Do not set unit on surfaces except clean, hard areas while engine is running.
Direct blowing debris away from people, animals, glass, and solid objects to prevent injury.
Never run unit without proper equipment attached; always install blower tubes when using as blower.
Check air intake/blower tubes for debris that can restrict airflow or cause damage.
Never place objects in air intake opening as this can restrict airflow or damage the unit.
Never use for spreading chemicals, fertilizers, or toxic materials.
Do not use near leaf/brush fires, fireplaces, or barbecue pits to avoid spreading fire.
Danger: Blade can thrust away from material, causing amputation of arms or legs.
Warning: Do not use the trimmer head as a fastening device for the blade.
Blade continues to spin after engine stops, posing a cutting hazard.
Inspect area for objects that can be thrown or entangled in the blade or line.
Throw away and replace blades that are bent, warped, cracked, broken, or damaged.
Install required shield properly; use metal shield for all metal blade use.
Only use brushcutter attachments with a metal shield and protruding nose.
Use only specified blades, ensure proper installation, and cut from left to right.
Always use the handlebar and a properly adjusted shoulder strap with blade.
Warning: Rotating tines can cause serious injury. Keep away from rotating tines.
Stop engine and disconnect spark plug before unclogging tines or making repairs.
Avoid heavy contact with solid objects that might stop tines; inspect unit for damage if contact occurs.
Never operate the cultivator without the tine cover in place and properly secured.
Keep the tines and guard clear of debris.
After striking a foreign object, stop engine, disconnect plug, and inspect for damage.
Disconnect attachment from engine before cleaning tines; oil tines to prevent rust.
Always wear gloves when servicing or cleaning tines, as they become very sharp.
Do not run unit at high speed unless cultivating.
Inspect area for debris and hard/sharp objects before starting the unit.
Danger: Keep hands away from blade; it moves momentarily after trigger release.
Stop engine, disconnect plug, and ensure blade stopped before clearing jammed material.
Do not grab or hold the unit by the cutting blade.
Inspect area for debris and objects that can ricochet, be thrown, or cause injury.
Do not use bent/cracked blades; have worn/damaged parts replaced by Sears.
Always keep unit in front of body; keep body parts away from cutting blade and air vents.
Keep the cutting blade and air vents clear of debris.
Warning: Reciprocating blade/rotating chain can cause severe injury. Keep away from blade/chain.
Warning: Blade/chain is sharp. Do not touch. Stop engine and disconnect plug when handling.
Warning: Coasting blade/chain continues to move after engine stop; maintain control.
Warning: Falling objects can cause severe head injury. Wear head protection.
Warning: Do not use more than one boom extension with a pole pruner attachment.
Warning: Keep the pruner away from power lines or electrical wires.
Only use for pruning limbs or branches up to 6 inches (15 cm) in diameter.
Warning: Keep hands and feet away from rotor when starting or running engine.
Never attempt to clear the rotor with the engine running. Stop engine and disconnect plug.
Warning: Never lean over discharge chute; thrown objects can cause serious injury/blindness.
Inspect area for objects that could be thrown or damage the unit; be alert for hidden objects.
Direct material discharge away from glass enclosures, automobiles, etc.
Do not run engine at high speed while not removing snow.
Be attentive and stay alert for terrain holes and other hidden hazards.
Make sure the rotor will spin freely before attaching the snowthrower to the powerhead.
If rotor will not rotate due to frozen ice, thaw thoroughly before operating.
Keep the rotor clear of debris.
Do not throw snow near other people; snow thrower can propel objects causing injury.
After striking a foreign object, stop engine, disconnect plug, and inspect for damage.
Never operate snowthrower near glass enclosures, automobiles, or trucks.
Never attempt to use the snowthrower on a roof.
Never operate near window wells, dropoffs, etc.
Never discharge snow onto public roads or near moving traffic.
Clear snow up/down slopes; use caution changing directions. Never clear steep slopes.
Let snowthrower run for a few minutes after clearing snow so moving parts do not freeze.
Look behind and use care when backing up; avoid slipping or falling.
Know how to stop the unit quickly.
Check carton contents against the list provided to ensure all parts are present.
Warnings regarding stopping the unit and disconnecting the spark plug before assembly.
If received assembled, repeat steps to ensure proper assembly and secure fasteners.
Step-by-step instructions for attaching the trimmer attachment to the coupler.
Ensure the locking/release button is in the primary hole and the knob is securely tightened.
Instructions for properly installing the shield, which provides protection and limits line length.
Familiarize yourself with controls and adjustments by comparing illustrations with your unit.
Instructions for loosening the wing nut, rotating the handle, and retightening it.
How to use the ON/STOP switch to stop the engine by pushing and releasing it.
How to use the primer bulb to remove air and fill fuel lines for easier starting.
How the start lever helps supply fuel for starting; squeeze throttle to disengage.
The coupler enables optional attachments to be installed on the unit.
Warning to read fuel information and safety rules before fueling.
Details on using unleaded gasoline mixed with quality synthetic 2-cycle oil at a 40:1 ratio.
Instructions on mixing fuel, avoiding automotive oil, and reading fuel container labels.
Warning about alcohol fuels attracting moisture, leading to separation and engine damage.
Empty fuel system before storage for 30+ days; use fresh fuel next season.
Warning against using engine or carburetor cleaner products in the fuel tank to avoid damage.
How to stop the unit by releasing the throttle trigger and using the ON/STOP switch.
Step-by-step guide for starting a cold engine using the primer bulb and start lever.
Procedure for starting a warm engine by squeezing the throttle trigger and pulling the starter.
Steps for starting a flooded engine by placing the start lever to RUN and squeezing the throttle.
Lists compatible optional attachments for the convertible feature with their part numbers.
Warning to stop unit and disconnect spark plug before removing or installing attachments.
Instructions for removing the trimmer attachment or other optional attachments.
Step-by-step guide for installing optional attachments into the coupler.
Ensure the locking/release button is in the primary hole and the knob is securely tightened.
Guidance on maximizing operating efficiency by not running the engine for longer than 1 minute at full throttle.
Shows correct operating position and lists required PPE: hearing protection, eye protection, long pants, heavy shoes.
Cut from right to left; wear eye/hearing protection and avoid leaning over the trimmer head.
Introduces different cutting methods: Trimming, Scalping, Mowing, Sweeping.
Hold head at an angle, allow only the tip of the line to make contact with vegetation.
Hold head at an angle, allow line tip to strike ground around objects, increasing line wear.
Keep line parallel to ground for mowing, avoid pressing head into ground to prevent damage.
Use less than full throttle for trimming/scalping to increase line life and decrease head wear.
Provides a schedule of maintenance tasks and when to perform them.
Operator responsible for maintenance; retain receipts, but warranty not denied solely for lack of receipts.
List of specific parts to check for looseness before each use.
Instructions on contacting Sears Service for replacement of damaged or worn parts.
Inspect unit for damage after each use and clean with a damp cloth.
Instructions for cleaning the air filter, emphasizing its importance for engine performance.
Information on the muffler's chemicals and recommendation for service after 50 hours.
Guidance on replacing the spark plug annually for easier starting and better running.
Instructions for replacing cutting line, choosing the right size, and proper insertion.
Warning about adjustments and the trimmer head spinning; procedures for idle speed adjustments.
Procedure for adjusting idle speed to prevent the trimmer head from moving or engine stalling.
Steps to perform after each use: cool engine, store in ventilated area, secure unit.
Prepare unit for storage at season's end or if unused for 30+ days; clean and store in dry area.
Empty fuel tank and run engine to empty fuel lines/carburetor before storage.
Using fuel stabilizer to minimize gum deposits during storage; follow mix instructions.
Instructions for engine storage: remove spark plug, add oil, pull rope, replace plug, clean filter.
Do not store gasoline from one season to another; replace rusty gasoline cans.
Troubleshooting steps for an engine that will not start, covering flooding, fuel, and spark issues.
Troubleshooting for improper idling, including carburetor adjustment and worn seals.
Troubleshooting for lack of power or dying under load, checking air filter, spark plug, carburetor.
Troubleshooting for excessive smoke, focusing on fuel mixture, air filter, and carburetor.
Troubleshooting for an engine running hot, checking fuel mixture, spark plug, and carburetor.
Explains EPA/California emissions warranty for small off-road engines and owner responsibilities.
Details coverage for defective emissions-related parts and engine causes of failure.
Owner responsible for required maintenance; Sears may deny coverage for abuse or neglect.
States warranty begins at purchase date and covers two years for specific parts.
Covers repair/replacement of warranted parts at no cost; diagnosis labor is free if part is defective.
Sears may be liable for damages to other engine components caused by warranted part failure.
Excludes failures caused by abuse, neglect, or improper maintenance, and add-on/modified parts.
Contact nearest authorized service center or call Sears for warranty rights/responsibilities questions.
Warranty services and repairs are provided at all Sears Service Centers.
Sears approved replacement parts for emission related parts are provided free if under warranty.
Owner is responsible for all required maintenance as defined in the operator's manual.
Information on engine certification standards (EPA, California) and air index.
Indicates engine certification for Moderate, Intermediate, or Extended use based on hours.
Diagram showing numbered parts for the upper section of the trimmer with corresponding part numbers.
List of parts for the upper section, including part numbers and descriptions.
List of parts for attachments, operator manual, and decals.
Diagram showing numbered parts for the lower section and engine of the trimmer.
List of engine components including part numbers and descriptions.
List of other components like clutch, drum, piston, cylinder, and ignition module.


 Loading...