The Front Panel:
EACH CHANNEL:
1: MIC: Use this jack to connect the input signal to the mixer. This combi-
nation jack allows the use of a balanced 1/4” Hi-Z or XLR-type Lo-Z con-
nector. The wiring for this jack is as follows: 1/4” Tip = signal +, Ring = sig-
nal –, Sleeve = signal ground; XLR pin 1 = signal ground, pin 2 = signal +,
pin 3 = signal –.
2: LEVEL: Use this control to adjust the signal level of each channel.
3. LOW EQ: Use this control to adjust each channel’s low frequency output.
The center position is flat - no boost or cut. Rotating the control counter
clockwise reduces the low frequency output; rotating it clockwise increases
the low frequency output. The Low control provides 30dB of boost or cut at
80Hz.
4. MID EQ: Use this control to adjust each channel’s midrange frequency
output. The center position is flat - no boost or cut. Rotating the control
counter clockwise reduces the midrange frequency output; rotating it clock-
wise increases the midrange frequency output. The Mid control provides
30dB of boost or cut at 600Hz.
5. HIGH EQ: Use this control to adjust each channel’s high frequency out-
put. The center position is flat - no boost or cut. Rotating the control count-
er clockwise reduces the high frequency output; rotating it clockwise
increases the high frequency output. The High control provides 30dB of
boost or cut at 10kHz.
6. MON: Use this control to adjust the level of the signal from each channel
to the Monitor bus. This signal is post-level, pre-eq.
7. DSP/EFF: Use this control to adjust the level of the signal sent to the inter-
nal DSP and the Effects Send jack (#19).
MASTER SECTION:
The Master tone controls serve as a three-band EQ to adjust the output of the
mixer to compensate for room acoustics or to fine-tune the overall sound.
The Low control is useful to reduce boominess. The Mid control greatly
enhances the vocals and helps control feedback. The High control helps
compensate for heavily draped, acoustically absorbent rooms, or bare
walled, acoustically reflective rooms, and can be used to help control feed-
back.
8: LOW EQ: Use this control to adjust the mixer’s low frequency output. The
center position is flat - no boost or cut. Rotating the control counter clock-
wise reduces the low frequency output; rotating it clockwise increases the
low frequency output. The Master Low control provides 30dB of boost or cut
at 50Hz and below.
9: MID EQ: Use this control to adjust the mixer’s midrange frequency out-
put. The center position is flat - no boost or cut. Rotating the control count-
er clockwise reduces the midrange frequency output; rotating it clockwise
increases the midrange frequency output. The Master Mid control provides
30dB of boost or cut at 600Hz.
10: HIGH EQ: Use this control to adjust the mixer’s high frequency output.
The center position is flat - no boost or cut. Rotating the control counter
clockwise reduces the high frequency output; rotating it clockwise increases
the high frequency output. The Master High control provides 30dB of boost
or cut at 10kHz and above.
11. POWER LED: This LED illuminates when the mixer is turned on.
12. DSP: Use this control to select one of the sixteen on-board digital effects.
These effects are described in the chart on page 4.
13. DSP RET: Use this control to adjust the level of effected signal coming
from the internal DSP.
14. AUX/EFF RET: Use this control to adjust the level of the signal from the
Aux In jack (#22) and the Effects Return jack (#20).
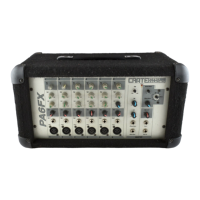
PA6FX/PA8FX Box Mixer with Digital Effects
 Loading...