Area A
This section mainly displays the current process stage. Click Next to proceed to the next stage of processing.
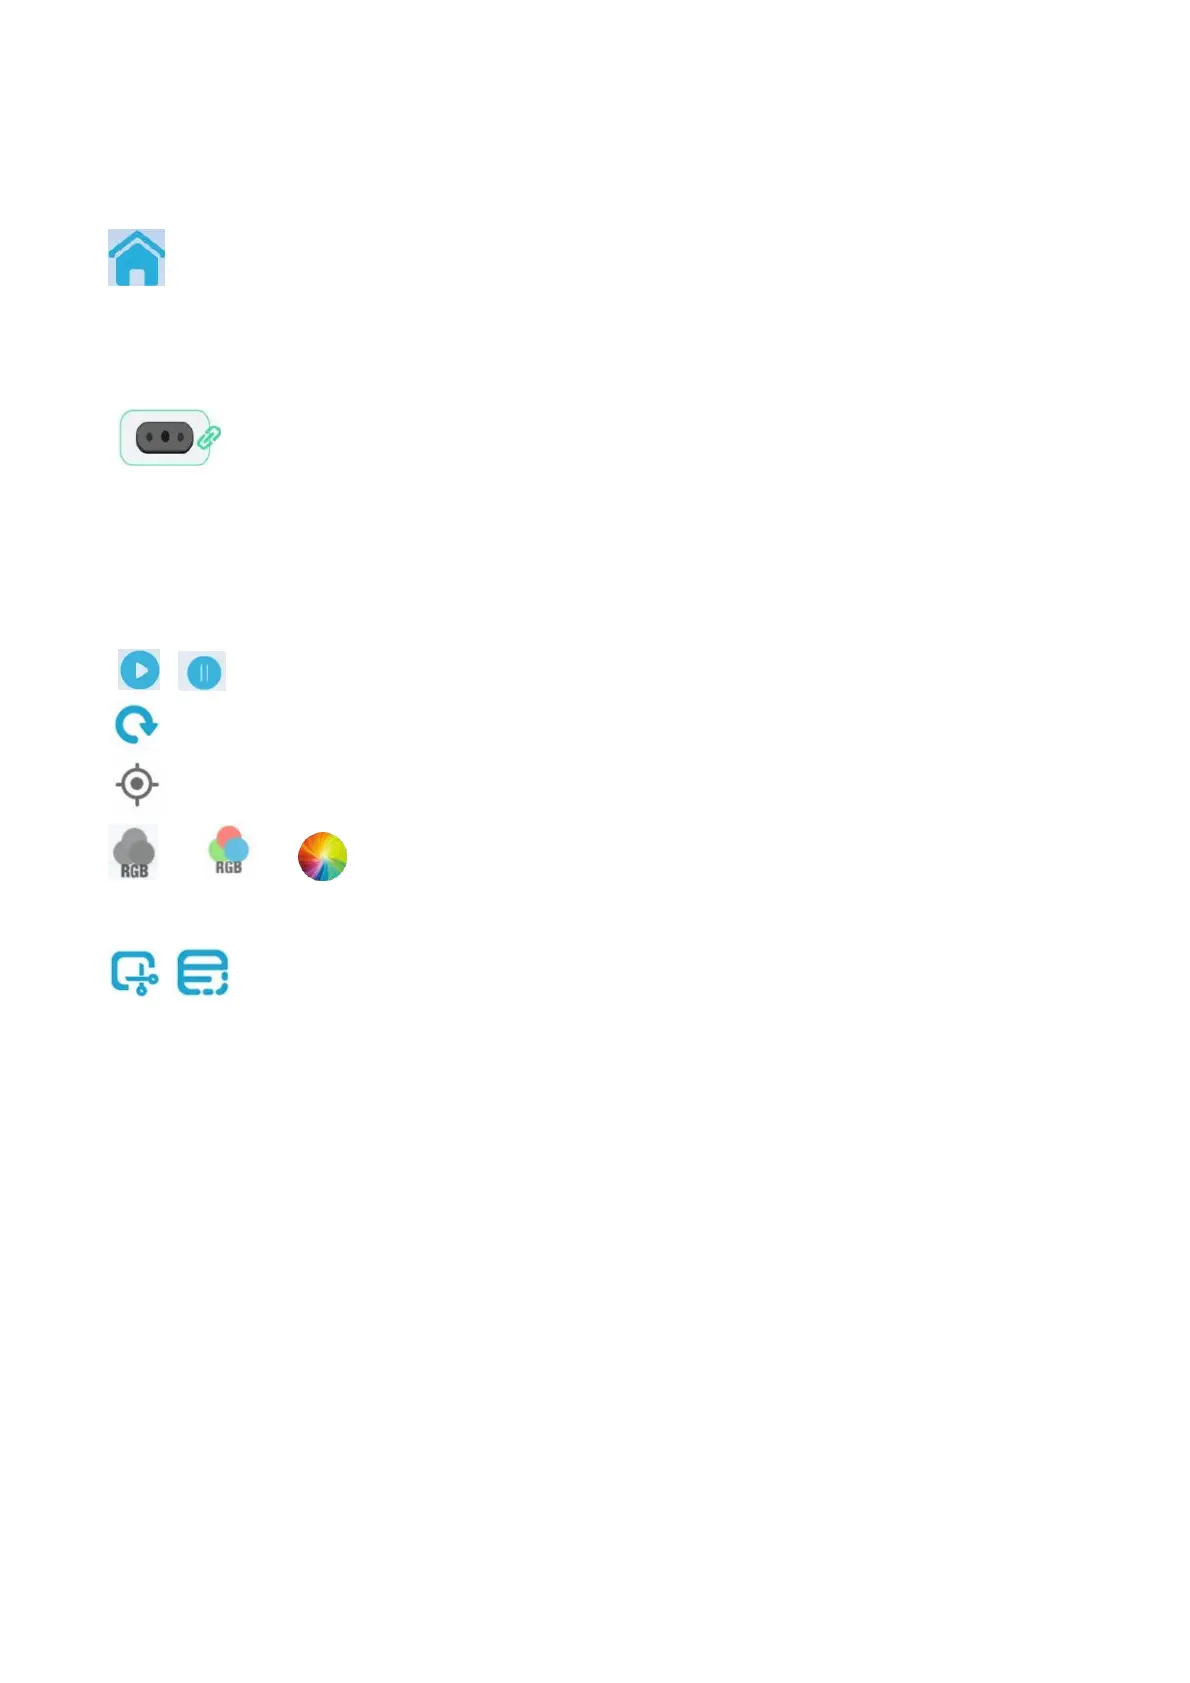
Home button, used to leave the scanning process and return to the home page.
Area B mainly displays the preview area of scanning.
This section is the same as the preview stage, and includes an IR preview window (above) and an RGB/depth
preview window (below). See the preview chapter for details of its configuration items.
: Indicating the device connection status, cannot be clicked.
Area C
Reminder area, displaying guidance that includes using distance reminders, keeping the scanner
scanning at the reminder "Perfect!” Distance.
Area D mainly displays the control area of scanning.
/ : Click to start (continue) / pause scanning;
: Refresh button, click to clear all the scanned point cloud and restart a new scan.
: Back to the right button, click to initialize the object rendering scale and display it in the center.
/ / : The display mode switch button can be switched to three modes: no color,
color(texture needs to set as color ), and quality color(Quality spectrum). Click to switch the current mode,
and the quality spectrum mode is default.
/ : Exclude Flat Base Enable / Exclude Flat Base Disable. The current frame point cloud in the
“Exclude Flat Base Enable” will be removed from the plane, that is the background plane will not enter the
scanned point cloud during scanning. It can be used to scan small and medium-sized objects placed on a
large plane. “Exclude Flat Base Disable” will not remove the background plane.
Other scanning suggestions
How to judge whether the scan is sufficient:
● Judge whether the scanning target is complete, and conduct multi-angle scanning
● Judge whether the color of the scanned point cloud has changed from red to green as a whole based on
the quality color
Once satisfied, you can click “Next” to perform point cloud optimization.
 Loading...