10
Proprietary, patented product and assembly instructions. Do not copy or distribute.
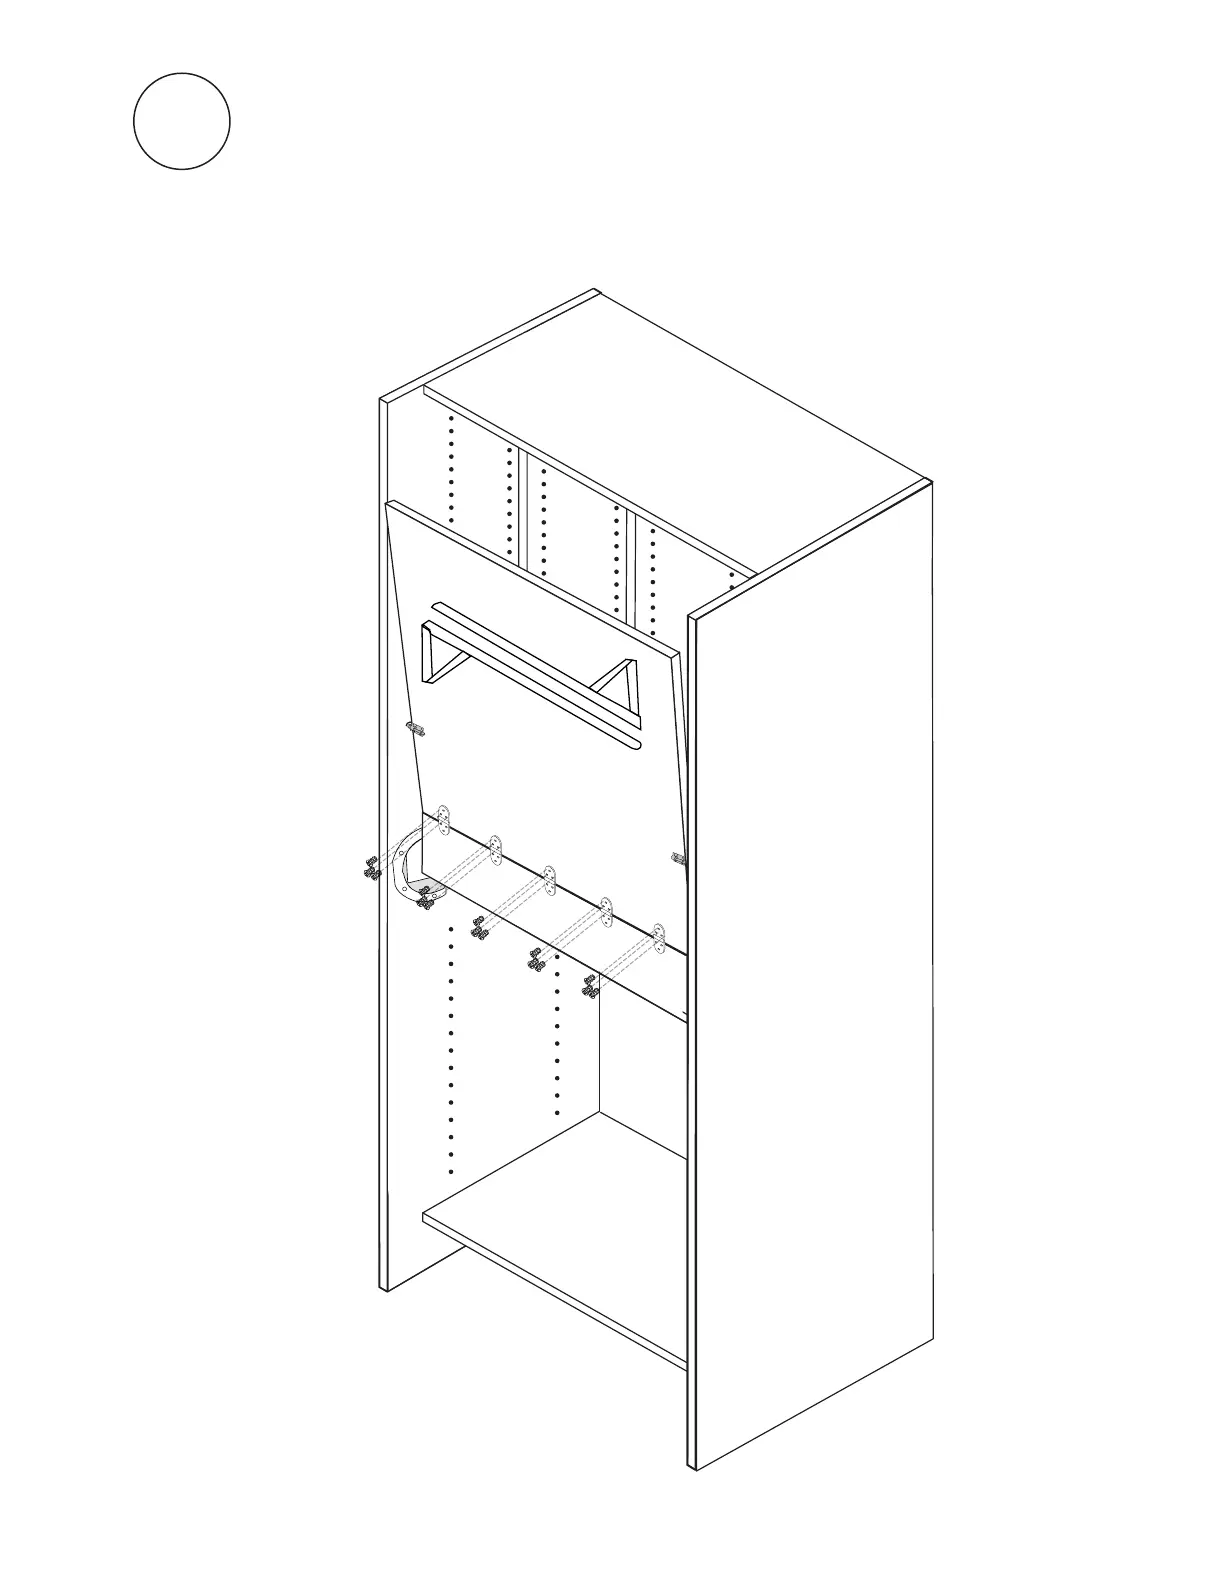
With Table 1 in the UP position, rest Table 2 on its edge, also in the
UP position with the hinges facing out. LOCK into place with Barrel
Locks. Attach (5) Standard Hinges to Table 2 with remaining
(15) #1:
13mm Euro Screws
adding one screw at a time to each hinge in rotation.
20
HEAVY TABLE! THIS STEP REQUIRES TWO PEOPLE.
LH
#1 Screws (15)
*Table does not store up. Table in the up position is for accessing lower supplies under the table.