Do you have a question about the Create Room Sew Station and is the answer not in the manual?
Decide whether to attach the Sew Station to the right or left side of your DreamBox.
Insert 12 connecting bolts into the corresponding holes of the back and side panels.
Install top panel and door catch based on chosen attachment side, using connecting bolts.
Place guide spacers in the designated corresponding holes on the drawer sides.
Install 270° door hinges into corresponding holes based on the chosen attachment side.
Install the sewing back panel and tighten cams to the sewing top panel.
Attach the sewing side 1 panel to the main assembly and tighten cams.
Attach the sewing side 2 panel to the main assembly and tighten cams.
Install four angle brackets and the sewing base, tightening cams.
Install guide rails according to the desired spool holder location graphic.
Attach the sewing side table and install the table leg using screws and hinges.
Attach the sewing back table and table leg using predrilled holes and standard hinges.
Install side U-wheels and carefully flip the Sew Station onto them, extending table legs.
Gather necessary hardware and align metal arms with the center component for the lift.
Install bearing arrangements through the metal arm to the center, ensuring free rotation.
Mount the metal arm center to the power lifter using pilot holes for guidance.
Install the power lifter carefully, avoiding over-tightening, to the appropriate side of the Sew Station.
Plug in cords to the remote and attach the transformer using Velcro.
Raise the lift and attach the sewing lift top shelf using screws to the power lifter.
Gather hardware and pieces, then install connecting bolts in the spool holder drawer base.
Install the spool base, sides, and shelf using cams to form the drawer structure.
Mount the inner guide rails to the spool back using guide screws for drawer movement.
Install the spool drawer by aligning guide rails and attach the door knob with screws.
Attach 270° door hinges and install the door support wheel and plate.
Click the 270° door hinges into their respective mounting points securely.
Attach the door with pull to the 270° hinges and install the door handle.
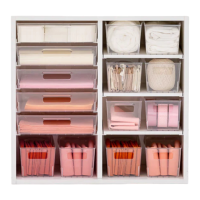
Install three sewing shelves using the provided shelf supports.
Snap spool pegs into peg shelves and install shelf supports for the spool shelves.
Attach the Sewstation to DreamBox 1 using barrel locks, catches, and sash locks for secure connection.
Attach to DreamBox 2 by sliding locking posts into grooves and adding hole plugs.
Instructions on how to collapse and lock the table leg for storage or stability.
| Brand | Create Room |
|---|---|
| Model | Sew Station |
| Category | Indoor Furnishing |
| Language | English |