7
ENGLISH
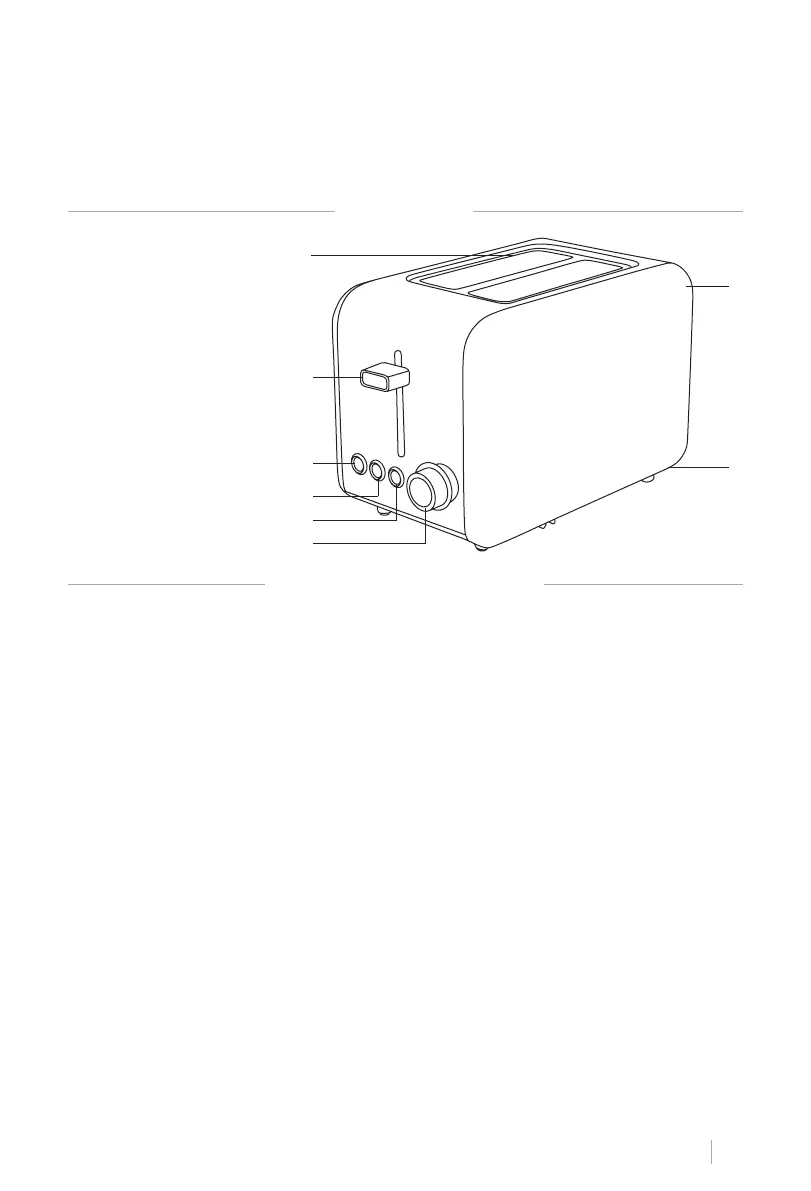
PARTS LIST
1. Bread toasting slot
2. Bread-carriage lever
3. Reheat button with light
4. Defrost button with light
5. Cancel button with light
6. Browning adjustment dial
7. Housing
8. Crumb tray
OPERATING INSTRUCTIONS
BEFORE USE
PREPARATION
TOASTING BREAD
Operate the toaster a couple of times, without bread, at the maximum setting (setting 6).
This will remove the last traces from the manufacturing process. A little smoke and odour
may be emitted by the toaster when it is used for the rst time.
1. Put the appliance on a stable and at surface.
2. Put the plug into the wall socket.
1. Set the browning with the adjustment dial.
• The browning is lowest when the dial is set to the lowest position (setting 1).
• The browning is highest when the dial is set to the highest position (setting 6).
• In the event of doubt, always begin at a lower setting.
• Older bread will need to be toasted at a lower setting than fresh bread.
• Brown bread will need to be toasted at a higher setting than white bread.
2. Put two slices of bread in the bread toasting slots.
3. Lower the bread carriage by pressing the lever until the lever locks into place. The indi-
cator light lights up. The appliance will now start toasting the bread; it will automatically
switch off once the toast is ready. The bread carriage will then rise automatically.
4. Remove the toast from the toasting slots.
5. Remove the plug from the wall socket.
separate system with remote control.
• Be careful when using the appliance outdoors.
• Never use the appliance in damp or wet locations.
• Thoroughly clean the appliance after use (see Cleaning and Maintenance).
1
2
3
4
5
6
7
8