8
ENGLISH
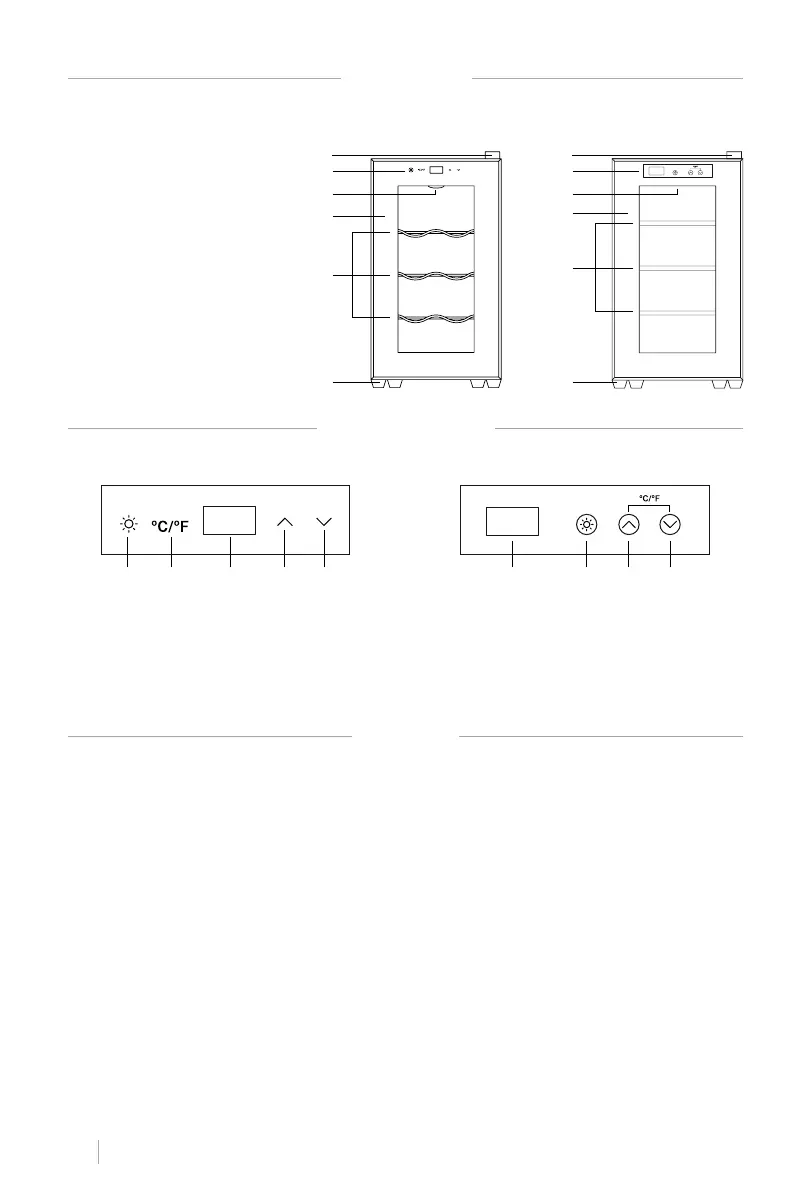
PARTS LIST
1. Top hinge
2. Control Panel
3. Light
4. Door
5. Shelves
6. Paws
FACILITY
Before putting your wine cellar into operation:
• Remove all internal and external packaging components.
• Check that none of the parts of the product are missing.
• Before connecting your device to a power source, leave it in an upright position for approxi-
mately 24 hours. This reduces the risk of failure of the refrigeration system to function due
to handling during transport.
• Clean the internal surfaces of the unit with a soft cloth and warm water.
• Place your unit on a oor strong enough to support the weight of the fully loaded unit.
• Make sure the unit is level by adjusting the front feet under the unit. Make sure the wine
cabinet rests on its legs in a stable manner.
• Install the appliance away from direct sunlight and heat sources (radiator, hot plate, etc.).
Direct sunlight can damage the unit's coating and heat can increase its energy consump-
tion. If the ambient temperature is extremely cold or hot, this may prevent the unit from
working properly.
• The unit is not designed to be installed in a basement or cellar.
• Check that the water tank is in place before connecting the unit.
CONTROL PANEL
WINECOOLER S
WINECOOLER S
WINECOOLER WOOD S
WINECOOLER WOOD S
1. Light button
2. Temperature control button
3. Screen
4. Temperature increase button
5. Temperature decrease button
1. Screen
2. Light button
3. Temperature increase button
4. Temperature decrease button
32 2 3 41 14 5
1
2
4
6
5
3
1
2
4
6
5
3