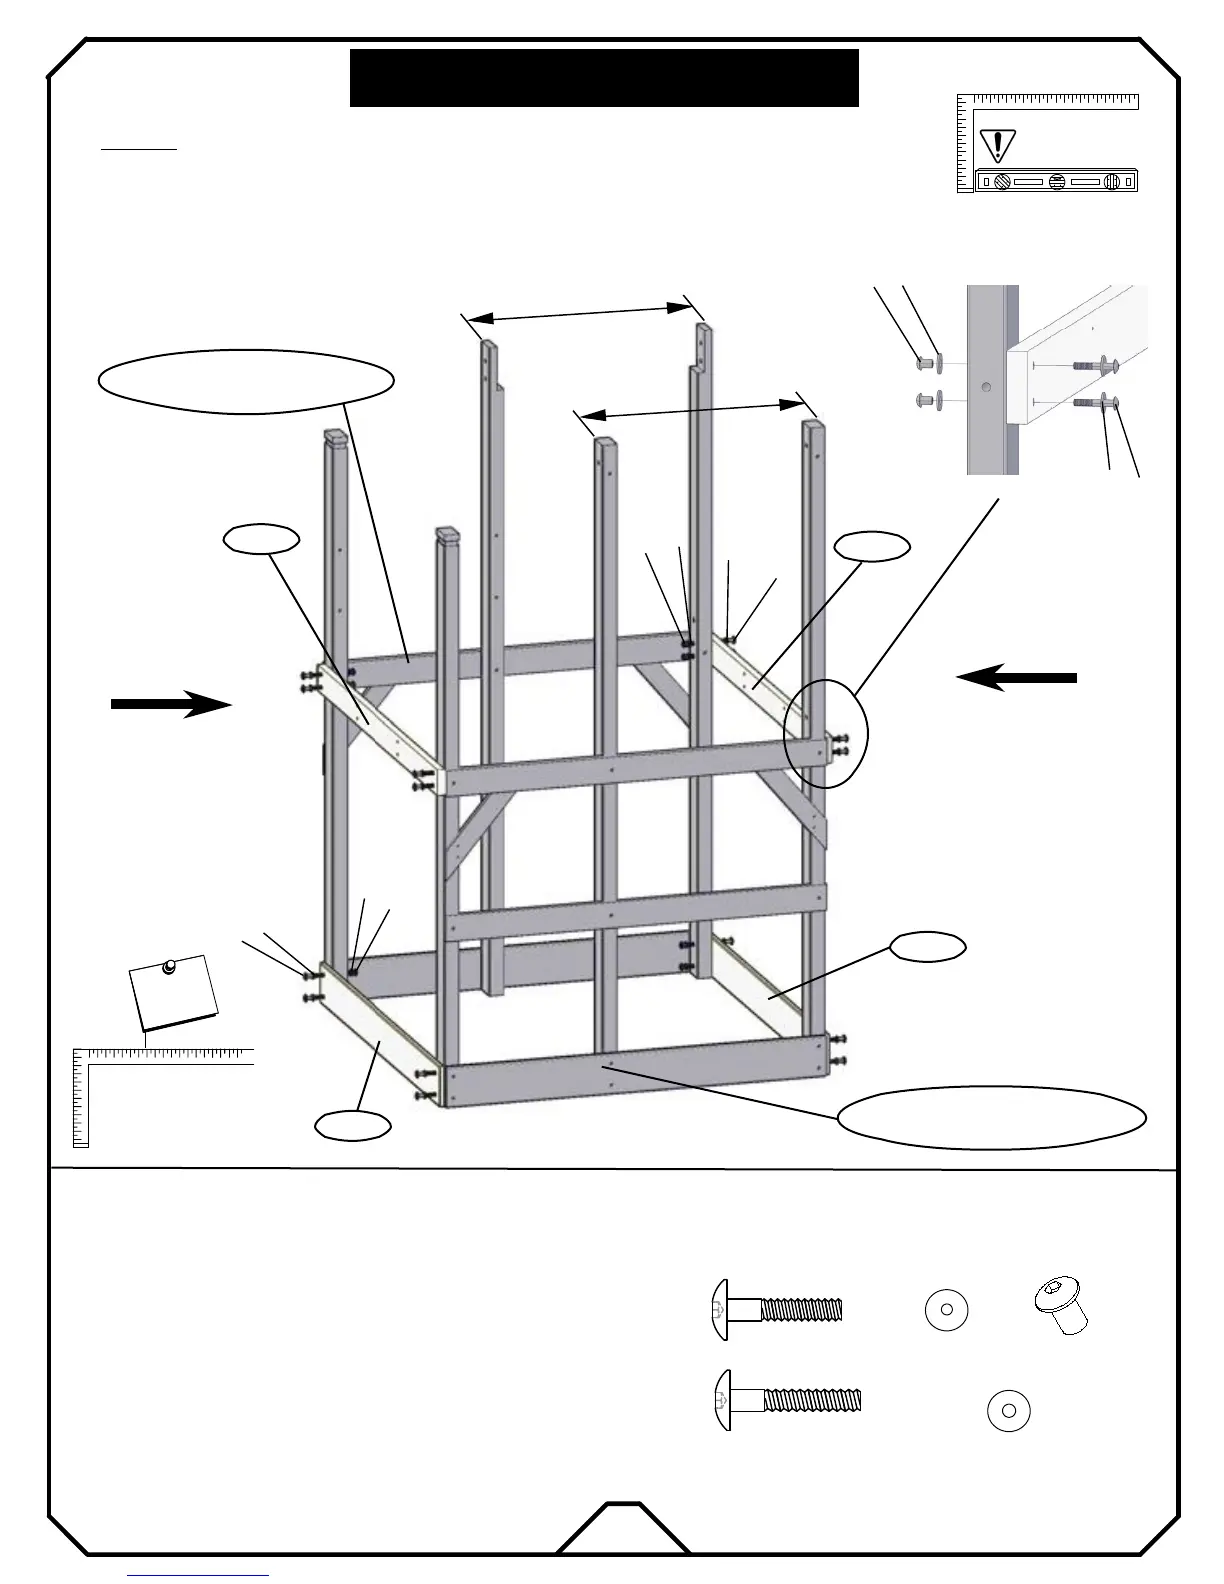
* Attach both WF01 to form the front and back bottom of the tower with bolts "e6".
* Stand Right Wall from Step1 and Left Wall from Step2.
(2) WD03 End Floor Support 5/4× 4×54
(2) WF01 Sanbox board-A 1×6×54
Note: It is vital that the fort
be level after this
phase!
WD03
WF01
3
STEP :
ITEMS NEEDED
WD03
WF01
e6
k2
k1
d1
Back side of tower
FRONT
(8)
(16)
(16)
(16)
HARDWARE NEEDED
(8)
e5
k2
d1
k1
e6
d1
k2
k1
e5
d1
k1
k2
e5
* Attach both WD03 to form the front and back middle of the tower with bolts "e5".
Right Wall of tower from Step1
TOWER ASSEMBLY
* Insert all nut barrels "d1" into the uprights respectfully.
N
o
t
e
!
I
m
p
o
r
t
a
n
t
MAKE SURE FRAME IS
SQUARE BEFORE
PROCEEDING TO
NEXT PHASE!
N
o
t
e
!
I
m
p
o
r
t
a
n
t
Left Wall of tower from Step2
Front side of tower
19
30 7/8"
30 7/8"