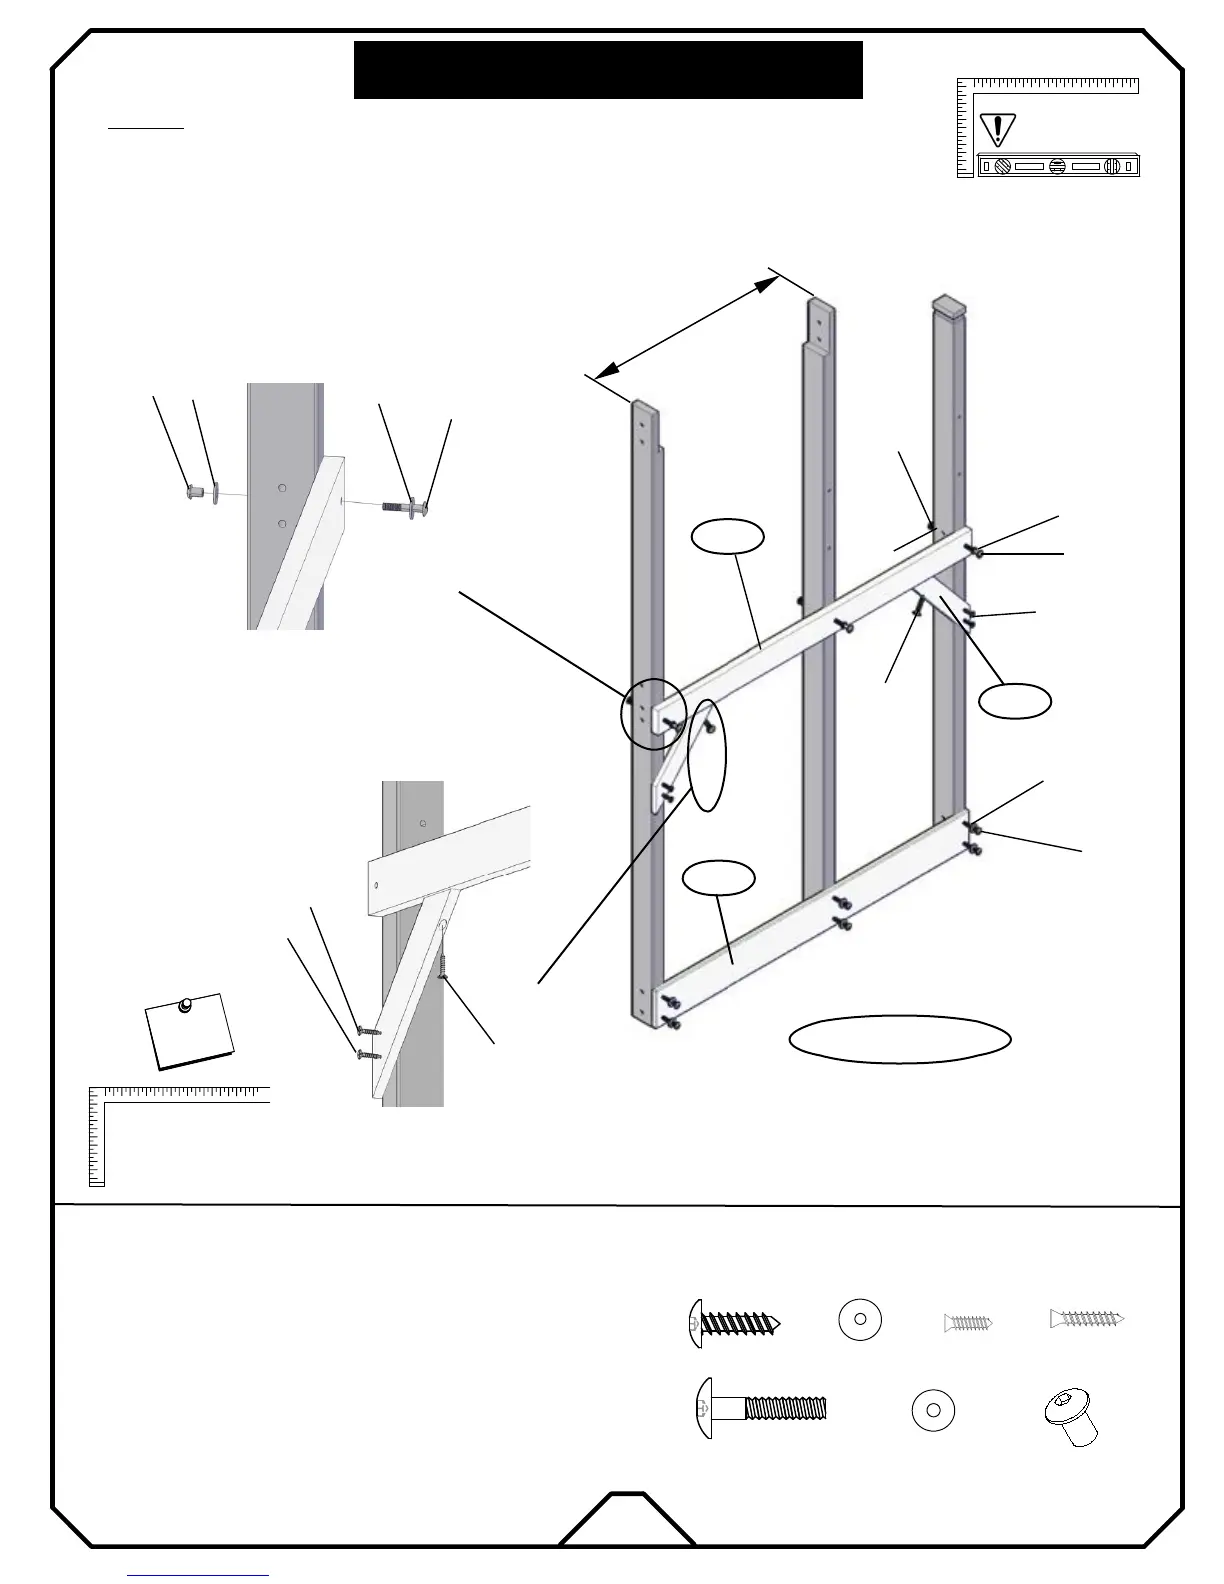
* Attach WD07 into the pre-drilled holes with bolts "e3".
* Lay out WQ06a, WQ06b and WQ02b as shown.
46 9/16"
ITEMS NEEDED
2
(1) WQ06a Upright-E 3×4×89
(1) WQ06b Upright-F 3×4×89
(1) WQ02b Upright-B 3×4×78 3/4
Note: It is vital that the fort
be level after this
phase!
STEP :
WQ02b
WQ06b
WQ06a
WD07
WF04
WC13
d1
b2
k2
k1
k2
e3
a3
a1
e3
(3)
d1
(3)
b2
k2
a3
a1
(6)
(9)
(4)
HARDWARE NEEDED
(3)
k1
(2)
k1
d1
k2
e3
(1) WF04 Sandbox Board-B 1×6×52 13/16
(2) WC13 Platform Support 1×3×15 5/16
(1) WD07 Floor Joist 5/4×4×52 13/16
* Attach WF04 into the pre-drilled holes with wood screws "b2".
* Attach both WC13 as shown.
Left wall of tower
* Insert all nut barrels "d1" into the uprights respectfully.
TOWER ASSEMBLY
N
o
t
e
!
I
m
p
o
r
t
a
n
t
MAKE SURE FRAME IS
SQUARE BEFORE
PROCEEDING TO
NEXT PHASE!
N
o
t
e
!
I
m
p
o
r
t
a
n
t
a1
a3
a3
18
30 7/8"