Getting Started 5
Step 2: Turn On Your Player
1 Slide the Power switch towards the Power icon and hold it there until the
LCD lights up.
2 When you turn on your player for the first time, the menu is in English. To
change the language:
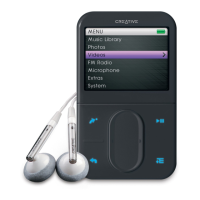
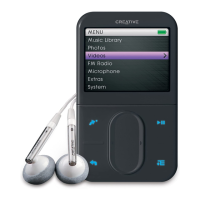
i. Press and hold the Menu/Back button . The main menu appears.
ii. Select System
→ Language → language that you want.
3 After you have finished using your player, slide the Power switch towards
the Power icon until the Shutting down message appears.
Step 3: Set Up Software
1 Turn on your computer. You must log in as an administrator in Windows
®
before you can set up the software. For more information, refer to your
operating system’s online Help.
2 Insert the Installation CD into your CD-ROM/DVD-ROM drive. Your CD
should start automatically. If it does not, follow the steps below:
i. Double-click the My Computer icon.
Alternatively, click Start → My Computer.
ii. Right-click the CD-ROM/DVD-ROM drive icon, and then click Autoplay.
3 Follow the instructions on the screen and when prompted, restart your
computer.
4 When your computer restarts, follow the product registration instructions
on the screen.
You will require an Internet connection to register your product.
Zen Vision Mini PM3.book Page 5 Friday, October 21, 2005 11:39 AM