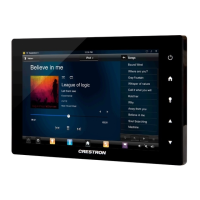
DO GUIDE
TSW-1050
10.1” Touch Screen
DO Install the Touch Screen
The Crestron
®
TSW-1050 touch screen installs easily over a
standard 2-gang or 3-gang U.S. electrical box or a 2-gang
European electrical box. It can also be attached directly
to drywall and other surfaces over the front of a 2 3/8” (60
mm) high by 3 3/8” (86 mm) wide cutout. When installed, the
touch screen protrudes just 1/2” (13 mm) from the mounting
surface and is magnetically adhered to its mounting bracket,
eliminating any visible screws for an ultra clean appearance.
To mount the TSW-1050 into an electrical box, use the
following procedure:
1. Use four of the eight included screws (four 06-32 x
3/4” or four 3 x 16 mm screws) to attach the mounting
bracket to the electrical box, as shown in the following
illustrations.
NOTE: For U.S.-style installations, use a #2 Phillips
screwdriver. For European-style installations, use a #1
Phillips screwdriver or equivalent.
For U.S.-style installations, use the 06-32 x 3/4” screws.
For European-style installations, use the 3 x 16 mm
screws.
2. Make connections to the TSW-1050 using Crestron
power supplies for Crestron equipment. Power and data
connection to the TSW-1050 is provided by a single
Ethernet cable connected to the LAN port at the rear of
the unit. A Crestron PoE power supply or PoE-capable
network switch is recommended (both sold separately).
Apply power after the Ethernet cable is connected.
Hardware Connection for the TSW-1050
3. Carefully hold the touch screen over the mounting
bracket and gently place it in position. The magnets
on the rear of the touch screen hold it in place on the
mounting bracket.
DO Access the Setup Screen
NOTE: The TSW-1050 can take up to 120 seconds to boot.
When power is applied for the rst time, the screen shown in
the following illustration appears.
Touch the Setup button to display the TSW-1050 Setup
screen. The buttons on the Setup screen enable basic
conguration prior to regular operation of the TSW-1050.
DO Check the Box
QTY PRODUCT PART NUM.
1 Metal Mounting Bracket 2034503
4 Screws, 06-32 x 3/4" 2033247
4 Screws, 3 x 16 mm 2013788
2 Screws, M3.5 x 25 mm 2023756
Mounting Bracket
Screws (4) 06-32 x 3/4”
TSW-1050
U.S. Electrical Box
Mounting Bracket
Screws (4) 3 x 16 mm
TSW-1050
European Electrical Box
Reset Button
LAN PoE:
10BASE-T / 100BASE-TX
Ethernet to LAN

 Loading...